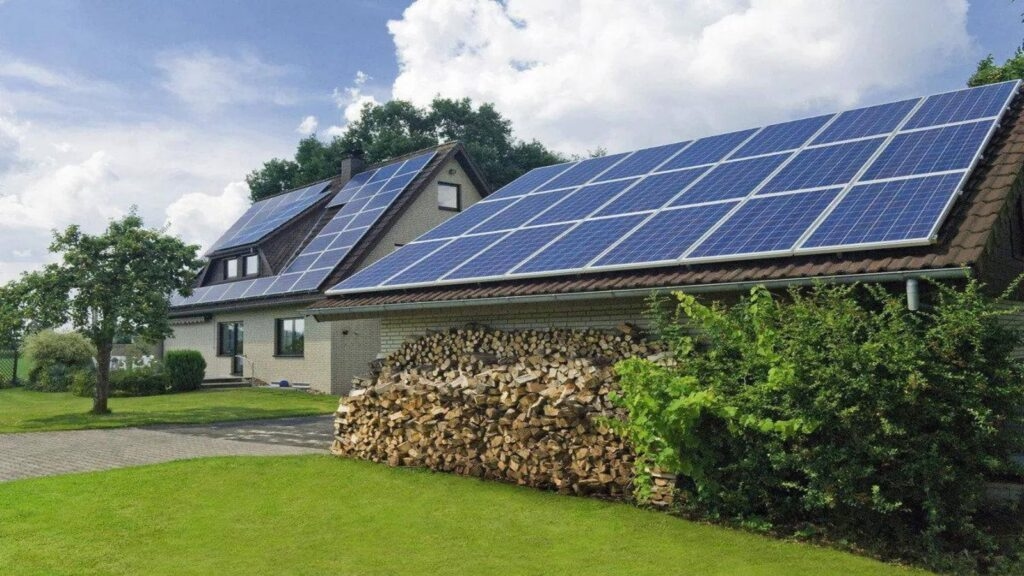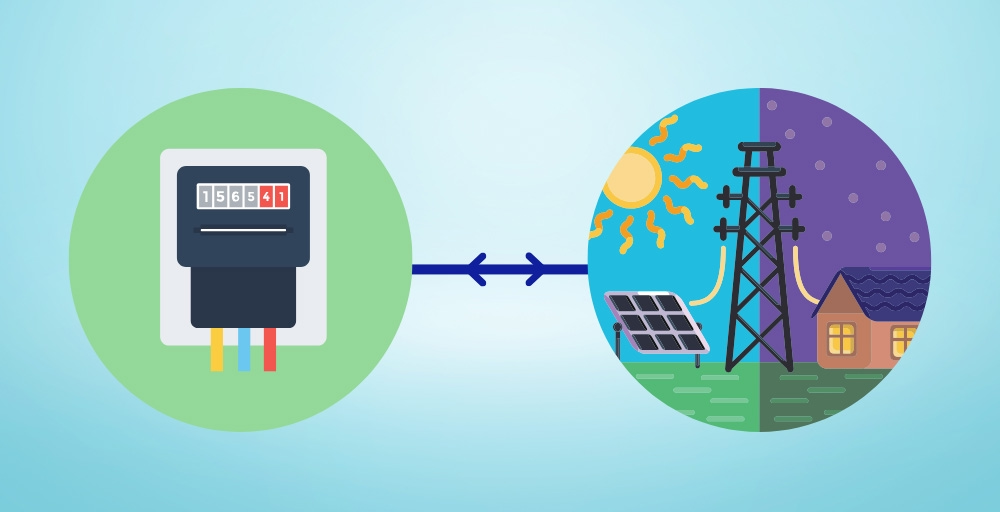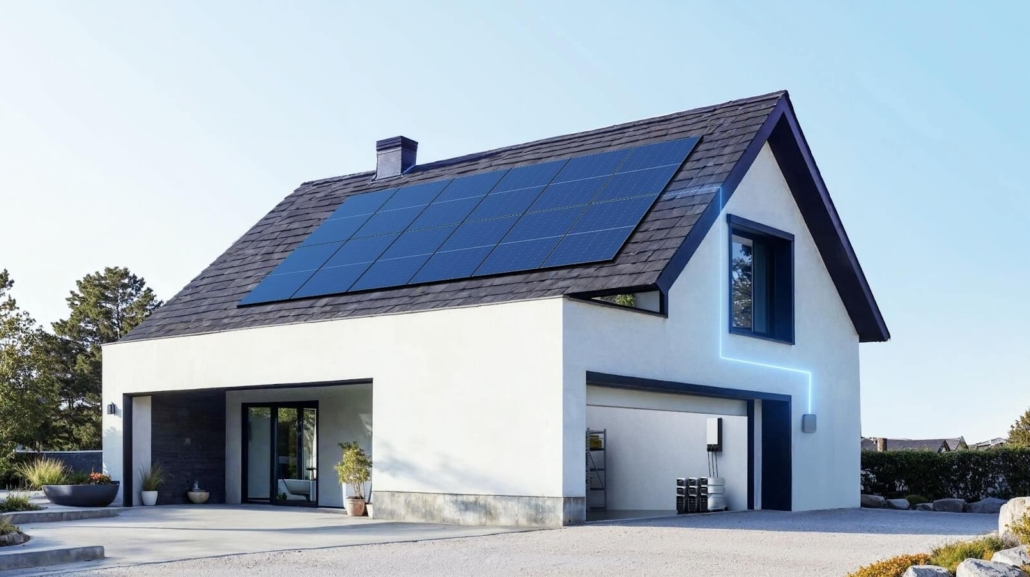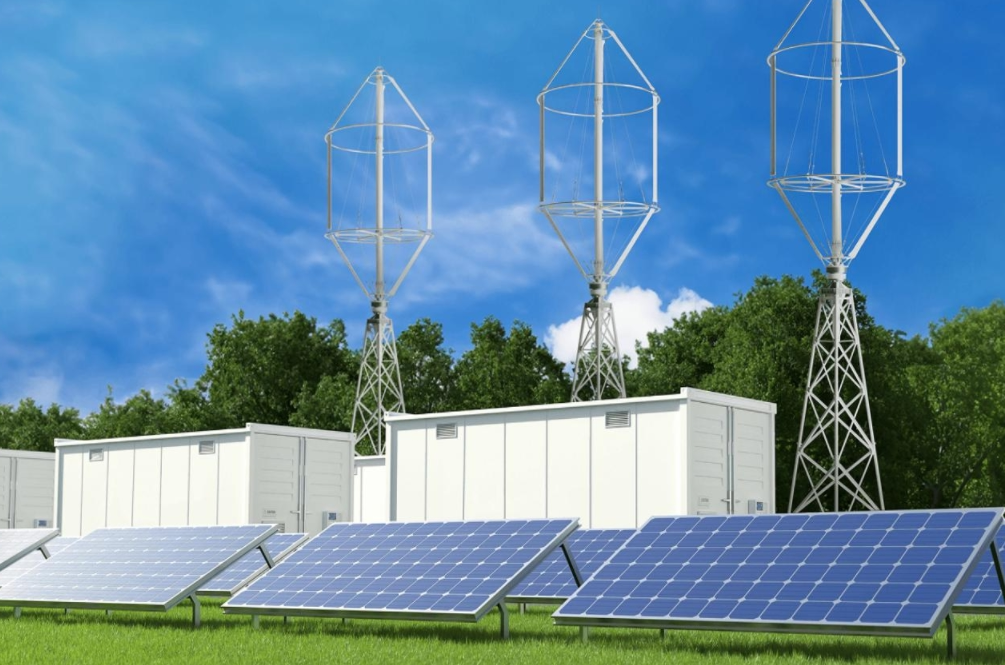
Off grid home solar system kit specifications: Key parameters buyers should ask for

Many off-grid households experience power shortages two years after installing their off-grid systems. Many of these issues are attributed to mismatched specifications—for example, the battery capacity is too small to cover cloudy days, or the inverter is too weak to power basic appliances. For families relying on off grid power, this means power outages can disrupt their lives at any time. Therefore, before purchasing an off grid home solar system kit, it’s crucial to inquire about the correct specifications. As a supplier, PowerDream carefully designs all off grid solar system specifications to avoid these pitfalls. We also explain six key specifications buyers must verify, using our 18 kWh kit as an example to illustrate the importance of proper sizing.

Off grid Home Solar System Kit: Solar Panel Power and Efficiency

If the solar panels in your off grid home solar system kit have too little power or low efficiency, you’ll never generate enough electricity to meet your needs. Buyers should be aware of the following questions and the specific performance of the PowerDream 18 kWh solar system:

Question 1: “What is the total power of the solar panels? How many panels are included in the kit?” The total power determines the daily power generation. A 1,500-square-foot (approximately 147 square meters) off-grid home requires 5-7kW of solar panels; PowerDream’s 18 kWh kit includes 36 550-watt monocrystalline solar panels, enough to generate 19.8kW of electricity on a sunny day.

Question 2: “What is the efficiency rating of the solar panels?” Efficiency is crucial for off-grid homes with limited rooftop/ground space. PowerDream’s solar panels have an efficiency of up to 23%, while budget kits have an efficiency of only 18-20%, allowing them to generate more electricity in the same space.

Question 3: “Are the solar panels suitable for extreme weather?” Off-grid homes often face inclement weather. PowerDream’s solar panels are IP68-rated and can withstand harsh conditions.
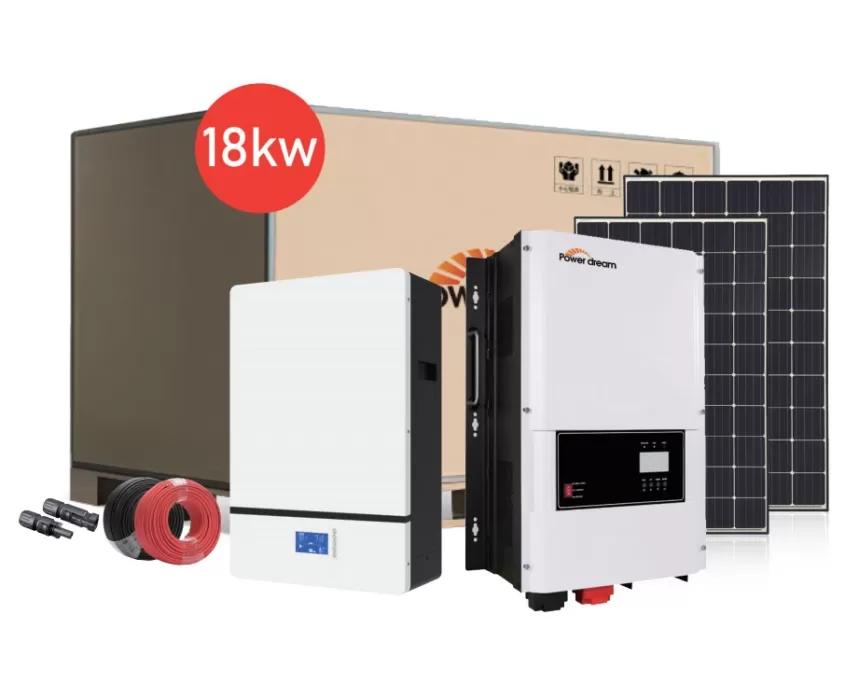
18Kw Off Grid Solar Kits

Battery Capacity and Type for Off Grid Home Solar System Kit

Off-grid solar systems cannot rely on the grid for backup power; your battery is your “energy bank” for nighttime and cloudy days. This is a common mistake buyers make. Here are some questions to ask and specifications to understand:

Question 1: “What is the usable capacity of the battery?” The nominal capacity is the total energy a battery can hold, while the usable capacity is the amount of energy you can safely use without damaging the battery. The PowerDream 18 kWh solar system uses a 19.2 kWh lithium-ion battery, which is enough to power a 1,500-square-foot house for more than 2 days on cloudy days.

Question 2: “What type of battery does this kit use, and what is its lifespan?” Lead-acid batteries have a lifespan of 3-5 years; lithium-ion batteries have a lifespan of 10-15 years. PowerDream uses lithium-ion batteries, which are safer and have a longer lifespan than other types.

Question 3: “Can the battery withstand temperature fluctuations?” Off-grid batteries can freeze in the winter and overheat in the summer. PowerDream batteries operate at a temperature range of -20°F to 60°F.
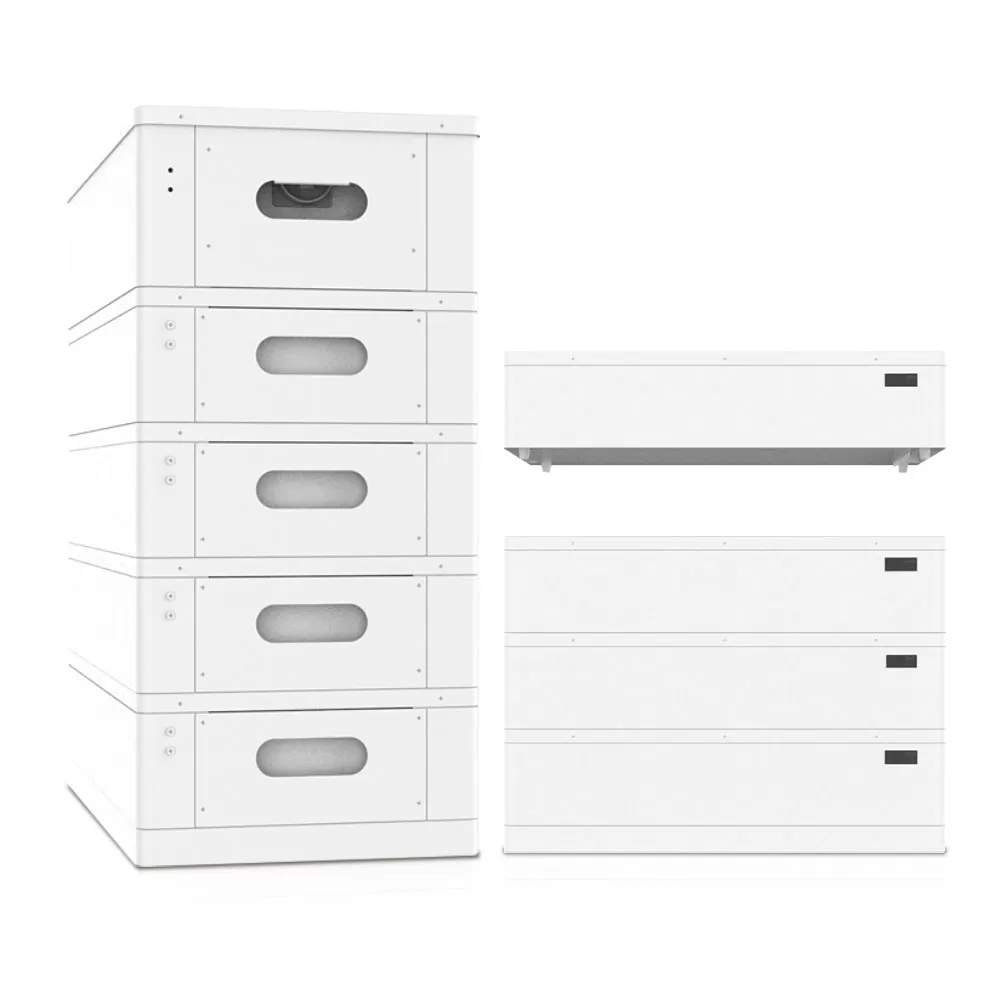
Battery Capacity and Type for Off Grid Home Solar System Kit

Inverter Power and Waveform, Converting DC to AC

Solar panels generate DC power, but your home appliances use AC—the inverter converts DC to AC. An underpowered or low-quality inverter can shut down when you need it most. Here are some questions to ask:

Question 1: “What is the inverter’s continuous power rating? What is its surge rating?” Continuous power rating refers to the amount of power it can deliver uninterrupted; surge rating refers to its ability to withstand short bursts of current. The PowerDream 18 kWh kit includes a 5kW pure sine wave inverter with 10kW surge power, enough to simultaneously power a 3kW heater, refrigerator, and lights.

Question 2: “Is this a pure sine wave inverter or a modified sine wave inverter?” Modified sine-wave inverters can damage sensitive electronics and generate noise. Ours uses pure sine wave, so all your devices will operate safely.

Question 3: “Does the inverter have built-in monitoring?” Off-grid households need to track their electricity usage. PowerDream’s inverters connect to a mobile app, allowing you to view real-time power generation, battery charge, and appliance usage on your phone.
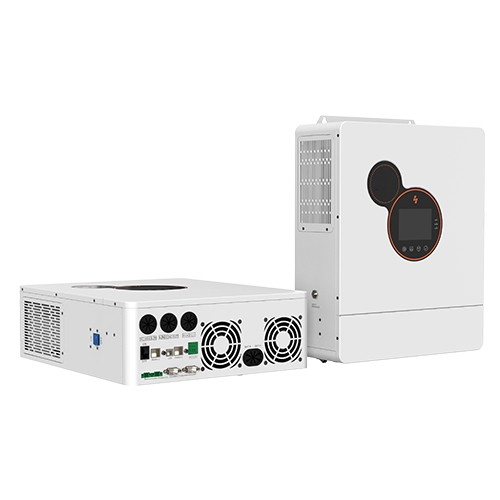
Inverter Power and Waveform, Converting DC to AC

Charge Controller Type and Amperage to Protect Your Batteries

A charge controller regulates the power flow from the solar panel to the battery. Excessive current can damage the battery, while too little current wastes energy. Here are some essential spec questions buyers should ask:

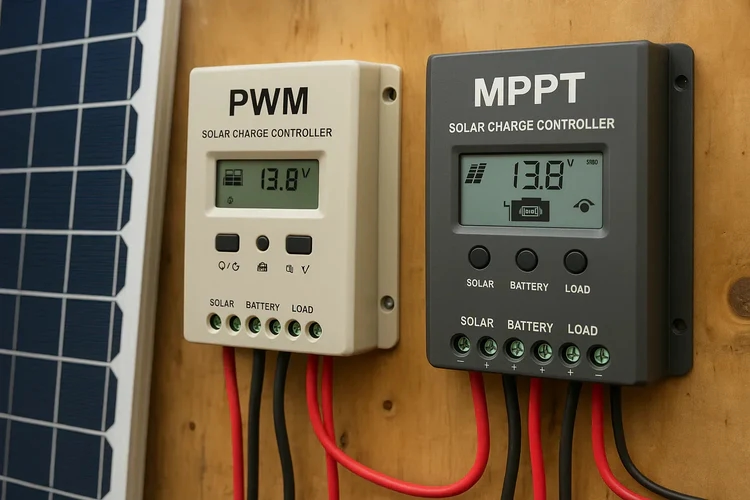
Question 1: “Is it an MPPT or PWM charge controller?” MPPT controllers have an efficiency of 90-99%; PWM controllers are only 75-80% efficient. PowerDream’s 18 kWh kit uses a 60A MPPT controller.

Question 2: “What is the controller’s voltage compatibility?” It must match your system voltage (12V, 24V, 48V). PowerDream’s kit uses 48V, which means lower current and thinner wiring, resulting in less energy loss.

Question 3: “Does it have battery protection?” Overcharging or deep discharging can damage the battery. The PowerDream controller cuts off power when the battery reaches 100% or 20% charge, extending battery life by 30%.

One user who recommended the PowerDream kit stated, “The PWM controller is overrated. The MPPT controller in the 18kWh kit yields 20% more battery power per day—a great value for off-grid customers.”

Backup Generator Compatibility for Extended Cloudy Days

Even the best off grid home solar system kits require backup power for weeks of cloudy days. To ensure compatibility, the following specifications should be determined:

Question 1: “What size generator is compatible with this kit? How do I connect it?” The PowerDream 18kWh kit works with 3-7kW propane/gas generators. It also has a built-in generator input, eliminating the need for additional wiring.

Question 2: “Will the kit automatically switch to generator power when the battery is low?” Manual switching is cumbersome. PowerDream’s off-grid solar system automatically starts the generator when the battery reaches 15% charge and automatically shuts down at 80%.

A Minnesota homeowner said, “Last January, we had 10 cloudy days. My generator automatically switched on and off, keeping the batteries charged, and I didn’t have to take cold showers or eat spoiled food.”

Understand the specifications to choose a reliable off grid solar system

The quality of an off grid home solar system kit depends on the specifications you choose or the specifications provided by the supplier. By understanding the panel power/efficiency, battery capacity/type, inverter size/waveform, charge controller type, generator compatibility, and warranty, you can avoid common problems that plague 62% of off-grid homeowners.
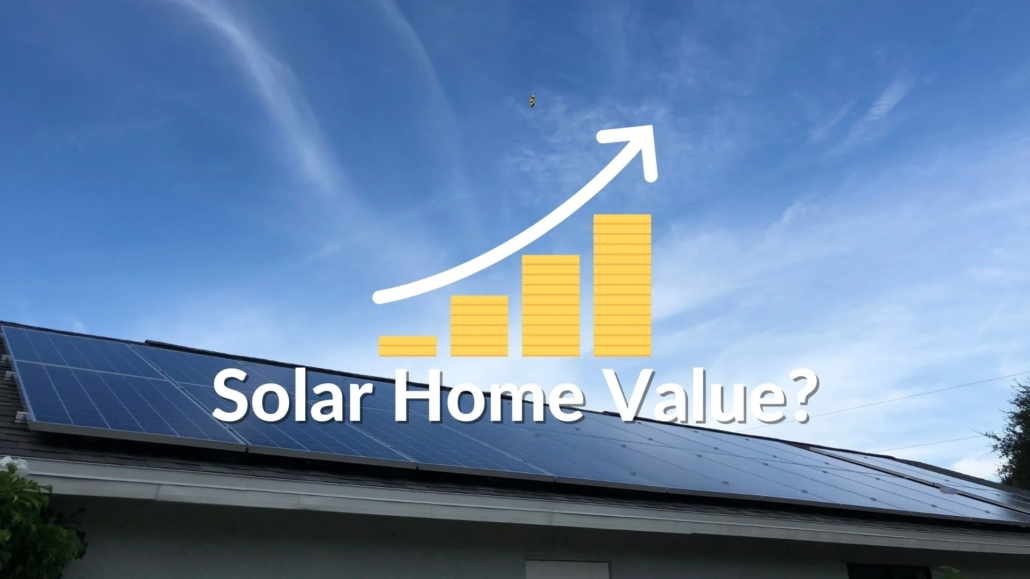
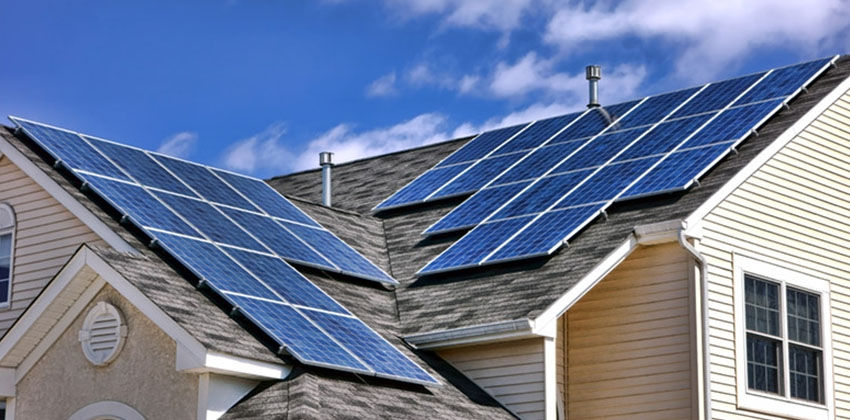
Home Solar Systems and Home Values: What Buyers Can Expect?

A Zillow Home Trends report indicates that homes with home solar systems sell for an average of 4.1% more than comparable non-solar homes. For a home valued at £500,000, this represents a £20,500 increase in value, more than offsetting a significant portion of the system’s upfront cost. However, 62% of homeowners remain skeptical: Does purchasing a solar system truly increase the value of their home? What factors determine the magnitude of this increase? PowerDream, a provider of home solar solutions and home solar system suppliers, has helped thousands of homeowners answer this question. The answer isn’t simply “yes,” but “it depends on how you build your system.”

The Science Behind Home Solar Systems Raising Home Value

A 2023 national study by Zillow, covering 2 million home sales across the United States, found that the average price premium of 4.1% remained constant even after controlling for factors such as location, size, and age. In sunny states like California and Arizona, the premium soars to 4.7%. At the same time, in more temperate climates, it remains at an average of 3.5%, dispelling the perception that home solar systems only increase value in sunny areas.

A 2022 LBNL study found that every additional $1 in annual electricity bill savings translates into a $20-25 increase in home value. For a home solar system that saves $1,800 annually, this translates to a $30,000-$40,000 increase in value, far exceeding the typical system cost.

Why is this so? Because homebuyers view solar systems as a “prepaid utility,” they avoid the upfront cost of installing the system while still reaping the monthly savings. As a PowerDream customer in Colorado put it, “When we sold our house, buyers kept asking about the solar savings. They considered it a ‘no-brainer’ upgrade that justified our asking price.”

The Science Behind Home Solar Systems Raising Home Value

Three Factors That Maximize the Value of Home Solar Systems

Home solar systems can add value to a home, but not all solar systems are created equal. Three key factors determine how much your system adds to your home’s value:

System size and efficiency: An appropriately sized system that can meet 70% to 100% of your energy needs will increase your home’s value more than an undersized system. PowerDream’s home solar solutions all use high-efficiency solar panels, which can generate more electricity in a smaller space. This means a PowerDream 5kW system can better meet your home’s needs than other suppliers.

Net metering availability: Homes in areas with strict net metering policies, such as California, Massachusetts, and Texas, experience higher home values. Net metering allows homeowners to sell excess solar power back to the grid, increasing their monthly savings. A 2023 study by the Solar Energy Industries Association (SEIA) found that homes in net-metered states sell for 1.2% more than similar homes in non-net-metered areas.

Installation quality and warranty: Installing a poorly made system can damage your home’s value. PowerDream works with certified installers to offer a 30-year solar panel warranty and a 5-year inverter warranty, which are transferable to new buyers. This gives buyers confidence that the system will last for decades, boosting the home’s appeal.

Three Factors That Maximize the Value of a Home Solar System

How Monthly Energy Savings Translate into Resale Value

For buyers, the appeal of a home solar system comes down to one thing: predictable energy savings. Let’s analyze how these savings translate into higher resale value through a real-world example:

System: PowerDream 5kW Home Solar System.

Monthly Savings: $150.

Annual Savings: $1,800.

Value Enhancement: Using Lawrence Berkeley National Laboratory’s (LBNL) “$20-25 in Returns for Every $1 Saved” strategy, this translates to an increase of $30,000-40,000 in home value.

Even in states with lower electricity rates, this can result in monthly savings of $110. Therefore, buyers are looking for more than just a “solar home”; they’re looking for a home that will save them thousands of dollars in the long run. As one real estate agent put it, “I’ve met buyers who would choose a solar-powered home even if it cost $10,000 more than a non-solar home. They know the savings will more than make up for the cost.”

Sustainability Demand: A Growing Value Driver

A 2023 National Association of Realtors (NAR) survey found that 77% of homebuyers consider energy efficiency a “very important” factor when purchasing a home. Many also said they would be willing to pay 2-3% more for a home with environmentally friendly features like solar.

A home solar system is a “visible sign” of a home’s sustainability. Unlike attic insulation or energy-efficient windows, solar panels are easy to see and use. PowerDream clients frequently feature their solar systems in their listing photos, and many report that their homes sell faster: one client in Oregon sold their house in 18 days, half the local average, because “buyers loved the home and enjoyed the solar-ready, environmentally friendly environment.”

Myths about the Value of Solar

Misconceptions about home solar systems often prevent homeowners from investing, but most of these misconceptions are unfounded. Let’s examine three common myths:

Myth: “Solar energy only increases value in sunny states.”

Fact: Zillow data shows that solar energy increases value in all regions of the United States, even in cloudier states like Washington and Maine. Thanks to net metering and high-efficiency solar panels, solar energy can still provide significant energy savings even in less sunny areas.

Myth: “Leased solar systems don’t increase value.”

Fact: Leased systems can increase value if the lease agreement is transferable and the monthly payments are lower than utility bills. A 2022 Redfin study found that homes with leased solar energy sold for 2.3% more than homes without solar energy. This is less than the increase for homes with owned solar systems, but it is still an improvement. PowerDream offers flexible ownership options to maximize value.

Myth: “Solar panels will damage your roof and reduce its value.”

Fact: Reputable home solar system providers use roof-safety mounting systems to prevent leaks. In fact, solar panels protect your roof from UV damage, extending its lifespan.

Save Costs, Add Value to Your Home

A home solar system can increase your home’s value, save costs, and make your home more attractive to buyers. Maximizing these benefits lies in choosing the right system and provider. PowerDream’s home solar solutions, featuring high-efficiency panels, a warranty, and professional installation, ensure your system is more than just an energy upgrade; it’s a value-added investment. For anyone considering solar power, the question isn’t, “Will it add value?” but, “How much value can the right system add?” So if you’re unsure about the right size system for your home, contact us. With PowerDream, you’re not just installing solar panels; you’re investing in the future of your home.

How a solar attic fan accelerates air circulation: 360° wide-angle circulation air supply

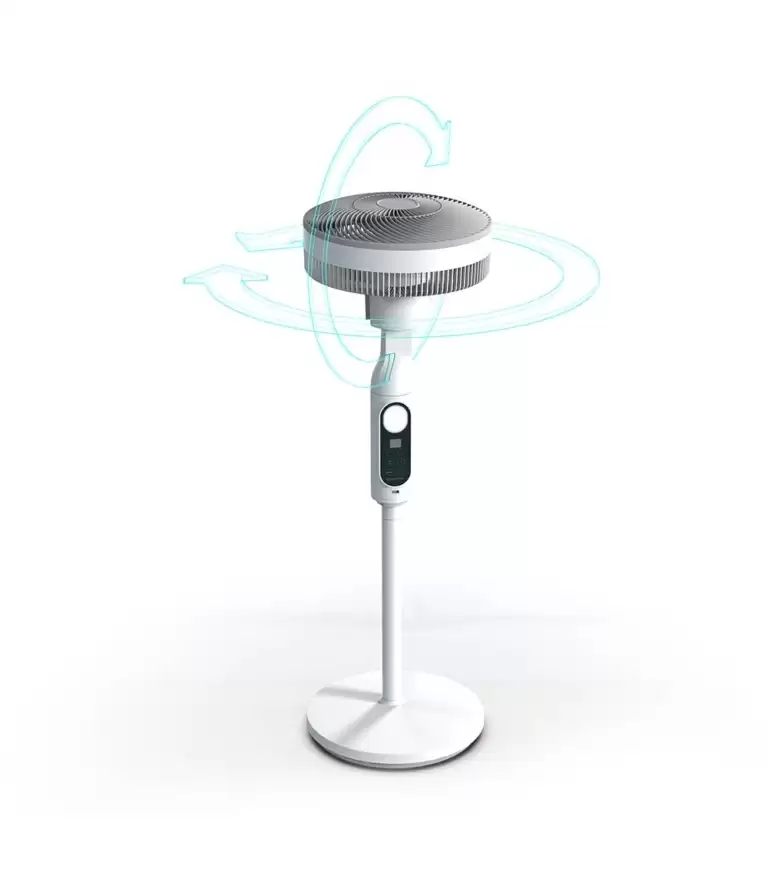
Many users of solar attic fan report that they still experience uneven attic temperatures. This is because most solar attic fans rotate in one direction or have a narrow oscillation range, leaving 50% of a room or attic without airflow. This is not only uncomfortable but also wastes energy: a hot attic forces frequent air conditioning use, increasing electricity bills by 10-15%. BARANA’s solar attic fan, with its 360° wide-angle oscillating air circulation and 3D humidification, not only moves air but also distributes it evenly, reaching every corner of the attic or house, thereby accelerating air circulation throughout the entire attic.

Why Don’t Solar Attic Fan Circulate Air Adequately?

The shortcomings of most solar attic fans stem from two restrictive design features:

Fixed-direction blades: These fan blades point straight up or rotate at a single angle, pushing air in only one direction. For an attic, this means the entire space never receives fresh air, leading to hot spots and moisture accumulation.

Narrow Oscillation Range: Some “improved” models can oscillate left and right, but their limited range still misses corners. A 90-degree oscillation only covers a quarter of a circle, leaving three-quarters of the attic stagnant.

These drawbacks can have serious consequences. A Florida homeowner using a traditional solar attic fan told us, “The west corner of my attic is so hot the roof shingles are peeling, but the east side is cool. The fan can’t reach there at all.” Moisture can also be a problem. The BARANA solar powered attic fan, however, oscillates 360 degrees, accelerating air circulation throughout the room.

BARANA Solar Attic Fan’s 360-degree Wide-Angle Oscillation

The BARANA solar attic fan’s highlight is its 360-degree wide-angle oscillation design, which accelerates air circulation.

360-degree Continuous Rotation: Unlike fans that start and stop, our solar attic fan’s blades rotate smoothly through a full circle (360 degrees) at adjustable speeds (low, medium, and high). This ensures even air flow through every square foot of the attic.

Adjustable Airflow: The fan’s solar panels power the blades, which, at high speed, deliver enough airflow to refresh the air in a 1,500-square-foot attic every five minutes. At low speed, the fan operates quietly for gentle circulation.

A homeowner in Texas experienced a 30°F (1.2°C) drop in their 1,400-square-foot attic after installing our solar attic fan, with no hot spots. “Now, the temperature is the same in every room,” they said.

BARANA Solar Attic Fan's 360-degree Wide-Angle Oscillation

3D Humidification Balances Airflow and Humidity

Air circulation isn’t just about moving hot air; it’s also about controlling humidity. Traditional solar fans dry out the air in their direct airflow path, leaving dead spots overly humid. This solar fan, however, features 3D humidification to ensure even moisture distribution without accumulation. The 3D humidification feature releases a fine mist as the fan rotates. This prevents over-drying and traps excess moisture, maintaining humidity levels between 40-50%. It also features 3D mist distribution, reaching every corner through 360° airflow. This means there are no dry spots near the fan, nor damp areas further away. Many users have found this solar fan has resolved their attic mold issues and maintained stable humidity levels throughout their entire home and attic.

Versatility – From Attic Workhorse to Home Fan

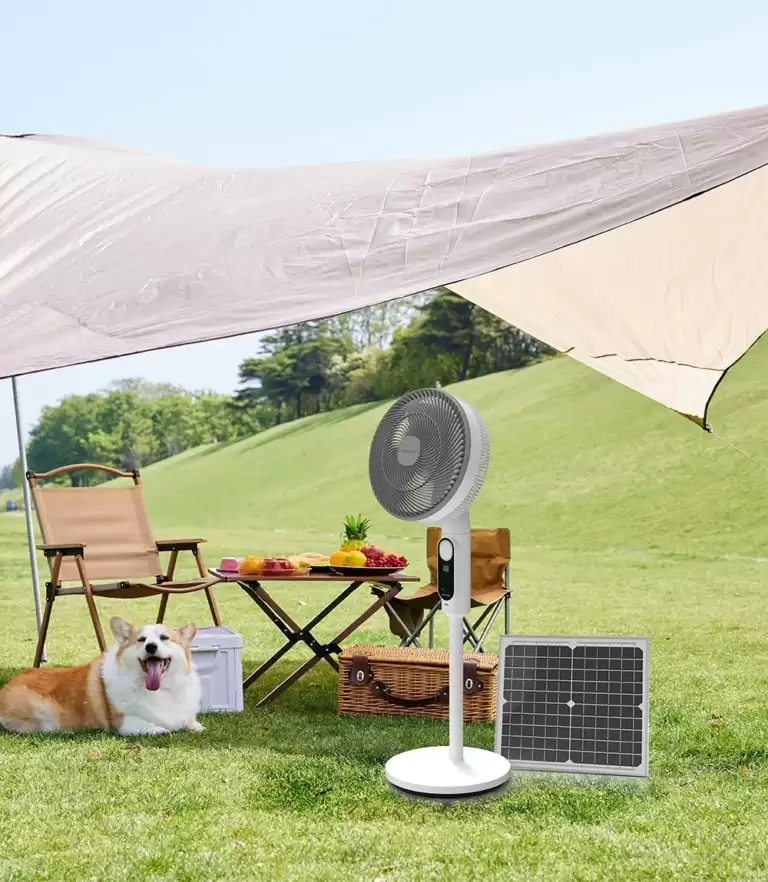
This solar attic fan isn’t just for attics; it’s also a versatile solar fan that can be used in the living room, garage, or patio. This adaptability solves another pain point: buying multiple fans for different spaces. They can be switched between different scenarios. If mounted on the attic ceiling, they use solar energy to circulate hot air and draw in fresh air. When placed on a stand in the living room or bedroom, they’re solar-powered and can also be connected to a small solar panel for nighttime use. The 360° oscillating design keeps the room cool without pointing directly at anyone. The durable plastic casing is dust- and rain-resistant, making it ideal for garages or covered patios. Many of our customers use them in three different scenarios: as an attic fan in the summer, as a living room fan in the fall, and as a patio fan in the spring.

Versatility – From Attic Workhorse to Home Fan

Energy Saving and Off-Grid Compatibility

Solar attic fans should save energy, not consume it, so we prioritized energy efficiency in their design. The solar panels on these fans generate enough power to keep them running at high speed even on cloudy days. They also charge a small built-in battery, allowing the fan to continue running for 2-3 hours after sunset.

If you already have solar panels, you can connect the fan to these batteries via a 12V adapter for all-day operation. They can also be used with portable solar generators, making them ideal for off-grid homes. They also operate at just 35 decibels on low speed and 45 decibels on high speed, making them quieter than most ceiling fans.

Accelerate air circulation in your home

For those tired of hot spots, mold, and energy waste caused by traditional solar attic fans, the BARANA solar attic fan offers 360° wide-angle circulation to cover every corner, 3D humidification to balance humidity, and the versatility to meet your home’s needs. It’s more than just a solar fan; it’s a system that keeps your attic and your entire home comfortable, safe, and efficient.

How to effectively calculate the static load bearing structure of a ground mount solar system?

According to one of our survey reports, 8% of ground mount solar system failures are due to flawed static load-bearing structure calculations. For ground-mount users, this translates to an average repair cost of thousands of dollars per failure, in addition to 4-6 weeks of lost power generation while the system undergoes maintenance. Even worse, the same study revealed that 62% of these failures could have been avoided with proper load analysis. As a solar racking system provider, we combine site-specific data, advanced engineering techniques, and detailed design documentation (layout drawings, joint specifications, installation guides) to ensure your system can withstand a wide range of loads, addressing your biggest installation challenges and providing peace of mind.

What is the static load-bearing structure of a ground mount solar system?

First, as a user, you need to understand the static load-bearing structure of a ground-mounted solar system and how it differs from other solar mounting systems. The static load-bearing structure refers to the framework that supports the solar array and prevents movement or deformation under constant (static) forces. For ground-mounted solar systems, this includes:

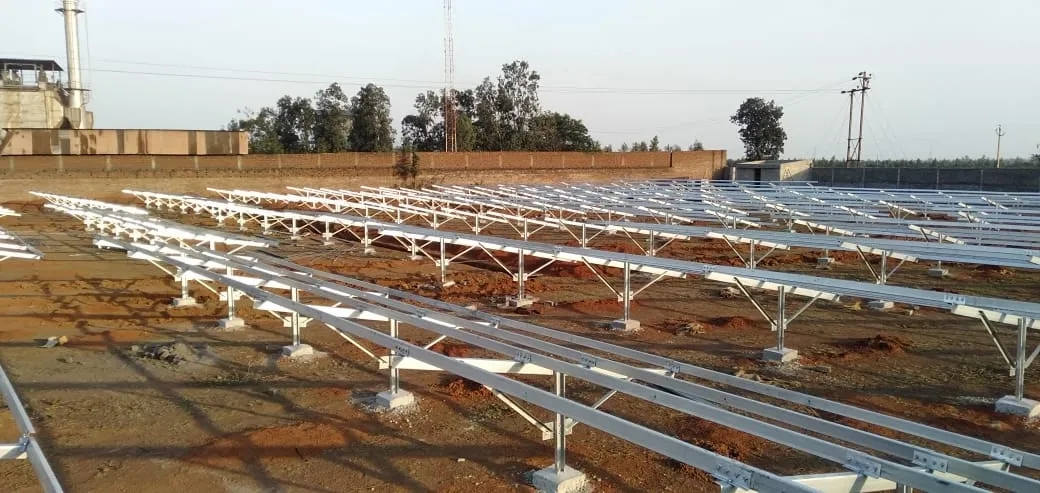
Foundation: The concrete foundation or anchor bolts that anchor the system to the soil.

Support columns: The metal or aluminum poles that connect the foundation to the track.

Tracks: The long beams that hold the solar panels.

Mounting hardware: The bolts, clamps, and brackets that secure the panels to the track.

Unlike dynamic loads, static loads act continuously. The system structure must withstand these forces. These loads can last for over 25 years without degradation. For example, a 5kW ground-mounted solar system has a static load of approximately 150 pounds per panel. This static load never dissipates, so the system structure must support it indefinitely. BARANA calculations ensure that every component, from half-inch bolts to 4-foot-tall columns, can withstand these long-term forces.

ground mount solar system 1

Calculating Critical Static Loads for Ground Mount Solar System

Effective static load calculations begin by determining all the forces acting on a ground-mounted solar system. BARANA analyzes three core load types and tailors the calculation to your site’s specific conditions:

1. Dead Loads
This is the fixed weight of the system itself, including the solar panels, rails, posts, and hardware, and the concrete foundation.
For a ground-mounted solar system with 20 solar panels, the total dead load is approximately 600-900 pounds. BARANA uses the exact specifications of your selected panels and solar racking system components to calculate this accurately to the nearest ounce.

2. Live Loads
Live loads are temporary forces, typically from maintenance workers. The International Building Code (IBC) requires a minimum of 250 pounds per worker for ground-mounted solar systems. Even if you do not plan on frequent maintenance, BARANA considers this in every calculation, as unexpected repairs require someone to stand on the rails.

3. Environmental Loads
These loads vary the most and are the most critical, as they depend on your location:
Wind Loads: Calculated based on National Oceanic and Atmospheric Administration (NOAA) data, for example, winds of 120 mph in Florida’s hurricane belt and 80 mph in tornado-prone areas of the Midwest. Miles per hour. Wind pushes against the solar panels, creating “lift” that pulls the system upward.
Snow load: Based on average local snowfall. Wet snow weighs more, so for areas with heavier wet snow, we use a compaction weight of 50 pounds per square foot.
Soil bearing capacity: Soil testing (required for all BARANA projects) tells us how much weight the ground can support, which determines the depth and type of foundation.

Calculating Critical Static Loads for Ground-Mounted Solar Systems

BARANA’s Four-Step Static Load Calculation Process

BARANA’s process is a site-specific, code-compliant workflow that eliminates risk. Here is how we calculate the static load-bearing structure of a ground mount solar system:

Step 1: Site Assessment
First, we gather field data to avoid making sweeping assumptions. Our engineers test your soil to measure its bearing capacity and drainage properties. We also obtain 30-year average wind and snow loads from the National Oceanic and Atmospheric Administration (NOAA) Climate Data Center. After determining the exact weight, size, and wind resistance data for your selected solar panels, we assess the load-bearing capacity of your soil.

Step 2: Load Quantification
We input all site data into our proprietary engineering software to calculate the magnitude of each load. For the dead load calculation, we factor in the combined weight of the panels, rails, and hardware. For live loads, we add 250 pounds for each potential worker position. We also calculate environmental loads such as wind pressure and snow weight.

Step 3: Structural Analysis
We use FEA software to simulate how each component will withstand the total load. We test whether the rails bend under the combined dead and snow loads and verify whether the columns tilt under wind loads. We also ensure that the foundation will not sink into the soil.

Step 4: Apply a Safety Factor
To account for unexpected forces, we multiply all loads by a safety factor according to IBC standards: dead load + live load x 1.5 times to ensure the structure can withstand a weight 50% higher than expected. Environmental load x 1.3 times. This process ensures your ground-mounted solar system not only meets code but also exceeds it.

BARANA Detailed Design Documents – Installation Guidelines

Calculations are meaningless without a clear execution plan. BARANA provides detailed design documents to ensure your ground mount solar system is installed correctly. These documents address the user’s primary concern: “Will the installer be able to install it correctly?” Our service includes three key components:

1. Layout Diagrams

2D/3D maps showing panel spacing, post location, and foundation location, along with instructions for setbacks (e.g., 5 feet from property line) and drainage (to prevent water accumulation around the foundation), as well as load labels for each section.

2. Mounting Joint Specifications

Includes precise bolt sizes, torque requirements, and joint cross-sections to prevent misalignment.

3. Installation Techniques

Foundation specifications: depth, concrete mix, and curing time, as well as track leveling tolerances and checkpoints.

Installation Guide for Ground-Mounted Solar Systems

Common Calculation Mistakes and BARANA’s Solutions

Even experienced installers can make mistakes in static load calculations, and BARANA’s process eliminates the most common pitfalls:

Mistake 1: Using Generic Weather Data

Problem: Installers rely on national averages instead of local data.
BARANA’s Solution: We use NOAA weather data. County-level data (e.g., 40 lbs/ft2 in northern Maine and 0 lbs/ft2 in southern California).

Mistake 2: Ignoring Soil Type
Problem: Skipping soil testing and using a standard foundation depth results in sinking in soft soils.
BARANA’s Solution: Soil testing is mandatory for every project, and we adjust foundation depth capacity based on soil bearing capacity.

Mistake 3: Forgetting Live Loads
Problem: Not accounting for maintenance workers, resulting in track bending when someone stands on it.
BARANA’s Solution: Including Live Loads in every calculation.
By addressing these mistakes upfront, we can better ensure your ground-mounted solar system avoids common failures with other systems.

Static Load Calculations: The Basics of Ground-Mounted Solar System Installation

For anyone considering installing a ground-mounted solar system, static load structural calculations are crucial in determining whether the system will last 25 years or fail within 5. BARANA We eliminate risks and address your biggest installation challenges based on field data, rigorous engineering, and detailed design documentation. We sell more than just solar mounting systems; we ensure your ground-mounted solar system is robust and durable, regardless of weather or time of year.

How does net metering work with grid-connected solar system and what must buyers know?

Buyers of grid-connected solar systems using net metering can see a 2-5 year payback period, which is 30% faster than for those without net metering. However, according to a recent survey, 62% of US homeowners considering a grid-connected solar system admitted they “didn’t fully understand” how net metering works. This gap can cost buyers thousands of dollars: some of our customers in California save $150 per month on a 5kW grid-tied solar system with net metering, but only $90 per month without it, resulting in a three-year payback period. As a manufacturer of grid-tied solar systems, Power Dream understands how net metering can turn solar energy into a wise financial investment.

What is a grid-connected solar system?

Before understanding net metering, you must understand what a grid-tied solar system is and why it’s the only system that uses net metering. Unlike off-grid solar systems, on grid solar systems connect directly to your local utility grid. Here’s how it works in a nutshell:

Your solar panels generate electricity during the day, and you can use that electricity as needed (for example, to power a refrigerator, lights, or air conditioning). Any excess electricity not used then flows back to the utility grid (this is where net metering comes into play). Then, when your solar panels aren’t generating enough electricity (for example, at night or on cloudy days), you can draw power from the grid, just as you do now.

Grid-connected solar systems don’t require batteries, though you can add batteries for backup, making the upfront cost lower than off-grid systems. The utility grid acts as your “virtual battery,” storing excess electricity through net metering for you to use later.

grid-connected solar system 2

How Net Metering Works with a Grid-Connected Solar System: Step-by-Step

Net metering is a utility program that tracks the “net” amount of electricity you use—the difference between the amount your grid-connected solar system generates and the amount you draw from the grid. Here’s a simple, practical explanation:

Step 1: The utility company installs a net meter
When you install a grid-tied solar system, the utility company replaces your standard electricity meter with a net meter. This meter tracks two numbers:

Input electricity: The amount of electricity drawn from the grid.

Output electricity: The excess electricity your solar panels deliver to the grid.

Step 2: Your grid-connected solar system generates electricity, which you use or export.
During the day, your solar panels generate electricity. Let’s assume a typical day: from 9 AM to 5 PM, the solar panels generate 8 kWh, and you use 4 kWh (exporting 4 kWh to the grid). From 5 PM to 11 PM, the solar panels generate 0 kWh, and you use 6 kWh (importing 6 kWh from the grid).

Step 3: Your utility company bills you for your “net” usage.
At the end of your billing cycle (usually monthly), your utility company calculates your “net” usage: Net usage = electricity imported – electricity exported.
In the example above, 6 kWh – 4 kWh = 2 kWh net usage. Therefore, you only pay for these 2 kWh, plus a fixed utility fee. If you export more electricity than you import, you’ll receive a net metering credit for the 2 kWh difference. These credits will then be rolled over to your next bill to offset future usage.

How Net Metering Works with Grid-Tied Solar Systems

Key Net Metering Rules You Must Know When Purchasing an On Grid Solar System

Net metering rules vary across states, utilities, and even cities. Ignoring these rules can lead to missed savings or unexpected costs. We’ve summarized the three most critical rules to verify before installing a on grid solar system:

1. Wide Variations Across States and Utilities

Each state handles net metering differently. For example, in California, the Net Energy Metering (NEM) 3.0 program pays lower rates for exported energy than previous versions, while still providing significant credits. Net metering in Texas isn’t a state requirement; each utility sets its own rules. Some utilities offer full net metering, while others restrict export limits. Be sure to review your local utility’s net metering policy and use the DSIRE database to confirm regulations.

2. Net Metering Credits Are Not “Cash,” But Bill Credits

A common misconception is, “My on grid solar system makes money by selling excess energy to the utility.” This is rarely true. Most net metering plans offer bill credits, not cash.

3. Some Utilities Limit Exports

Many utilities limit the amount of excess energy a on grid solar system can export to the grid, typically to 100% of your historical annual usage. If you install an oversized system, the utility may refuse to net meter the extra 5 kW or pay you at a much lower rate.

Key Net Metering Rules You Must Know When Purchasing a Grid-Connected Solar System

How Net Metering Improves Your Grid-Tied System’s ROI

Net metering is the most critical factor in ensuring the economic viability of an on grid solar system. Let’s use a real-time example to illustrate its impact:

Example: 5kW On Gird Solar System in Arizona

Upfront cost: $15,000.

Monthly Solar Power Generation: Approximately 700 kWh (Arizona has abundant sunshine). Monthly electricity usage: Approximately 500 kWh.
Electricity price: $0.14/kWh.

Without net metering:
You use 500 kWh of solar power, but the additional 200 kWh is fed back to the grid and not counted towards the credit. Although you pay $0 for the kWh, you miss out on potential savings of $28 per month.
Annual savings: $0.
Payback period: Approximately 12.5 years.

With net metering:
You use 500 kWh of electricity and export 200 kWh, earning a $28 credit. In a cloudy month, if you use 600 kWh of electricity and export 400 kWh, you can use the $28 credit to offset the 200 kWh you imported.
Annual savings: $1,680. Payback period: Approximately 9 years. This represents a 3.5-year reduction in payback period.

Common Myths About Net Metering and Grid-Tie Systems

Debunking these myths will help you set realistic expectations for your grid-tied solar system:

Myth 1: “Batteries Replace Net Metering”

Batteries allow you to store excess electricity for nighttime use, but they don’t replace net metering. If your battery is fully charged, the excess electricity will still be delivered to the grid, and net metering will pay you accordingly. Batteries complement net metering, not replace it.

Myth 2: “Net Metering Is On the Way Out”

While some states have updated their net metering rules, the complete elimination of net metering is rare. Utilities need distributed solar to reduce the strain on the grid during peak hours. As long as your grid-tied solar system was installed before significant rule changes, you’ll likely be able to enjoy current electricity rates for 10 to 20 years.

Myth 3: “All grid-connected solar systems are eligible for net metering”

Some utilities exclude small commercial systems or systems over a specific size from net metering. So, before you commit to a grid-tied system, be sure to check with your utility company to confirm your eligibility.

Net metering is essential for grid-tied systems.

For anyone considering a grid-connected solar system, net metering isn’t just a bonus; it’s what makes solar a wise economic choice. It turns excess energy into real savings, shortens payback times, and makes solar energy accessible to homes and small businesses. The key to success lies in doing your homework: review state/utility regulations, size your system appropriately, and work with a grid-tied solar system manufacturer who can guide you through the net metering process.

How can hybrid solar power system improve resilience and provide stable power during grid outages?

Some areas with severe weather experience unexpected power outages of 1.5 to 4 hours annually, with these severe weather events causing outages lasting several days. Traditional grid-connected solar systems pose a significant cost to homeowners during these crises, as they automatically shut down during outages, leaving users without electricity.The Hybrid solar power system offer a solution. Unlike grid-connected or off grid systems, hybrid solar power systems combine solar panels, battery storage, and a grid connection to provide reliable power regardless of grid conditions.

What is a hybrid solar power system? How does it differ from grid-connected/off-grid systems?

Hybrid solar power systems differ from other solar installations in that they bridge the gap between grid-connected and off-grid systems:

On grid systems: Connect to the utility grid but lack battery storage. They save on electricity costs but shut down during outages.

Off grid systems: Use batteries to operate independently of the grid, but are too complex for most users. They require more panels/batteries than needed for daily use and cannot rely on the grid for power during extended periods of cloudy weather.

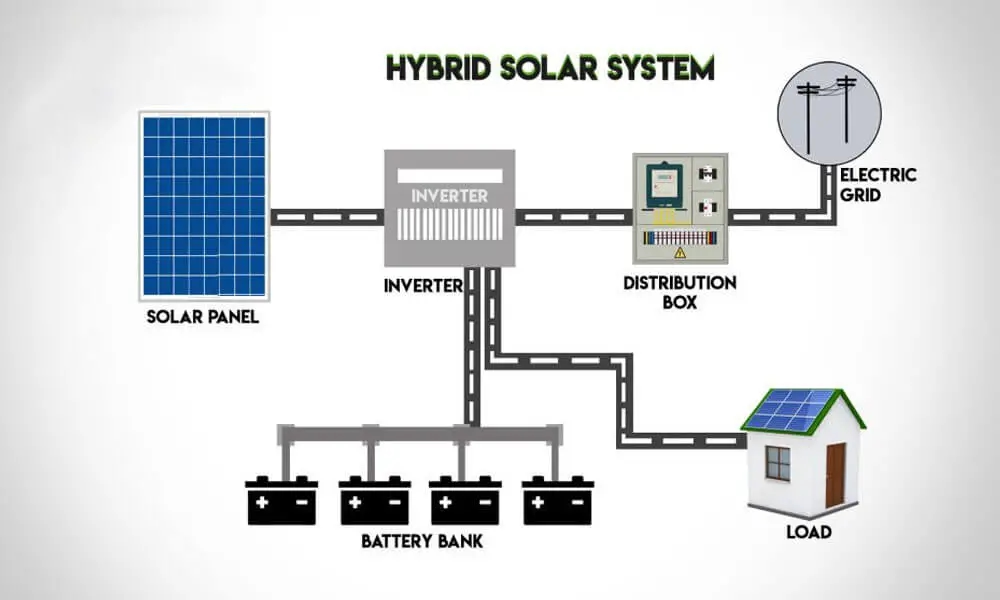
Hybrid solar system combine solar panels, batteries, and bidirectional inverters. When solar/battery power runs low, they draw power from the grid and automatically switch to battery backup during a power outage. This “best of both worlds” design makes hybrid solar systems an excellent choice for users who value resilience.

What is a hybrid solar power system

Hybrid solar power systems use batteries to store excess solar energy for use in the event of a power outage.

The key to a hybrid solar power system’s resilience to power outages lies in its battery storage technology. During regular grid operation, your solar panels generate electricity. Any unused energy is immediately charged to the hybrid solar system’s batteries. In the event of a grid failure, the system disconnects from the grid and uses the stored battery power to power your home or business.

This revolutionizes the ability of solar power systems to withstand power outages. On grid systems without batteries cannot achieve this, as they immediately cease power supply in the event of a grid failure. Even backup generators rely on fuel, which can be depleted during a prolonged power outage. In contrast, a hybrid solar power system stores energy for free, ready for use when needed. A typical 5kW hybrid system, paired with a 10kWh battery, can power critical household loads for 2-3 days during a power outage—even longer if there is sufficient sunlight to recharge the battery.

Hybrid solar power systems use batteries to store excess solar energy for use in the event of a power outage (1)

Seamless Switchover Between Grid and Backup Power

One of the most frustrating aspects of a grid outage is the “blackout interval,” the time between when the grid goes out and when the backup power source kicks in. Generators typically take 5-10 minutes to start, and manual transfer switches require frustrating manual switching from the grid to the backup source. Hybrid solar power systems eliminate this gap with seamless, automatic switching.

A hybrid solar system’s inverter continuously monitors the grid voltage. Once it detects a grid fault, it triggers islanding mode and switches to battery power in just 10 to 50 milliseconds. That is faster than the blink of an eye. For users, this means no interruption: your lights will stay on, your refrigerator will keep running, your Wi-Fi will stay connected, and you might not even notice the grid outage. This seamless switchover is crucial for sensitive loads, such as medical equipment or commercial equipment.

Seamless Switchover Between Grid and Backup Power

Continuous battery charging during power outages provides long-lasting power

Unlike backup generators or standalone battery systems, hybrid solar systems continuously charge their batteries during a power outage, as long as the sun is shining. This “self-sustaining” feature provides a level of power far beyond what traditional backup systems can provide.

During a power outage, a hybrid solar system’s solar panels will continue to generate electricity if there is sufficient sunlight. Instead of sending this energy to the grid, the system transfers it directly to the batteries, providing power for overnight use or extended outages. For example, a 5kW hybrid solar system with a 10kWh battery might consume 4kWh of energy overnight while powering critical loads. The next morning, four hours of sunlight will generate 15kWh, fully charging the battery and providing additional power for the day. This means a hybrid solar system can power your home for days, not just hours, even during multi-day outages.

Prioritize critical power needs with load management

During extended power outages, battery capacity is limited, and hybrid solar power systems employ intelligent load management to ensure you power your most important devices. Most hybrid solar systems allow you to program “critical loads” and “non-critical loads.” In the event of a grid failure, the system automatically cuts power to non-critical loads, dedicating all battery energy to essentials. This feature extends battery life and ensures resilience when you need it most. With load management, a 10 kWh battery can last five days instead of two, doubling your power resilience. As a hybrid solar system manufacturer, we pre-program load management into the system, but users can adjust it via the mobile app.

Providing Reliable Solar Power

Hybrid solar systems combine four key features: battery storage, seamless transfer, solar charging, and load management, resulting in more reliable operating power. Unlike grid-tied systems or generators, hybrid solar power provides reliable, free solar power even during grid failures.

As a hybrid solar system manufacturer, we recommend that you assess your outage risk and critical loads when sizing your system. A small home might require a 5kW system with a 10kWh battery, while a business might need a 15kW system with a 30kWh battery. This allows you to find the power generation system that’s right for you.

MPPT and PWM for solar off grid system: Which one offers higher efficiency gains?

For users of off grid solar systems, a suboptimal charge controller can waste 15% to 25% of the system’s annual energy production. For a family relying on a 5kW off grid solar system to power their remote cabin, this translates to a 450% to 750kWh annual loss—enough to power a refrigerator for 6-10 months. One farm user struggled to keep their irrigation pump running because their PWM charge controller couldn’t capture enough energy on cloudy days until they upgraded to MPPT. This article will also address a key question when using solar off grid system: Which offers greater efficiency gains, an MPPT or a PWM charge controller?

What are MPPT and PWM charge controllers for the solar off grid system?

Both devices perform the same core function: regulating the power from the solar array to the battery bank, preventing overcharging and undercharging.

PWM charge controller: A simpler, more affordable option. PWM works similarly to a light switch, sending a steady “pulse” of current from the array to the battery when the battery charge is low. As the battery nears full charge, it reduces the pulse width to avoid overcharging. PWM is best suited for small off-grid solar systems where the array voltage matches the battery bank voltage.

MPPT charge controller: A more advanced option. MPPT doesn’t just output power; it “searches” for the solar array’s “maximum power point.” It then converts the solar array’s excess voltage into the additional current needed by the battery. For example, if your solar array generates 48V in full sunlight, and the battery voltage is 12V, the MPPT converts this 48V into four times the current, capturing more energy.

Solar off grid system providers typically use PWM with small off grid solar systems and MPPT with larger, more demanding installations. The key difference is that MPPT can adapt to changing environmental conditions, while PWM works best in stable, full sunlight.

What are MPPT and PWM charge controllers for the solar off grid system


MPPT vs. PWM Efficiency Comparison

In terms of efficiency, MPPT charge controllers outperform PWM in almost all practical scenarios, especially in solar off grid systems where grid power can’t offset energy waste. Here’s a comparison of the two:

Full-sun conditions: MPPT controllers operate at 90% to 95% efficiency, meaning they convert 90% to 95% of the array’s energy into battery power. PWM controllers are 75% to 80% efficient under ideal sunlight conditions, but because they can’t convert excess voltage, they waste 20% to 25% of that energy as heat. For a 2kW array, under full-sun conditions, MPPT captures approximately 7.6kWh, while PWM captures approximately 6.4kWh, a daily difference of 1.2kWh.

Variable conditions: This is where MPPT truly shines. Cloudy skies, partial shade, or extreme temperatures can all change the array’s maximum power point. PWM controllers can’t adjust; if shade causes the array voltage to drop by 20%, PWM efficiency drops to 60% or less. MPPT, on the other hand, can find a new maximum power point, maintaining 85-90% efficiency even in partial shade.

Large Arrays or Voltage Mismatch: For off grid solar systems with power greater than 2kW, or for arrays operating at higher voltages to reduce wiring costs, MPPT is the best choice. Its voltage conversion capability allows you to use larger, higher-voltage arrays without sacrificing efficiency.

MPPT vs. PWM Efficiency Comparison

When is PWM Suitable for the solar off grid system?

PWM still has its place in specific off grid system settings. It’s suitable for smaller systems where the energy consumption is minimal. If your system only generates approximately 2kWh per day, the extra $100-200 for MPPT may not be worth it. Furthermore, when your budget is tight, a PWM controller can cost 30-50% less than an MPPT. For users who prioritize upfront savings over long-term efficiency, PWM is an ideal choice.

Furthermore, the efficiency gap with PWM is minimized if your off grid solar system is located in a sunny, unobstructed area with minimal temperature fluctuations. Under these ideal conditions, PWM energy loss may be only 10-15%, acceptable for small systems.

MPPT Advantages in Off-Grid Solar Use Cases

MPPT efficiency is essential for solar off grid systems that power or operate critical loads. Solar off grid systems that power entire homes (refrigerator, stove, heating system) need to make the most of every watt. A 5kW array equipped with MPPT in partial shade can capture approximately 4.75kWh per day, enough to keep a heat pump running on cloudy afternoons.

In addition, in remote areas, an off grid solar system for farm power uses solar energy to operate irrigation pumps, livestock water heaters, or grain dryers, all of which require a stable energy source. MPPT can adapt to variations in sunlight, ensuring that pumps run longer and reducing the need for backup generators. Furthermore, in areas where low temperatures in winter cause the array voltage to rise, MPPT can convert the excess voltage into higher current, offsetting the effects of shorter days. In contrast, PWM wastes excess voltage, leading to undercharged batteries and dead loads.

Cost and Efficiency: The ROI of MPPT vs. PWM

The biggest drawback of MPPT is its higher upfront cost, but the long-term energy savings generally make it a better investment. Let’s take a typical off grid solar system as an example:
Upfront Cost Difference: For example, a 3kW off grid solar system costs approximately $3,500 using PWM mode, while an MPPT system costs approximately $3,700.

Annual Energy Savings: In a sunny location with occasional shade, MPPT mode consumes approximately 300 kWh more per year than PWM mode. For off grid users, this translates to an annual savings of $90.

Payback Time: The $200 higher cost of MPPT mode is recouped in approximately 2.2 years. The energy savings continue thereafter, and after 10 years, the MPPT system will have saved approximately $900, more than covering its initial cost. For larger systems, the return on investment is faster. A 5kW off grid solar system equipped with MPPT can save approximately 500 kWh per year, shortening the payback period to 1.5 years.

The ROI of MPPT vs. PWM

Choosing the Right Charge Controller

Which offers higher efficiency, MPPT or PWM? MPPT is clearly more efficient, especially under variable conditions or for large off-grid solar systems. However, for smaller, cost-effective systems in sunny conditions, PWM is still suitable. As an off-grid solar system manufacturer, we analyze your sunlight data, load requirements, and budget to find the most suitable off-grid solution for you.

Recommended Industrial Hybrid Solar Inverter: Supports 99.9% MPPT Efficiency and 6HP Motors

A statistical report found that 32% of US manufacturing plants lose 10% to 15% of their potential annual power generation due to low MPPT efficiency in hybrid solar inverters. A more serious problem: 45% of these plants are unable to power critical heavy machinery with existing inverters, forcing them to rely on expensive grid power even during peak sunlight hours. To address this shortcoming, we designed the BHESP 3-8kW hybrid solar inverter. This industrial-grade hybrid solar inverter is more than just a power converter; it’s a tool for maximizing the return on solar investment for large-scale operations. The inverter delivers 99.9% MPPT efficiency, supports motors up to 6 hp, provides 16 kVA surge capacity, and allows expansion up to 48 kW through parallel connections.

Industrial-grade, scalable hybrid solar inverter to meet growing demands

The BHESP 3-8kW hybrid solar inverter is designed for industrial flexibility—starting with single-unit output and scalable to meet large-scale needs. As an industrial-grade hybrid solar inverter, it provides 3kW to 8kW of continuous three-phase output right out of the box, making it ideal for medium and large-scale installations. Its unique scalability lets users connect up to six BHESP units in parallel for a total output of 48kW, providing enough power for a large manufacturing plant or a multi-building business park. This paralleling capability solves a common drawback of hybrid inverters, which typically limit output to 10kW and prevent expansion without replacing the entire unit.

As the solar array expands, four units can be added, increasing the total output to 48kW without the need for rewiring or new control systems; plug-and-play integration is all that’s required. The BHESP’s industrial-grade design ensures stable performance even when connected in parallel, and its built-in load balancing function evenly distributes power across the units.

Industrial-grade scalable hybrid solar inverter to meet growing demands

99.9% MPPT efficiency maximizes solar energy capture

The MPPT is the heart of any hybrid solar inverters, adjusting in real time to varying sunlight to maximize energy capture from your PV array. Most industrial hybrid solar inverters have a maximum MPPT efficiency of 98-99%, while the BHESP 3-8kW increases this to 99.9%, a difference that can result in significant energy savings. For a 16kW PV array, 99.9% efficiency means only 16kWh of potential energy is lost annually, compared to 160-320kWh lost with an inverter with 99% or 98% efficiency. Over ten years, this avoids 1,600-3,200 kWh of wasted energy. This hybrid solar inverter achieves this efficiency through dual MPPT trackers, allowing you to connect two independent PV strings and independently optimize the output of each.

This is crucial for large PV arrays, where shading may affect only one area. Furthermore, the BHESP supports an ultra-high open-circuit voltage of 800V, reducing current in the PV lines, thereby lowering cable costs and minimizing energy losses due to resistance.

maximizes solar energy capture(1)

Hybrid Solar Inverter with Support for 6-HP Motors and 16kVA Surge Capacity

Industrial operations use heavy machinery such as conveyors, pumps, and compressors, and they typically drive these systems with 5–6 HP motors. Traditional hybrid inverters perform poorly in this area because they lack the surge capacity to start these motors and often trip or shut down under load. The BHESP 3-8kW industrial-grade hybrid solar inverter addresses this issue with two key features: support for 6-HP motors and 16kVA surge capacity. The 16kVA surge capacity handles the initial power spike when a 6-HP motor starts, ensuring smooth operation without grid backup power.

For example, a beverage bottling plant uses a 6-HP pump to move water through its production line. With its previous hybrid inverter, the pump would cause the system to trip two to three times per week, forcing the plant to switch to grid power. After installing the BHESP, the pump started reliably every time and ran 100% on solar power during the day. The BHESP’s robust design, including thermal protection and voltage regulation, makes it an ideal choice for industrial users who can’t afford production line downtime or inefficiencies.

It’s also ideal for large PV arrays

Large PV arrays require an inverter that can handle high input power, adapt to array layouts, and integrate with industrial electrical systems. The BHESP hybrid inverter meets all of these requirements. First, its maximum 16kW PV input means it can be paired with fairly large array units. When paralleled to 48kW, it can support arrays up to 48kW. Second, its 800V open-circuit voltage is a game-changer for large installations. The higher voltage allows the use of thinner, less expensive cables and reduces energy losses in long cable runs.

Third, the BHESP’s three-phase output matches the electrical systems of most industrial facilities, eliminating the need for expensive phase converters. Unlike single-phase hybrid inverters, three-phase power provides consistent, balanced power, making it compatible with heavy machinery and factory switchboards. For example, a distribution center with a 30kW PV array uses three 8kW BHESP units to power its conveyor system and lighting. The three-phase output ensures smooth conveyor operation without voltage dips.

Key Differences from Standard Industrial Hybrid Inverters

To understand the significant advantages of the BHESP, let’s compare it to a typical industrial hybrid inverter (e.g., 5kW, single MPPT, 98.5% efficiency):

Feature BHESP 3-8kW Hybrid Solar Inverter Standard Industrial Hybrid Inverter
MPPT Efficiency 99.9% (dual MPPT) 98.5% (single MPPT)
Motor Support Up to 6HP Up to 3HP
Surge Capacity 16kVA 8–10kVA
Scalability Up to 48kW (6 units parallel) Max 10kW (no parallel)
Max PV Input 16kW (per unit) 8kW (per unit)
Open-Circuit Voltage 800V 600V

These differences mean that a facility using the BHESP can capture 1.4% more solar energy, power a motor twice the capacity, and increase system size by 4.8 times, while reducing installation costs through higher voltage compatibility. This makes it a superior industrial inverter for industrial users.

Hybrid Solar Inverter 6-6

Built for Industrial and Large Commercial Users

The BHESP 3-8kW hybrid solar inverter is designed for industrial and large commercial users, offering the three key industrial-grade features: maximum solar efficiency, robust performance, and scalability. This includes powering 6-horsepower machinery and scaling with growing production. Easily handle large PV arrays and three-phase power systems. You can also connect units in parallel to power multiple buildings with one solar system. As a hybrid solar inverter manufacturer, Power Dream puts every unit through a 48-hour continuous load test and backs it with a 5-year warranty, ensuring you the reliability and performance you demand.

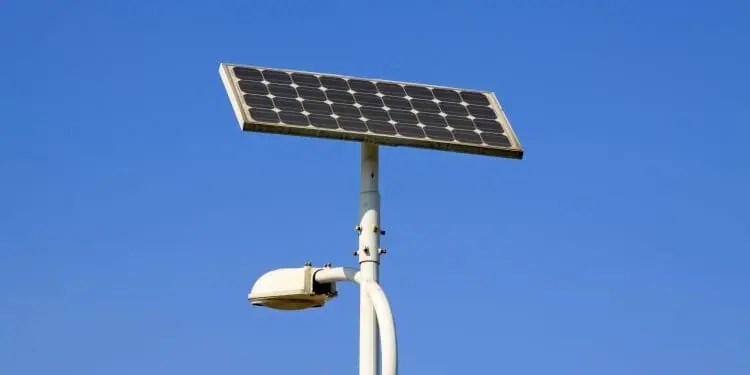
Troubleshooting of common faults of the solar street lamp

Approximately 65% of solar street lamp downtime is caused by easily fixable issues, such as loose wires, misconfigured controllers, or dirty panels, resulting in hundreds of dollars in unnecessary repairs per light for municipalities and businesses each year. As a professional solar street lamp manufacturer, we offer simple troubleshooting tips that can save weeks of dark streets and wasted budgets.

Troubleshooting Solar Street Lamp “No Light” Issues

Solar street lamps failing to illuminate at night is one of the most common complaints we hear—and 80% of the time, the solution is simple. First, check the manual switch: Most solar street lights have a three-position switch on the controller or light itself. If it’s set to “off,” switch it to “auto.” Next, inspect the LED bulb: Check the bulb or base for burn marks. If damaged, replace it with the wattage recommended by the solar street light manufacturer.

Next, check the wiring connections: Turn off the light fixture and inspect the bulb, controller, and battery for loose, frayed, or disconnected wiring. Loose wiring in the controller is often the cause. Gently press the connector to ensure it’s secure. Finally, test the controller’s LED indicator. Most controllers use a red/green light to indicate power. If no light illuminates, the controller may need to be reset or replaced. If these steps don’t work, contact the manufacturer.

Troubleshooting Solar Street Lamp No Light Issues

Fixing Dim or Flickering Lights on Solar Street Lamps

Dim or flickering lights are not only annoying but also reduce pedestrian and driver safety. First, check the battery charge. Low battery levels can cause dim output. We can use a multimeter to test the battery voltage. If the battery is low, manually charge it with a compatible charger. Next, inspect the bulb for dirt or debris. Dust, insects, or bird droppings on the bulb cover can obstruct the light. Wipe it clean with a soft, damp cloth.

Next, check for voltage drops. Excessively long or thin wires between the battery and bulb can reduce current flow. During installation, we recommend using 14-gauge or thicker wire for distances over 10 feet. If your wire is too thin, you may need to upgrade to a thicker wire. Finally, verify the controller’s “Dim Mode.” Some bright solar street lamps have a dimming feature (for example, reducing brightness by 50% after midnight) that could be accidentally activated.

Troubleshooting Solar Panel Charging Problems

If your solar street lamp’s battery never fully charges, the problem is likely with the solar panels. First, check for obstructions: Leaves, snow, dirt, or bird nests on the solar panels can block sunlight. Use a soft brush to clean the panels. Additionally, in areas with heavy snow or debris, consider solar street lamps with panels tilted at a 30-45 degree angle; this design helps automatically remove snow and dirt. Next, check the alignment of the panels: In the Northern Hemisphere, solar panels need to face due south and match your latitude to maximize sunlight absorption.

If wind or vandalism has caused the panels to move, use a compass to realign them. Then, test the panel output with a multimeter: On a sunny day, place the multimeter probes on the positive and negative terminals of the panel. If the reading is lower than this, the panel may be damaged and need to be replaced.

Troubleshooting Solar Panel Charging Problems on Solar Street Lights


Troubleshooting Rapid Battery Drain

If your solar street lamp dies within hours of turning it on, rapid battery drain is a common cause, and this problem is often preventable. First, check the age of the batteries: lead-acid batteries typically have a lifespan of 3-5 years, while lithium-ion batteries have a lifespan of 5-7 years. If your batteries have exceeded their lifespan, replace them with batteries that match the voltage and capacity (Ah) specified by the solar street lamp manufacturer.

Next, check for parasitic loads: a faulty bulb, damaged wiring, or a faulty sensor may be drawing power from the battery even when the light is off. To test this, disconnect the battery and use a multimeter to check the current between the light wires. If current is present, isolate the issue by disconnecting individual components. Next, verify the controller’s over-discharge protection setting. If it’s set too high, the light will shut off prematurely. Use the controller’s dial or app to adjust it for a 12V or 24V system.

Troubleshooting Controller Failures

The controller is the “brain” of the solar street lamp, managing charging, lighting duration, and battery protection. Therefore, a malfunction can cause a range of problems. First, reset it. Most controllers have a small reset button; pressing and holding it for 5 seconds restores the default settings. This can resolve some common issues, such as incorrect time settings, where the street light turns on at noon instead of at dusk. Next, check for water damage: Industry standards require that the controller be IP65 waterproof; however, cracks in the housing can still allow moisture to enter. Open the controller housing and inspect for rust or water damage. Wipe dry with a clean cloth and seal any cracks with waterproof tape. For a permanent fix, replace the housing or controller. Next, update the firmware. Some modern solar street lamps utilize app-connected controllers, which necessitate occasional firmware updates to address bugs.

Proactive maintenance to avoid solar street lamp failures

The best troubleshooting approach is prevention. Check the solar panels for debris, bulbs for dirt, and wiring for damage on a monthly basis. Once a year, test the battery voltage and clean the controller’s wiring. For solar street lamp buyers, choose a manufacturer that prioritizes durability and provides clear troubleshooting guides; this will save you time and money in the long run.

String Monitoring vs. Central Monitoring for Solar On grid System: Pros, Cons, and Costs

For those considering or already using a solar on grid system, a system without proper monitoring can lose 5-15% of its energy annually due to undetected issues such as shaded solar panels, faulty inverters, or wiring errors. This not only wastes sunlight but also wastes electricity bills and delays return on investment. Therefore, appropriate monitoring tools are needed to transform reactive repairs into proactive optimization. To this end, we’ve analyzed the two core monitoring methods for solar on grid systems—string and centralized—and analyzed their pros, cons, and costs to help you choose based on system size, budget, and performance goals.

What are string and centralized monitoring for solar on grid system?

String monitoring tracks the performance of “strings” (groups of 8-12 solar panels) by measuring string-level voltage and current, typically through sensors connected to the system’s inverter. Most entry-level home solar on grid systems include basic string monitoring functionality, as they need to be paired with the home inverter. Central monitoring, by contrast, provides system-wide visibility, tracking not only the strings but also the output of individual inverters, battery storage systems, and sometimes even individual solar panels. Central monitoring systems for solar on grid systems are scalable and often include cloud-based dashboards, allowing users to access real-time data anytime, anywhere.

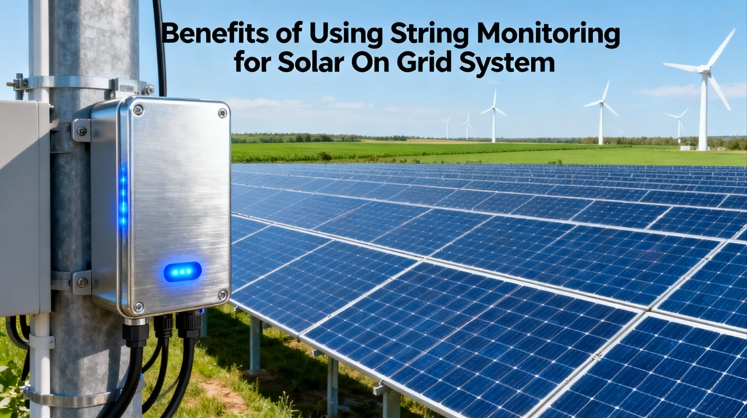
Benefits of Using String Monitoring for Solar On Grid System

String monitoring is particularly advantageous for users who prioritize simplicity and cost when purchasing a solar on grid system, especially for small and medium-sized systems. First, it’s affordable: Solar On Grid System manufacturers often reduce the price of string monitoring hardware (sensors, basic dashboards) to a fraction of that of central monitoring tools, making it an ideal choice for homeowners or small businesses with tight upfront budgets. Second, it’s easy to install. Most string monitors integrate directly with standard inverters, allowing installers to set up within hours.

Third, it provides actionable data for small systems: if the output of a particular string drops, you know to check whether there are issues with shading, debris, or faulty panels within that group. Furthermore, string monitoring requires virtually no maintenance. For many users, this balance of affordability and ease of use makes string monitoring a popular choice when purchasing a solar on grid system.

Benefits of Using String Monitoring for Solar On Grid System

Disadvantages of String Monitoring

While string monitoring is suitable for small systems, it has some key limitations that become increasingly apparent as the system size or performance requirements grow. The most significant disadvantage is that string monitors cannot pinpoint problems with individual panels; they can only identify issues with the entire string. If a single panel in a string of 10 panels fails, the monitor will indicate low output power for that string, but you must manually inspect each panel to locate the fault. This delays repairs and prolongs energy losses.

Secondly, string monitoring often lacks advanced features, such as predictive maintenance. Unlike centralized tools, it cannot alert you to impending inverter failure or decreased panel efficiency, requiring you to become aware of the problem only after performance has degraded. Furthermore, string monitoring struggles with complex setups: if your solar on grid system includes multiple inverters or battery storage systems, string monitoring tools may not synchronize data across the components, resulting in fragmented information.

Advantages of Central Monitoring

Central monitoring is explicitly designed for users with large solar on grid systems, and its advantages more than offset the higher procurement costs of solar on grid systems. First, it provides unparalleled visibility: solar on grid system manufacturers build central tools to track every component, from individual panels to inverters and energy storage systems. This means you can identify a single faulty panel or a failing inverter within minutes, reducing energy losses.

Second, it supports predictive maintenance: Central monitoring utilizes data analytics to identify trends and alert you to issues before they cause downtime, such as an inverter starting to overheat or a panel’s efficiency decreasing at a rate faster than usual. Third, it is scalable. As you expand your solar on grid system, central monitoring can seamlessly integrate new components without the need for additional hardware. For users with large solar on grid systems, this means less downtime, lower repair costs, and a faster return on investment.

Advantages of Central Monitoring

Disadvantages of Central Monitoring

The main obstacles to central monitoring are cost and complexity, two key considerations when purchasing a solar on grid system, especially for budget-conscious users. First, there are higher upfront costs: Central monitoring hardware and software subscriptions increase your initial investment. Solar on grid system manufacturers typically charge 10% to 25% more for central monitoring than for similarly configured string monitoring, which can be prohibitive for homeowners or small businesses on a tight budget.

Second, the installation process is more complex, requiring additional technicians to connect sensors, synchronize components, and set up the cloud dashboard. This can add one to two days to the installation time compared to string monitoring. Small businesses without a dedicated maintenance team may struggle to fully utilize the potential of central monitoring, resulting in a wasted investment.

Choosing the Right Monitoring Solution

The decision between string monitoring and central monitoring depends on three key factors: system size, budget, and performance goals. For homeowners and small businesses with systems of 8 kW or less, string monitoring offers a better balance of affordability and ease of use, reducing the purchase cost of a solar on grid system while providing sufficient data to fix common problems. For commercial users, large farms, or anyone with a system over 8 kW, central monitoring is more suitable, minimizing downtime, lowering maintenance costs, and maximizing energy output.