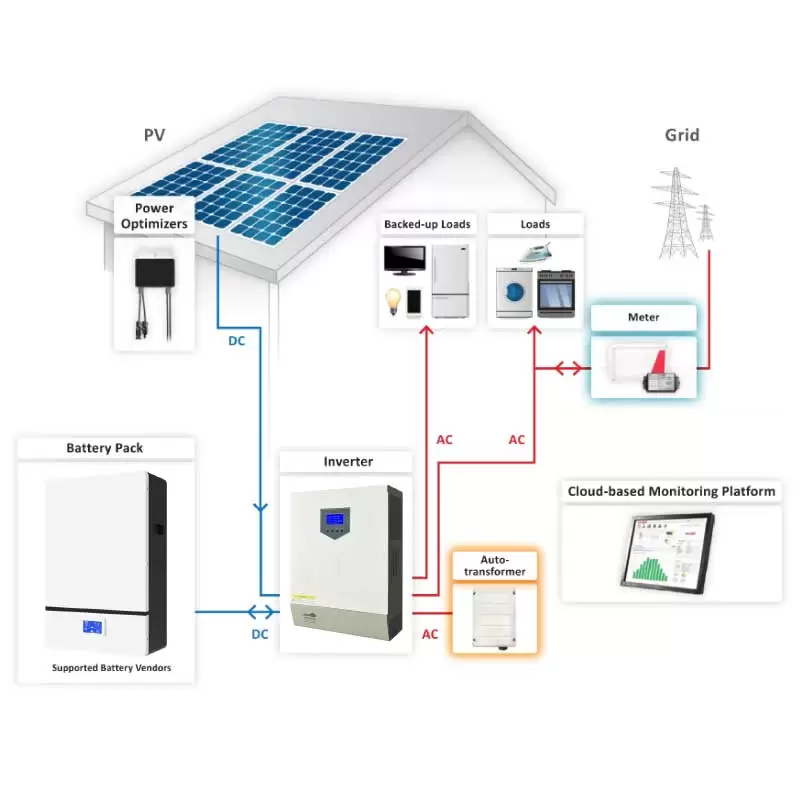
How to Plan for Seasonal Energy Storage Swapping in an Off Grid Home Solar System Kit?

In the 40° North latitude region, daily solar production drops by 35% during winter months, which makes it difficult for customers in this area to use solar energy year-round. Therefore, we designed a seasonal battery rotation strategy to ensure that your off grid home solar system kit always meets demand. First, calculate the winter energy gap by comparing the average summer production with the winter production. Then, plan to supplement energy storage and swap in higher capacity battery packs during the darker months. So, double the battery pack capacity between November and February. In addition, use a modular rack system so that battery modules can be added or removed quickly. By strategically rotating battery packs and adjusting the array configuration, your off grid solar system can always be fully charged regardless of the season.

Evaluating seasonal solar power generation changes

We need to understand the solar irradiation pattern to design the off grid home solar system kit in a targeted manner. For example, your solar panels may output 7 kWh/kW in the summer, but only 4 kWh/kW in the winter, so longer nights and cloudy days will exacerbate the gap. I analyzed a five-year irradiance dataset to accurately model monthly energy shortfalls while accounting for system losses due to snow, foliage, and solar panel dirt. I calculate the required battery recharge capacity (typically 30-50% of base capacity), then analyze local weather forecasts and historical peak demand to optimize the switching timing. By performing accurate seasonal performance modeling, you can ensure that your off-grid home solar system kit maintains a steady supply of power year-round, avoiding unexpected outages and ensuring critical loads remain powered.

Evaluating seasonal solar power generation changes

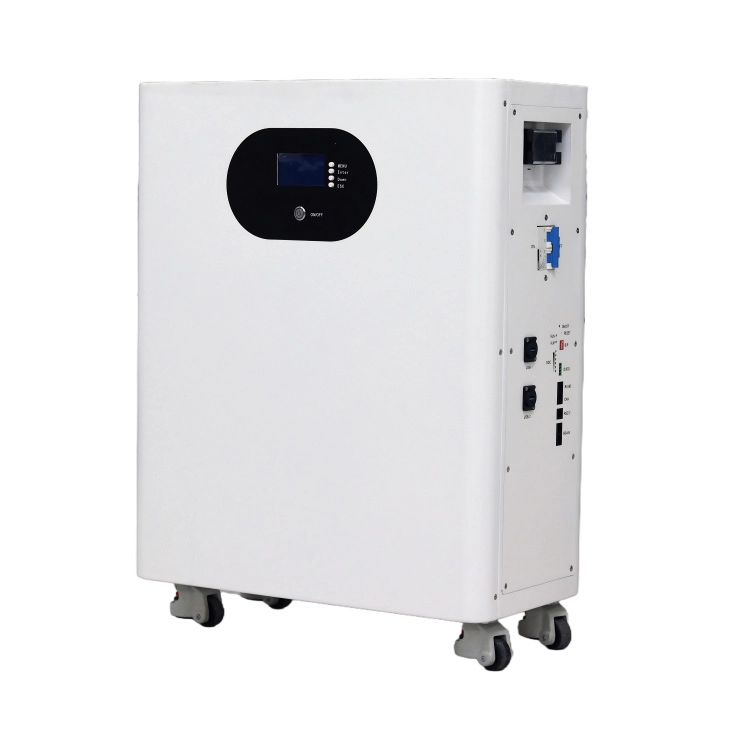
Modular battery pack design for easy replacement in off grid home solar system kit

The modular battery architecture simplifies seasonal replacement of off grid home solar system kits. First, select individual battery modules so they can slide into the rack enclosure. Then, you label the off-season modules and store them in a climate-controlled area to extend their life. I specify the use of quick-disconnect busbars and ergonomic handles for safe and quick tool-free replacement, minimizing downtime. In addition, by integrating a battery management system that dynamically identifies the health and charge status of each module, balances the batteries, and reports faults. We select lithium-iron phosphate batteries to ensure stability and cycle life over seasonal cycles. Your off grid solar system automatically reconfigures when adding new modules, optimizing charge rates and discharge cycles to extend battery life.

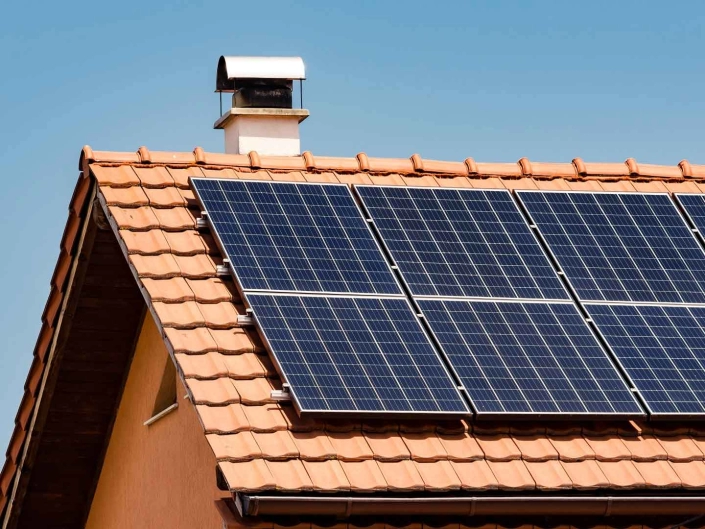
Seasonal Array Reconfiguration and Tilt Adjustment

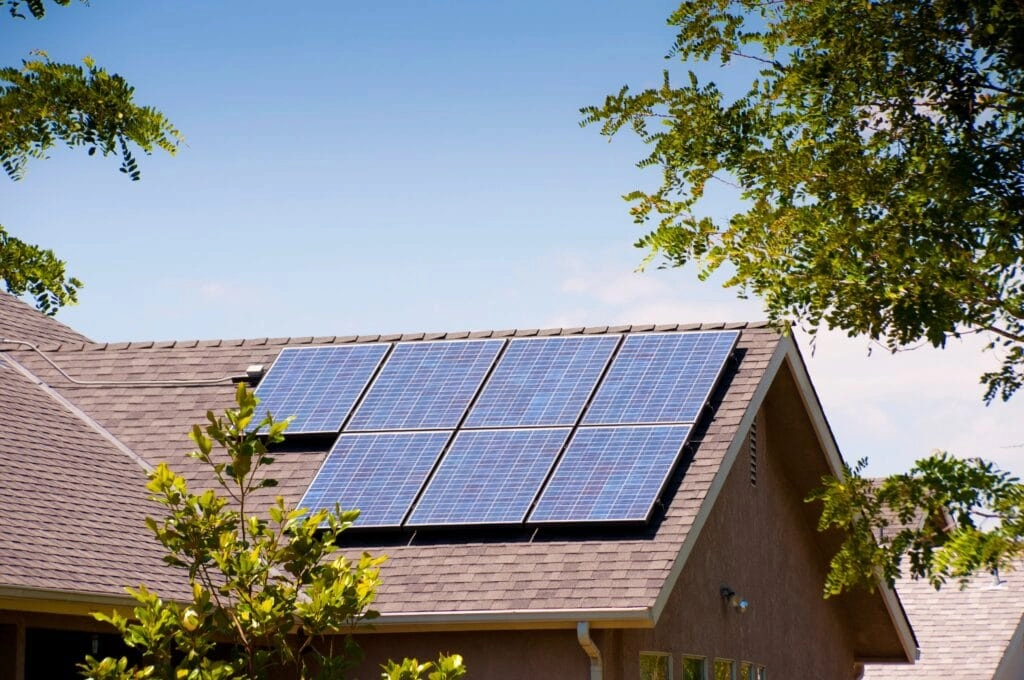
Optimizing your off grid home solar system kit for the lower winter solar altitude can significantly increase power generation. We will adjust the panel tilt angle from the summer angle (usually latitude minus 15°) to the winter angle (latitude plus 15°). This will capture more low-angle photons even during shorter days. We use electric or manual tilt brackets to allow for two to four re-tilts per year to adjust to the changing solar altitude. In addition, consider temporarily reducing the number of parallel modules to change for the lower winter power generation and minimize mismatch losses.

In addition, you need to perform a regularly scheduled spring cleaning to remove accumulated debris and optimize power generation. By adjusting the array and tilt angle according to the season, an off grid home solar system kit can get maximum power during the period when power generation is most needed, supplement your larger winter battery bank, and keep the system running in balance.

Integrate Hybrid Backup Power and Generators in Off Grid Home Solar System Kit

Even if solar and battery swaps are optimized, long cloudy days will require an off grid solar system as a backup. Integrate a generator with an ATS in addition to seasonal energy storage. However, its capacity should be used only for essential loads to minimize fuel consumption. I configure the ATS to start only when the battery charge is below 20% for more than two hours to prevent accidental starts and wear. Also, schedule monthly load drills for the generator to maintain reliability, and keep detailed fuel and operation logs for preventive maintenance. In addition, install an eco-mode speed governor to reduce the speed under light loads to save fuel. By combining renewable generation, energy storage, and generator backup, your off-grid home solar system kit can achieve near 100% availability even during prolonged inclement weather, giving the homeowner complete peace of mind.

Monitoring, Automation, and Predictive Maintenance

Implementing seasonal energy storage swaps requires a robust monitoring and automation system in your off-grid solar system. For example, installing remote telemetry to track individual module voltages, array output, and generator run time allows for early detection of performance deviations, by setting up an energy management system that sends SMS or app alerts when winter generation is less than 10% of the forecast, prompting timely adjustments. The mobile app automatically sends swap reminders and tilt angle alerts to keep users informed. Predictive maintenance algorithms analyze battery degradation trends, inverter efficiency, and generator health to recommend proactive repairs or module retirements before failures occur. With these data-driven tools, your off-grid solar system will operate at peak efficiency, seamlessly coordinating seasonal swaps and maintenance.

Off-grid home solar system kit seasonal array reconfiguration and tilt adjustment

Ensure Year-Round Energy Security

Planning seasonal energy storage swaps in an off grid home solar system kit includes calculating seasonal generation variations, designing modular battery packs, reconfiguring array tilt, integrating hybrid backup power, and leveraging monitoring and automation technologies. By combining data-driven system sizing with modular hardware and innovative controls, you can ensure continuous power regardless of the season.

How to size lithium ion solar batteries for off-grid applications?

When purchasing an off-grid system, customers often ask: how many lithium ion solar batteries are needed to power a home or facility reliably? Simply put, you need to calculate the site’s daily energy needs, select the required operating range, and then determine the battery capacity by adjusting for available depth of discharge (DoD), round-trip efficiency, temperature, and aging margin. Finally, ensure that the battery pack’s nominal capacity, voltage, and charge rate match those of the inverter and solar array, allowing the system to power and recharge loads under available sunlight. Below, I’ll provide a practical, step-by-step approach with formulas and example figures to give the clarity off-grid buyers need.

Lithium ion Solar Batteries: Assessing Daily Energy Needs and Load Profiles

Accurate sizing begins with a pragmatic energy audit. List all appliances and estimate their daily energy consumption in kWh. For example, a small LED lamp (10 W) running for 4 hours consumes 40 Wh; a laptop (60 W) running for 5 hours consumes 300 Wh. Add these items together to arrive at the total daily energy consumption. If you have meters, measure your actual electricity consumption over a typical week, as behavioral habits and seasonal variations can significantly impact electricity use.

In addition to energy consumption, also record peak loads and surge demands: Motors, pumps, refrigerators, and inrush currents may require high, short-term power. Furthermore, your inverter and battery must safely deliver sustained peak power. For example, a fridge operating at a 100-W load might generate a 700-W startup surge, and designers must ensure that a lithium ion solar battery can withstand this surge for hundreds of milliseconds.

Lithium ion Solar Batteries Assessing Daily Energy Needs and Load Profiles

Determine the required autonomy and reserve days

Reaching time, also known as storage days, refers to the amount of time a lithium ion solar battery must provide energy without requiring a recharge. Typical design options are 1-3 days for low-risk areas, 3-5 days for remote locations or high-reliability sites, and longer for mission-critical facilities. Multiplying the reaching time by the daily energy consumption directly determines the available storage capacity. For example, if a small household uses 4 kWh of electricity per day and you want 3 days of autonomy for the baseload (70%), the available energy is 4 × 3 × 0.7 = 8.4 kWh.

Determining the autonomy period also influences the size of the PV array in an off grid solar system. A more extended autonomy period generally means more days of charging, but users may need to recharge during months of low electricity. If weight and cost limit battery capacity, designers should strike a balance between autonomy and the use of a backup generator. Many systems combine moderate battery storage (2-3 days) with a backup generator to handle extended periods of cloudy weather economically.

Consider the DoD, cycle efficiency, and aging of lithium ion solar batteries

A battery must provide the required available energy with a nominal capacity exceeding the target available energy, as solar battery are not designed to be fully depleted and incur losses during both charging and discharging processes. Lithium ion solar batteries, particularly those using lithium iron phosphate (LIFP), typically have a deeper Depth of Discharge (DoD) (70-90%) and a longer cycle life, thereby providing higher usable energy than traditional battery chemistries. For LFP batteries, a DoD of 80% is a safe, long-life design. The round-trip efficiency (battery, inverter, and charger losses) is approximately 0.85–0.92, depending on the hardware. Engineers include a safety/aging factor of 1.10–1.25 to ensure sufficient capacity as the battery ages.

Continuing with the previous example (8.4 kWh usable capacity), the Depth of Discharge (DoD) is 80%, the round-trip efficiency is 90%, and the safety factor is 1.15. Because lithium battery capacity slowly degrades with the number of cycles and time, slightly increasing the nominal capacity can ensure years of reliability.

lithium ion solar batteries

Capacity Matching with Inverter and System Voltage

The nominal capacity is only part of the story. The solar array must be matched to the inverter power, charger/MPPT rating, and PV array size so that the off grid solar system can supply peak loads and take advantage of available sunlight hours for charging.

Standard off grid solar systems use 24 V or 48 V DC battery banks. A higher voltage (48 V) reduces the current for a given power and is more suitable for larger off grid solar systems. For a battery with a nominal capacity of 13 kWh at 48 V, the amp-hours are ≈ 271 Ah. Manufacturers typically rate modules at, for example, 51.2 V and 200 Ah, allowing you to connect modules in parallel or series to meet capacity and voltage requirements.

If your site has a continuous load of 2 kW and a refrigerator with a surge power of 6 kW, select an inverter with a surge power of at least 6 kW and a continuous power margin of 2-3 kW. The lithium-ion solar cell capacity must be balanced with the PV array power to allow for battery charging during daylight hours and typical weather conditions.

Estimate the daily sunshine hours for your location. For a cabin with 4 kWh of daily usage and 4 hours of peak sunshine, PV_kW ≈ (4 / 4) / 0.9 = 1.11 kW. To charge a larger battery after autonomous use, increase the PV power, or accept multi-day charging.

Environmental, Installation, and Safety Considerations

Sizing also requires consideration of practical installation details: weight, footprint, ventilation, temperature control, and BMS integration. Lithium ion solar batteries offer high energy density and good thermal performance, but they still require a suitable ambient temperature range (typically -20°C to +50°C). Their capacity decreases in cold weather, typically by 10% to 30% at low temperatures. Battery thermal management is crucial when operating the system in cold climates.

Safety and monitoring features include a battery management system, which provides battery balancing, overvoltage/undervoltage protection, temperature monitoring, and remote telemetry communications. The battery cabinet should be located in a dry, secure, and easily accessible location, adhering to the manufacturer’s clearance and access requirements. You must install appropriate fuses and DC circuit breakers, and you must adhere to local electrical codes. Furthermore, when planning for spare parts and service, our quote includes the expected service life, warranty, and replacement schedule, helping buyers understand long-term costs.

Providing you with a precise quote breakdown

The required battery capacity equals your available energy requirements, adjusted for system efficiency and the allowable depth of discharge (DoD). This energy requirement must be converted to the number of modules and physically laid out using the supplier’s dimensions. Our quotes to customers include kWh, module model and quantity, cabinet footprint and weight, electrical single-line diagrams, BMS functionality, environmental requirements, and maintenance/commissioning scope.

The Solar Adventure: A Home’s Journey to Energy Independence (3)

As the years passed, the Smiths became pioneers in the solar realm, hosting workshops to share their magical knowledge with the community. They transformed their garage into a solar tinkering workshop, inviting neighbors to join in crafting solar-powered lanterns and whimsical garden ornaments.

The solar adventure took an unexpected turn when the family decided to embark on a road trip, equipped with a solar-powered camper. The mobile haven not only provided them with a cozy home on wheels but also garnered admiration from fellow travelers who were captivated by the idea of harnessing the sun for their journeys.

In an effort to give back to the environment, the Smiths initiated a neighborhood tree-planting project. Solar-powered lights illuminated the pathway as families came together to plant saplings, creating a green oasis powered by the same sun that fueled their homes.

The Smiths’ tale of solar enchantment reached far and wide, attracting the attention of a renowned environmentalist who commended their commitment to sustainability. The family found themselves participating in solar advocacy campaigns, spreading the message of clean energy and inspiring others to embark on their own eco-friendly adventures.

As the sun set on each day, casting a warm glow over the solar panels, the Smiths gathered in their enchanted backyard. The solar-powered fairy lights twinkled overhead, and the family marveled at how a simple decision to embrace solar power had transformed their lives into an ongoing saga of joy, innovation, and environmental stewardship.

And so, the Smiths’ home continued to be a beacon of solar magic, where the sun’s rays not only illuminated rooms but also sparked creativity, connected communities, and turned the ordinary into the extraordinary. In this ever-evolving tale, the sun remained the steadfast protagonist, casting its spell over the Smiths’ home and inspiring others to embark on their own solar adventures.

What are the best practices for post-installation commissioning of an 18 kWh solar system?

When off grid solar kits and off grid home solar systems underperform, a small percentage of the reason is due to insufficient commissioning. To ensure your 18 kWh solar system can achieve its rated 18 kWh daily output, a thorough mechanical check of the solar panel mounting brackets and array alignment is performed. All electrical connections and PV string voltages are then verified, and the inverter, charge controller, and battery interface are configured and tested. After that, performance is verified under actual irradiance and load conditions. You subsequently calibrate safety devices, surge protectors, and ground fault monitors. Finally, you demonstrate the training monitoring software. These commissioning methods achieve continuous system uptime of more than 98% and confirm that all solar panel mounts are performing at peak performance.

Mechanical and Structural Verification of 18 kWh Solar System

When installing an 18 kWh solar system, first ensure that the physical installation is accurate and secure. For example, you should check that all solar panel mounting brackets are properly torqued, verify that they meet the manufacturer’s specifications, and confirm that they have corrosion-resistant coatings suitable for coastal or desert climates. Additionally, verify that the tilt and azimuth settings meet the design specifications for the seasonal sun path, which is typically 30-35° for mid-latitudes. You can tighten the rail and bracket bolts to the specified 15 Nm using a calibrated torque wrench to prevent micro-movements that could cause connector fatigue or lead to wind-induced stress fractures. Additionally, you should seal the roof penetrations with UV-resistant, waterproofing materials and ensure that the battery enclosures in these off grid solar kits are level and adequately ventilated to prevent heat buildup.

Mechanical and Structural Verification of 18 kWh Solar System


Wire connection test for an 18 kWh solar system

Next, we need to perform electrical verification of the 18 kWh solar system, which is critical for any off grid home solar system setup. First, confirm the open-circuit voltage and short-circuit current of each string under standard test conditions using a handheld PV string tester. Then, verify that polarity, phase alignment, and grounding between modules, inverters, and charge controllers are correct using a continuity checker. To prevent intermittent arcing, you should mark each DC string and securely lock the MC4 connectors. Then, test the ground lugs of each solar panel mounting bracket to ensure the resistance is less than 5 Ω. Additionally, ground fault detection testing ensures the off grid solar kit’s grounding electrode system is functioning correctly, preventing electrical shock hazards and fire risks. Accurate electrical checks prevent parasitic losses and dangerous faults, protecting equipment and personnel.

Wire connection test for 18 kWh solar system

Debug and check the inverter and battery interface configuration

Commissioning an 18 kWh solar system also requires the precise setup of the inverter, MPPT charge controller, and battery management system. In addition to verifying the firmware version, configure the inverter’s MPPT voltage window to match the panel Voc and maintain optimal power tracking across the temperature range. To maximize energy extraction from the panels mounted on the solar panel mounting bracket during cloudy mornings and evenings. I adjust the charge and discharge current limits of the lithium ion solar batteries to 0.5 C to balance fast charging and battery life, and test the inverters’ on-grid or off-grid switching within 200 milliseconds. Test the switching between on grid and off grid modes, and verify the low-voltage disconnect threshold at the battery pack level. Properly calibrated power electronics ensure seamless energy flow and battery health within your off grid home solar system.

Performance Verification Under Real-World Conditions

To confirm that your 18 kWh solar system is delivering the expected yield, you perform performance verification under realistic irradiance and load profiles. For example, you install a weather station module next to the solar panel mounting rack to record irradiance, ambient temperature, and module backplane temperature every minute for at least one week. This allows you to compare the measured AC output with simulated yield data of 1,000 W/m² on a sunny day. Additionally, you deploy monitoring software to calculate the system’s performance ratio (PR), which should aim for 75–85%. This is a key metric for a well-installed off grid home solar system, and it also helps troubleshoot any strings that deviate by more than ±5%. Real-world testing uncovers shading issues, voltage imbalances, and connection losses that commissioning might miss, verifying your 18 kWh solar system reliably powers critical loads.

PanelsCost-min-1024x680

Safety Device Calibration and Protection Settings

Safety comes first when commissioning any 18 kWh solar systems or off grid solar kit. Start by calibrating overcurrent protection devices, such as DC string fuses rated at 125% of their full current rating and AC circuit breakers rated at 125% of their full current rating. However, avoid oversizing, which can delay fault clearing and risk equipment damage. Next, rigorously test residual current devices (RCDs) to trip within 30 ms at a 30 mA leakage current, ensuring immediate isolation of any ground faults near the solar panel mount or battery bank. Also, verify that surge protection devices clamp transients to less than 1.5 kV on both the DC and AC sides to protect sensitive electronics in these off-grid home solar systems. Correctly set protection devices prevent damage during lightning events or utility disturbances, making your 18 kWh solar system both operationally resilient and compliant.

Best Post-Installation Commissioning Practices

Post-installation commissioning best practices for 18 kWh solar systems include mechanical integrity checks of solar panel mounts, electrical connection testing, inverter and battery setup, actual performance verification, and calibration of safety devices. We recommend referring to this commissioning process to achieve optimal energy yield and provide reliable, sustainable power.