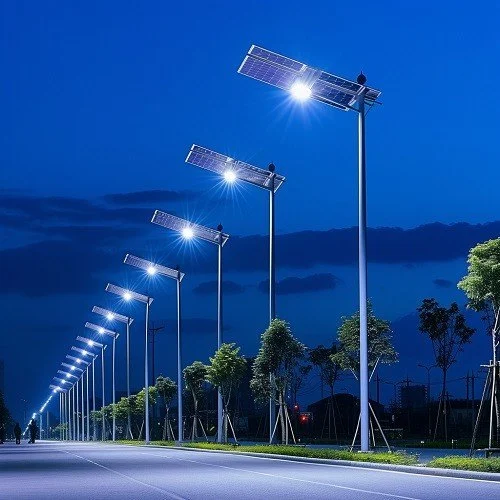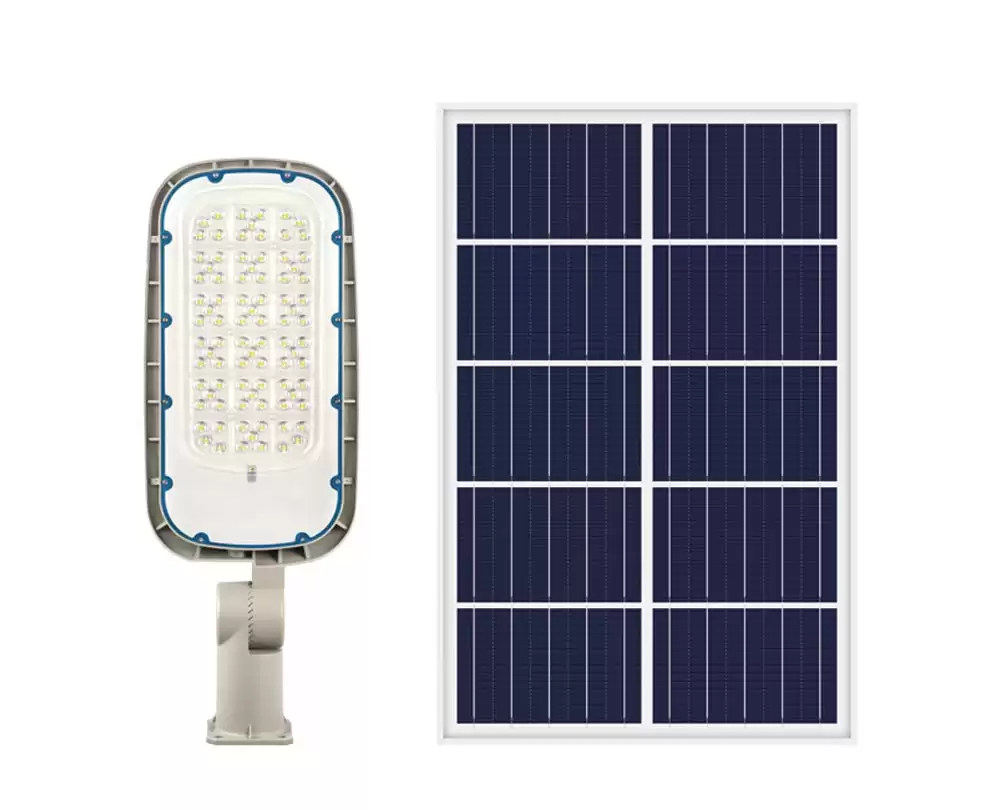
Several key features to look for when purchasing a solar panel roof mount

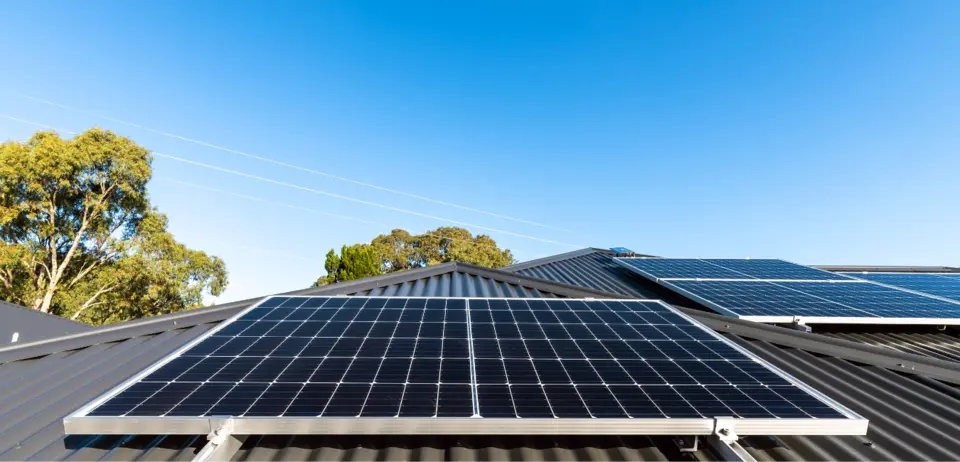
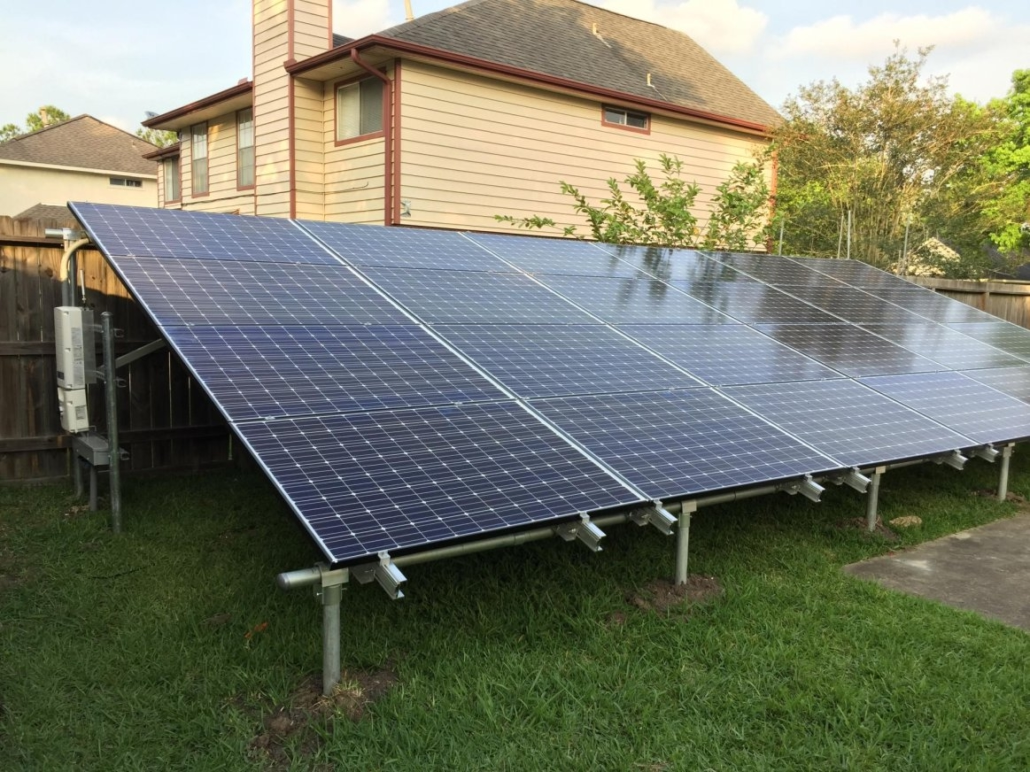
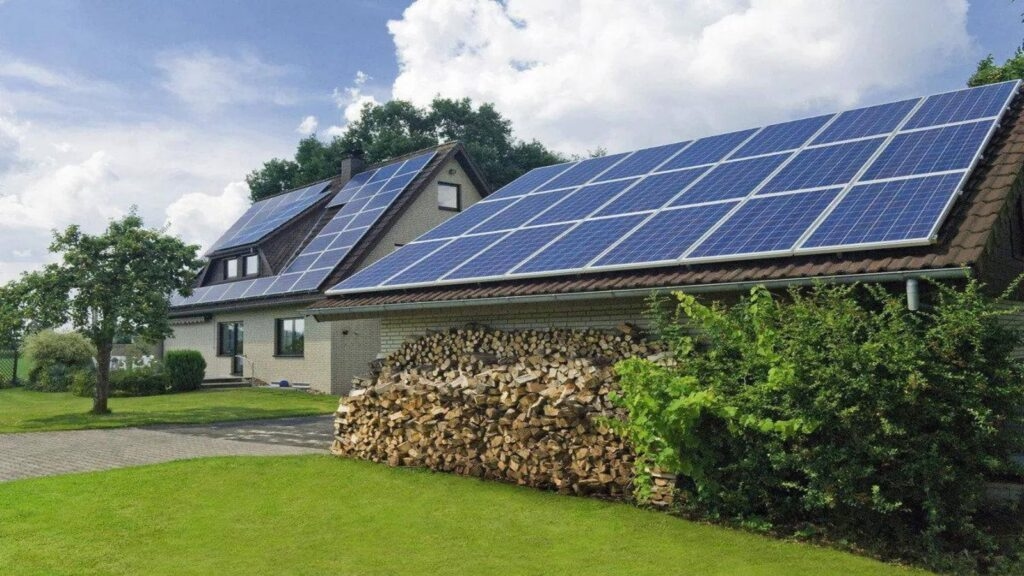
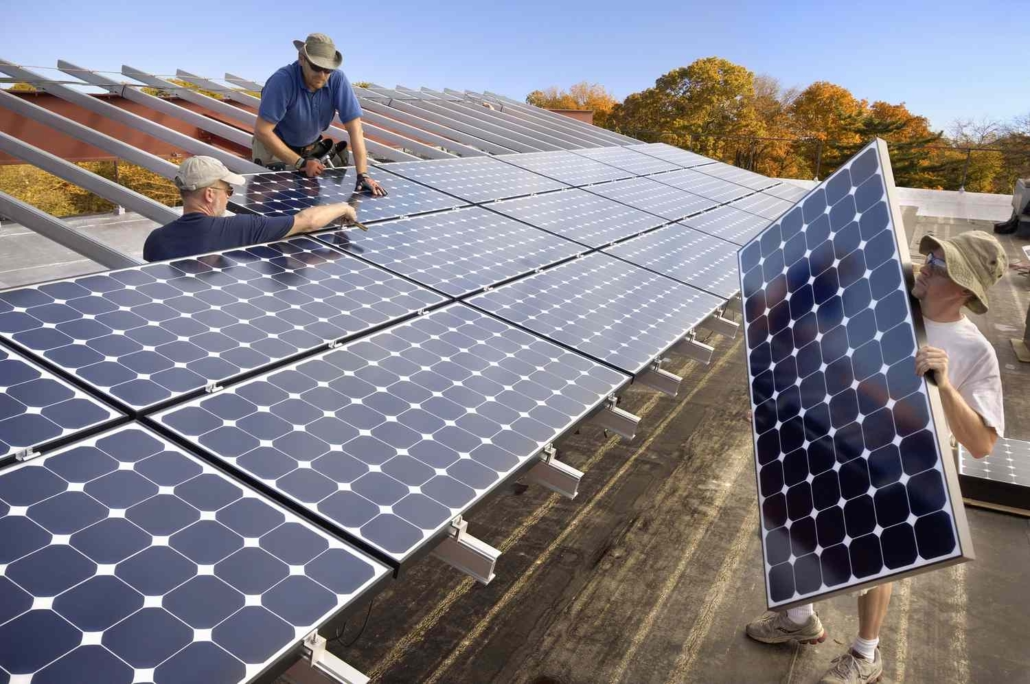
When installing a solar power system, the most critical yet often overlooked component is the solar panel roof mount. The rooftop solar panel mounting system not only securely holds the solar panels in place but also plays a vital role in ensuring the overall efficiency, durability, and longevity of the solar power system. Whether you’re installing solar panels for your home or business, choosing the right solar panel mounting system will maximize energy production and ensure your solar product lasts for years to come.

Material Quality and Durability of Solar Panel Roof Mount

One of the most important factors when choosing a solar panel roof mount is its construction material. Solar panel roof mountings and mounting systems must be made of high-quality, corrosion-resistant materials to withstand the harsh environmental conditions they may be exposed to. Common materials for solar panel roof mounting include aluminum, stainless steel, and galvanized steel, all of which are recognized for their strength and resistance to corrosion.

Aluminum is popular for its lightweight properties, rust resistance, and exceptional durability. While slightly heavier, stainless steel offers outstanding rigidity and resistance to extreme weather conditions, making it ideal for areas subject to strong winds or heavy rainfall. Galvanized steel, coated with a protective zinc layer, is also corrosion-resistant, making it a cost-effective alternative. Therefore, when choosing a solar panel roof mount, it’s essential to ensure the material is suitable for your area’s specific weather conditions, as this will directly impact the long-term reliability and stability of the installation.
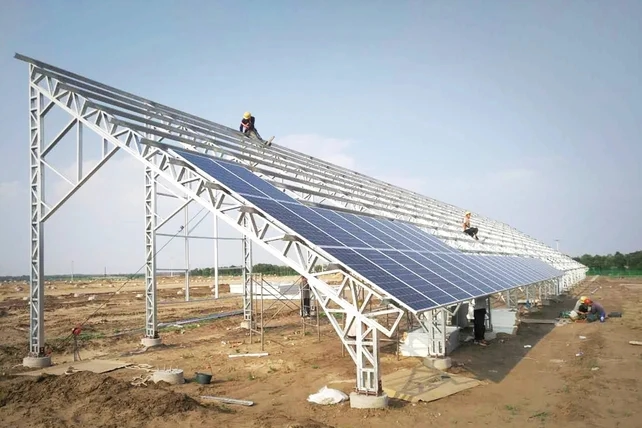
Material Quality and Durability of Solar Panel Roof Mount

Roof Compatibility and Installation Flexibility

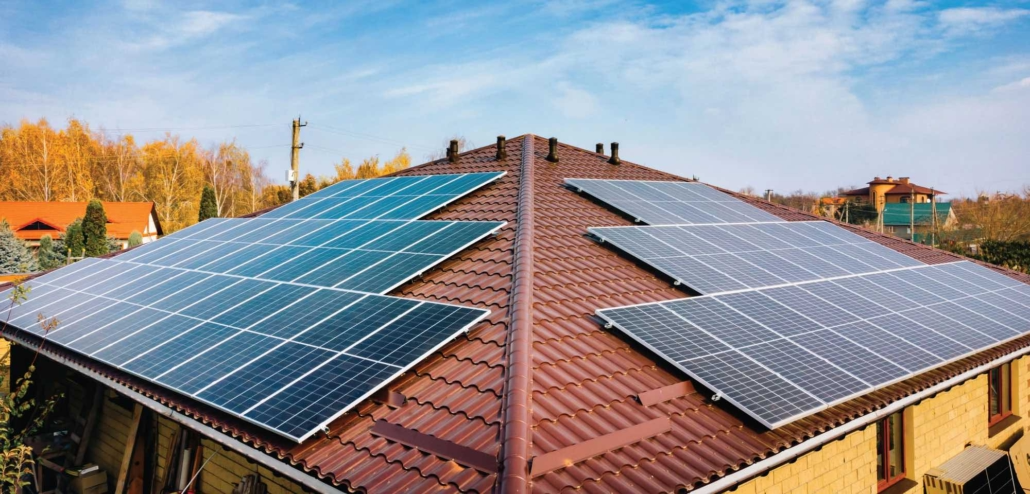
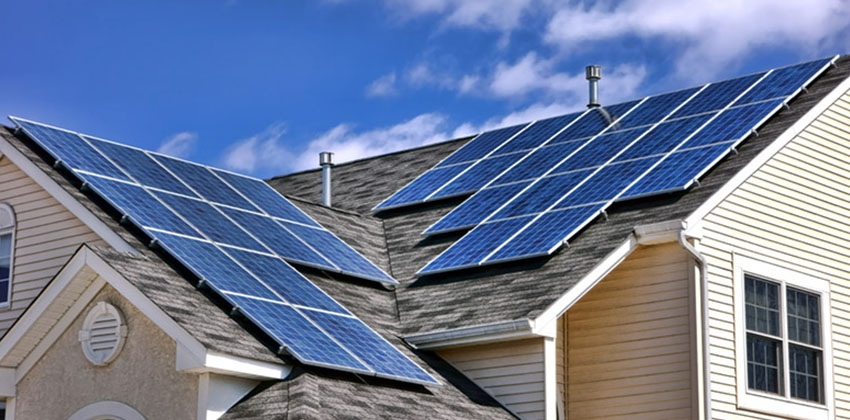
Every roof is unique, so when choosing a solar panel roof mount, it’s essential to ensure it’s compatible with your roof type. Whether your roof is flat, pitched, or metal, choosing a solar panel roof mount system tailored to your specific needs is crucial. Alternatively, you can choose a versatile mount that’s compatible with multiple roof types, ensuring a secure installation without compromising the roof’s integrity.

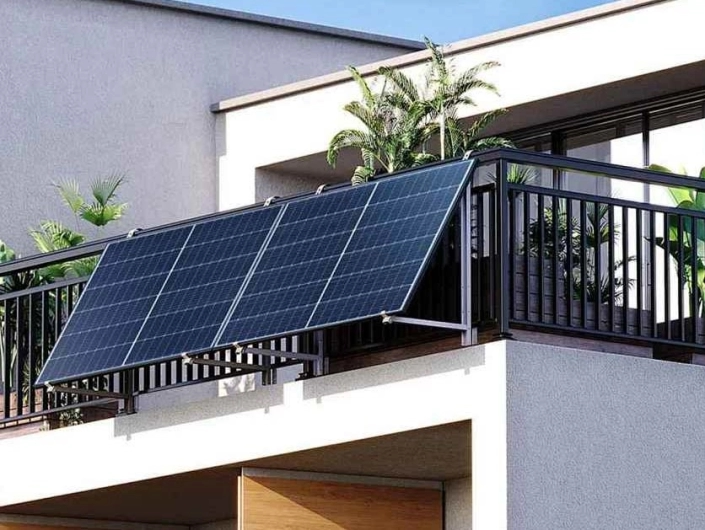
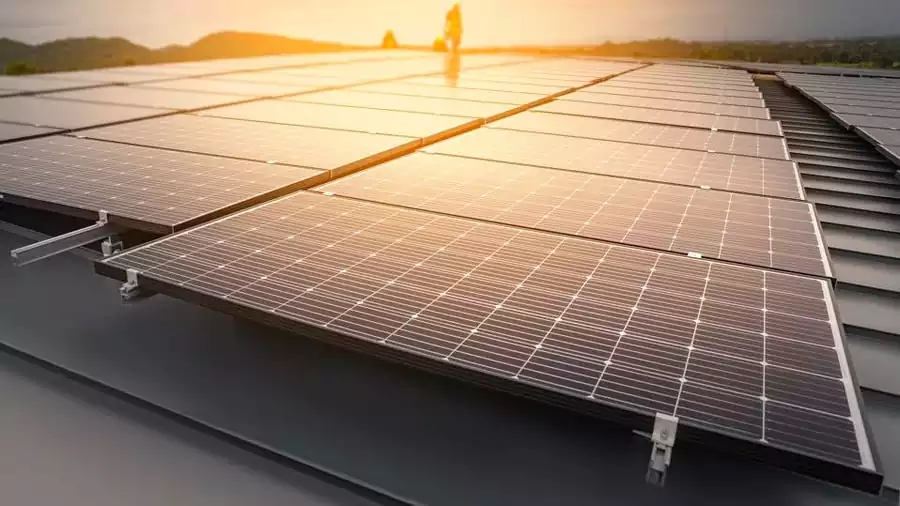
Flat roofs often require adjustable mounts to tilt the solar panel to the optimal angle for sunlight exposure. On the other hand, pitched roofs may require mounts that align more easily with the slope. Mounts for metal roofs should utilize specialized mounting solutions to ensure a secure system that prevents leaks and damage to the roof surface. These types of rooftop mounts should be easily adjustable in tilt and angle, ensuring maximum solar energy absorption throughout the day, thereby increasing the efficiency of your solar installation.

Ease of Installation and System Integration

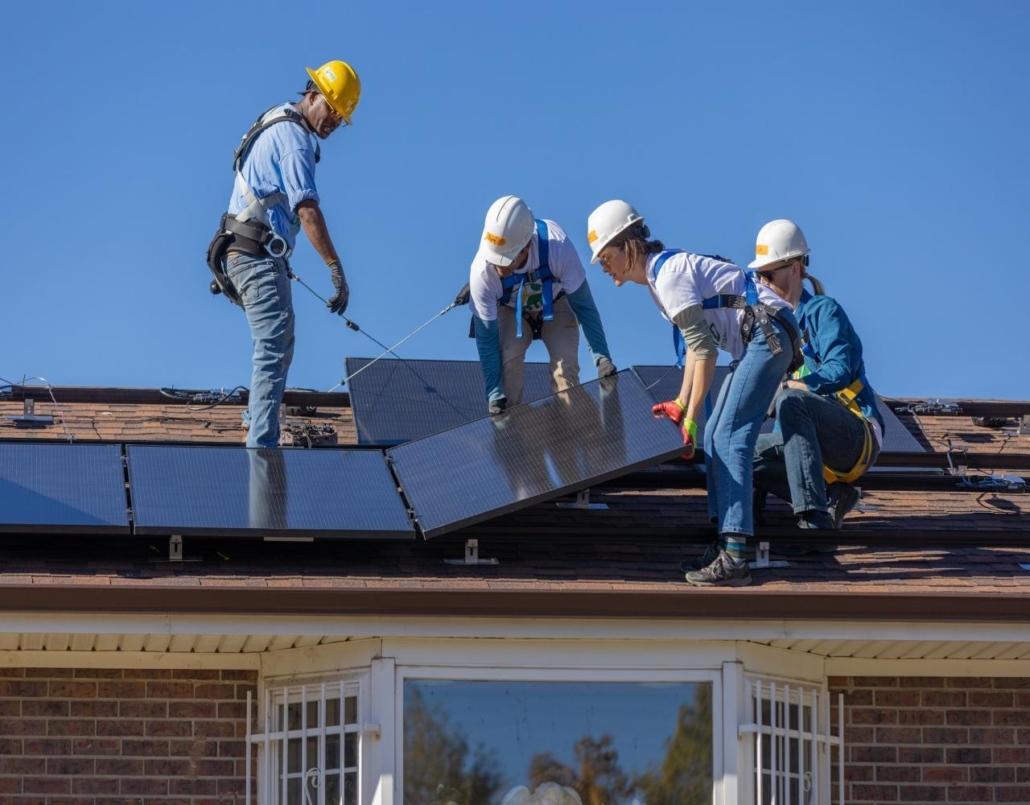
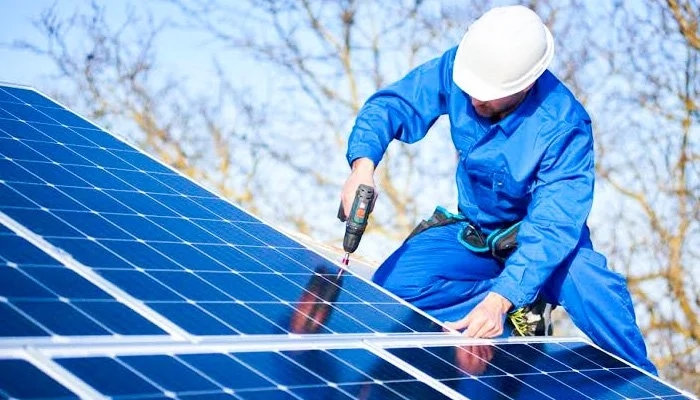
When purchasing a solar panel rooftop mount, ease of installation is also a key consideration. A well-designed solar panel mount should be easy to install, even for professionals working in demanding environments. Therefore, choose systems that provide clear installation instructions, pre-assembled components, and adjustable accessories for a seamless installation process.

Furthermore, a solar panel rooftop mount should integrate seamlessly with other components of your solar power system, such as panels, inverters, and wiring. Some solar panel rooftop mounts are designed for specific panel brands, while others are more universal (you should consult your solar panel mount supplier for details). A solar panel rooftop mount that is easy to install, adaptable to various systems, and compatible with a range of panel types can save you time and simplify the installation process.

Adjustability and Flexibility of Solar Panel Rooftop Mounts

The angle at which installers mount solar panels significantly affects their efficiency. An easily adjustable solar panel bracket enables flexible tilting and reorientation of panels to optimize sunlight capture. By adjusting the tilt of your panels, you can ensure they’re in the optimal position to maximize energy production throughout the day, especially during seasonal periods when the sun’s angle fluctuates. Look for solar panel roof mounts with features like adjustable tilt and a swivel base for precise alignment with the sun. This feature is particularly valuable in areas with highly variable weather conditions and sunlight patterns. This adjustability can help you achieve maximum energy efficiency, optimizing the return on your solar system investment.
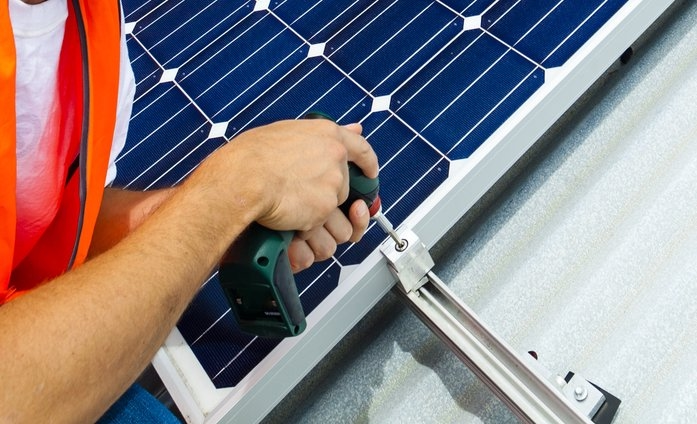
Adjustability and Flexibility of Solar Panel Rooftop Mounts

Weatherproofing and Protection from External Elements

Since solar panel roof mounts are exposed to the elements year-round, weatherproofing is crucial. Ensure the mounts can withstand extreme weather conditions, such as strong winds, heavy rain, snow, and intense sunlight, without performance degradation or damage. Choose solar panel roof mounts with weather-resistant coatings and sealed components to protect them from corrosion, rust, and other environmental damage. In coastal areas, saltwater can accelerate rust and corrosion, so choose corrosion-resistant materials like stainless steel and aluminum. Additionally, solar panel mounts with sealed fasteners and integrated waterproofing can help prevent water intrusion and damage.

Making the Right Choice for Your Solar Panel Roof Mount

When purchasing a solar panel roof mount, consider several key factors, including material quality, compatibility with roof type, ease of installation, adjustability, weather resistance, cost-effectiveness, and aesthetic design. Carefully considering these factors will ensure that the solar panel roof mount provides stable, secure, and efficient support for your solar panels, optimizing their performance and lifespan.

Common Questions When Purchasing Solar Panel Brackets

Q1. How is a solar panel roof mount compatible with my roof?
A1: Contact us to review specifications and find out if a solar panel roof mount is suitable for your roof type (flat, pitched, or metal).

Q2. Can solar panel roof mounts withstand heavy snow and strong winds?
A2: Yes, most high-quality solar panel roof mounts are designed to withstand harsh weather conditions, including strong winds and heavy snow. For optimal durability, choose mounts with a high wind load rating and corrosion-resistant materials.

Q3. What is the best material?
A3: The best material is corrosion-resistant, such as aluminum or stainless steel. These materials offer strength and durability in a variety of environmental conditions.

Q4. Do I need a permit for installation?
A4: This will depend on your location. Please consult your local building department to ensure compliance with local regulations and zoning laws.
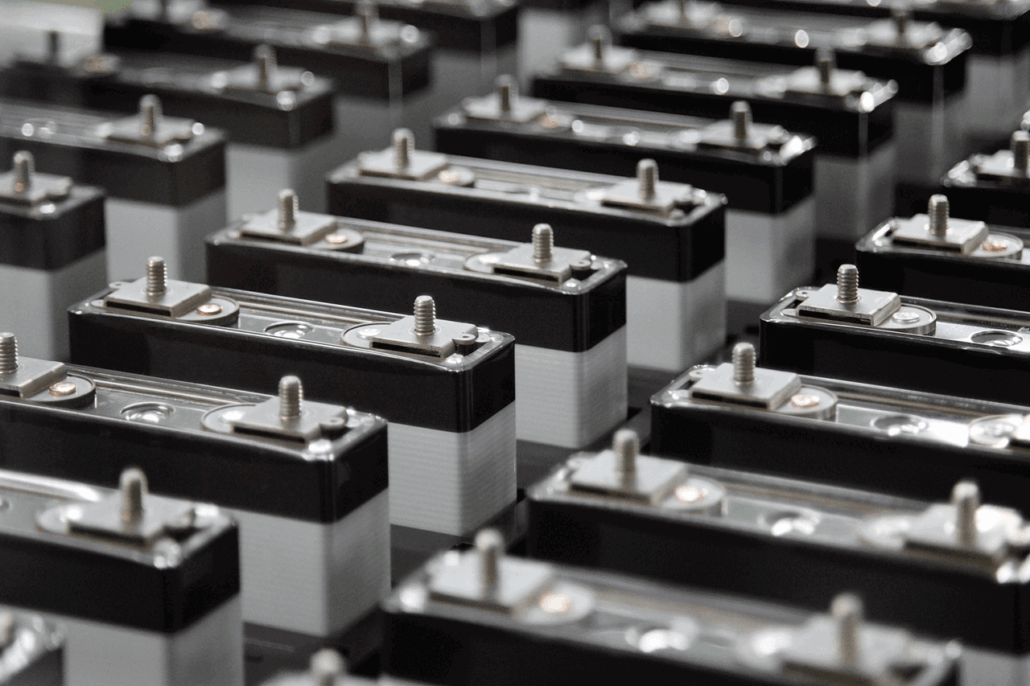
BMS Features to Look For When Buying a lithium ion solar battery

When purchasing a lithium ion solar battery, the battery management system (BMS) is the most significant factor influencing its safety, lifespan, performance, and cost. A high-performance BMS can transform a battery pack into a reliable energy asset; a weak or underspecified BMS can turn the same batteries into a liability. Therefore, buyers of lithium ion solar batteries should prioritize BMS features early in the purchasing process, rather than as an afterthought. Features to consider when purchasing a lithium-ion solar cell include: individual cell voltage and temperature monitoring; accurate state of charge and state of health estimation; active or passive battery balancing; and robust overvoltage, undervoltage, and overcurrent protection. We will explain in simple terms the importance of each feature for both residential and commercial lithium ion solar battery applications.

The Foundation for Long Life and Safe Operation of Lithium ion solar battery

Accurate individual battery monitoring and effective battery balancing are core BMS responsibilities for any lithium ion solar battery. Batteries age and drift: Initially, minor differences in capacity and internal resistance increase with cycling and calendar aging. If left uncontrolled, these differences can concentrate stress on weaker cells, accelerating performance degradation and creating safety risks. Therefore, a qualified BMS should continuously measure the voltage of individual cells and frequently sample temperatures at multiple locations within the battery stack.

Balancing maintains a uniform state of charge across all batteries. Currently, there are two prevalent balancing strategies: passive balancing, in which excess charge from high-voltage batteries is dissipated as heat; and active balancing, in which excess charge is removed from high-voltage cells. Active balancing redistributes charge from high-voltage cells to lower-voltage cells. Passive balancing is simpler and less expensive; active balancing is more complex and slightly more costly. It is suitable for large battery stacks and systems with significant imbalances, resulting in a longer battery life. Therefore, buyers of lithium ion solar batteries who desire frequent deep cycling or extended battery life may prefer BMS designs with active balancing.

The Foundation for Long Life and Safe Operation of Lithium ion solar battery 1(1)

Accurate Estimation of Voltage, Current, State of Charge (SOC), and State of Health (SOH)

State of Charge (SOC) and State of Health (SOH) estimation significantly impact nearly every aspect of lithium ion solar battery operation, from the system’s initial charge acceptance to the depth of discharge during backup events. A BMS that can report SOC to within a few percentage points and reliably track SOH enables strict depth-of-discharge strategies, maximizing available energy without risking premature capacity loss. BMSs typically combine multiple methods to calculate SOC, including coulomb counting (tracking charge inflow/outflow) and model-based corrections related to voltage and temperature.

The most accurate systems layer in model-based estimators, such as Kalman filters or adaptive algorithms, compensates for sensor drift and cell aging. Lithium ion solar battery suppliers are required to provide SOC accuracy specifications at typical operating temperatures (e.g., ±2-5% SOC at 25°C, ±5-10% SOC from -10°C to +50°C), detailed information on the estimator algorithm, and evidence of long-term calibration strategies. Finally, BMSs are required to support configurable depth of discharge settings and automatic derating as SOH decreases; these features ensure safety and extend service life.

Thermal Management and Safety Features of Lithium ion Solar Battery

For any lithium solar battery, thermal performance is a primary factor affecting its safety and service life. BMSs must quickly detect and manage temperature, a critical requirement for systems operating in hot climates, in enclosed cabinets, or near heat-generating inverters. Practical BMS thermal features include temperature sensors for each module, dynamic charge and discharge derating based on temperature, active thermal control outputs, and well-defined thresholds for emergency shutdown in the event of a runaway indicator.

A high-quality BMS design distributes multiple temperature sensors throughout the battery stack, enabling the system to respond to local hot spots, not just the average stack temperature. The BMS should implement a graded response: mild derating when temperatures rise, forced shutdown at a preset maximum, and emergency pre-charging or isolation measures when temperatures rise to levels that indicate thermal runaway. For high-risk applications, the BMS can incorporate thermal event mitigation measures such as forced ventilation, fire suppression interlocks, or commands to external HVAC systems.

Thermal Management and Safety Features of Lithium ion Solar Battery

Protection Mechanisms, Fault Handling, and Fail-Safe Logic

A robust lithium ion solar battery BMS can provide layered protection to handle both conventional and catastrophic faults. These protections include overvoltage and undervoltage protection at the cell and module levels; overcurrent and short-circuit protection; high and low temperature protection; isolation monitoring; and ground fault detection. Furthermore, the BMS must not only detect faults but also coordinate the isolation of cells, comprehensively report events, and enable controlled recovery when necessary.

The choice of fault handling design is also crucial. The BMS should use time-domain logic to distinguish transient faults from sustained faults. It should offer configurable trip thresholds and lockout strategies to accommodate the system integrator’s tolerance for automatic recovery versus manual inspection. Therefore, when purchasing, consider both protective hardware and intelligent software logic, and request fault injection test results from the supplier, along with examples of how the BMS responds to simulated worst-case scenarios.

Communication, Interoperability, and Smart Grid Capabilities

Modern lithium ion solar batteries must be fully compatible with the rest of the energy system, making the BMS’s communication capabilities a crucial purchasing parameter. Essential features include support for widely used protocols (CANbus, Modbus RTU/TCP, RS485, and the increasingly popular Ethernet/IP), secure remote telemetry, and a comprehensive integration API.

Beyond basic telemetry capabilities, BMS functionality for lithium ion solar batteries can enhance value by enabling time-of-use scheduling, programmable charge and discharge profiles, demand response integration, and virtual factory compatibility. Therefore, the BMS should accept external setpoints and must be able to enforce local safety limits independently of external commands. Good communication and intelligence capabilities can transform lithium-ion solar cells from static energy storage into flexible assets that participate in grid optimization and revenue generation strategies.

Choosing a BMS that protects value and enables integration

When purchasing lithium ion solar batteries, evaluate the BMS as a tool to protect your investment, enhance safety, and support integration with a broader energy strategy. Prioritize single-cell monitoring and active balancing to extend battery life; accurate SOC/SOH estimation to determine usable capacity; and robust thermal management and well-defined derating curves to ensure safety in real-world installations. Additionally, ensure the BMS supports the correct protocols, enables secure remote operation and firmware management, and provides lifecycle features that align with your procurement and operational maintenance (O&M) plans.

On Grid Solar System Payback Calculator: What Can Buyers Expect?

Many on grid solar system users are concerned about how long it will take to recoup their investment and which variables most influence this timeline. Put, a on grid solar system payback calculator converts the energy generated and the utility purchases avoided into dollars and compares these savings to the net installation cost. This expectation is subject to change, and the model’s output is expected to depend more on local utility rates, net metering regulations, and system performance than on the brand of solar panels. To illustrate this more intuitively, we will explain this later this afternoon.

On Grid Solar System: Key Inputs Every Payback Calculator Needs

A reliable on grid solar system payback calculator requires accurate inputs. The most influential variables include system size, installation cost, local solar resource, system performance ratio (inverter, line, pollution, and temperature losses), retail electricity prices, incentives, and behavioral drivers such as self-consumption and time-of-use.

Start with the nameplate capacity of the on grid solar system; this is the baseline for estimating energy generation. Next, quantify local irradiance. Payback calculators typically accept location-specific daily peak sunshine hours or energy production in kilowatt-hours/kilowatt-year. Next, focus on the application performance ratio, a comprehensive factor that accounts for inverter efficiency, mismatch losses, temperature losses, pollution, and cabling. Because the performance ratio can significantly impact annual energy production, document the assumed performance ratio in your scenario.

For economics, use the installed price, which includes solar panels, inverters, installation, wiring, labor, permits, and any balance-of-system (BOS) costs. Then apply known incentives: direct rebates can reduce upfront costs, while tax credits can reduce the buyer’s net cash outlay. Additionally, consider recurring operating and maintenance costs, as well as potential upgrades to the battery or meter. Finally, use the correct retail electricity price and billing structure, as this can significantly impact the return on investment. System ROI Estimation.

On Grid Solar System Key Inputs Every Payback Calculator Needs

On Grid Solar System: Energy Production Modeling and Real-World Example Calculations

The core of any on grid solar system ROI calculation is annual energy production modeling. A simple method is to multiply the system capacity by the average peak sunshine hours, then by the system performance ratio (PR) to estimate annual energy production. We can use the following formula:

Annual Energy Production = System Size × Peak Sunshine Hours × 365 × Performance Ratio

For a practical example, consider a 6.0 kW system with approximately 4.5 hours of peak sunshine per day and a PR of 0.77. This yields:
Daily Raw Energy Production = 6.0 kW × 4.5 hours = 27 kWh/day;
Annual STC Energy Production = 27 × 365 = 9,855 kWh/year;
Adjusted PR = 9,855 × 0.77 = 7,588 kWh/year;

This annual energy production figure forms the basis of revenue in the payback model. If your retail utility rate is $0.16/kWh and your system’s output and consumption credits are matched 1:1, the first-year savings are ≈ $7,588 × $0.16 = $1,214. Therefore, these savings directly offset your installation costs, resulting in a payback.

Energy Production Modeling and Real-World Example Calculations

Upfront Costs, Incentives, Payback, and Examples

The financial model converts electricity generated into dollars and compares that flow to costs. For buyers of solar on grid systems, report at least three metrics: simple payback period, net present value or discounted payback period, and levelized cost of energy. I will illustrate this with a simple, easy-to-understand example.

Example Scenario:
System Size: 6.0 kW DC.
Installation Cost: $2.75 per watt → Installed cost = $16,500.
Incentive: 30% Investment Tax Credit → Reduces net upfront cash outlay to $11,550. Annual power generation (before): 7,588 kWh
Retail electricity price: $0.16/kWh → First-year savings ≈ $1,214
Annual O&M estimate: $20/kW-year → $120/year
Degradation: 0.5%/year; calculated system life: 25 years

Based on these numbers, the simple payback period is ≈ 9.5 years. This means net positive cash flow begins in the 10th year, before discounting. For the lifetime cost metric, calculate the lifetime energy delivered after degradation and then divide the lifetime cost by the lifetime electricity consumption to estimate the levelized cost of energy. Therefore, based on the above assumptions (0.5% annual degradation over 25 years and $120 annual O&M costs), the levelized cost of energy for this example system is approximately $0.081/kWh.

Upfront Costs, Incentives, Payback, and Examples

How net metering, time-of-use pricing, and rate structures change payback

A calculator that ignores how you pay for the energy you export is incomplete. Buyers of on grid solar systems also need to understand utility compensation models, including net metering, net billing based on avoided costs, time-of-use (TOU) differentials, and demand charges, as these models directly affect the practical value of each kilowatt-hour generated.

If your utility offers full retail net metering, each kilowatt-hour of electricity exported offsets the kilowatt-hour you would have otherwise purchased at the retail rate. This can maximize first-year savings and shorten the payback period. However, many utilities have shifted to net billing or time-of-use (TOU) rates. Demand charges are calculated differently, and commercial customers may pay an additional fixed fee for peak demand. While a pure solar system can reduce energy consumption, it may not significantly reduce peak demand unless it is specifically sized and controlled for this purpose. In this case, adding battery energy storage to reduce peak demand can significantly improve economics, although this will increase capital costs.

Advanced Metrics and Sensitivity Analyses Buyers Should Run

Beyond simple return on investment, some experienced buyers evaluate net present value, internal rate of return, and levelized cost of energy to compare investments in on grid solar systems with other capital options. Net present value (NPV) discounts all future cash flows to their present value using a selected discount rate. Internal rate of return (IRR) is the discount rate that makes the NPV zero and represents the annualized rate of return for the project. The levelized cost of energy (LCOE) spreads the total lifecycle cost across the lifetime energy consumption to answer the question, “What will it cost per kilowatt-hour of electricity generated over the lifetime of the system?”

To calculate NPV, project the annual net cash flows, select a discount rate, and add the present values ​​for each year. The internal rate of return (IRR) is a root-finding method; if the IRR exceeds your required return or cost of capital, the project is considered attractive relative to the buyer’s alternatives. For many residential projects, the utility price per kilowatt-hour and incentive levels are the primary factors to consider. For commercial projects, demand charges and financing terms often take precedence. Use these insights to prioritize actions; negotiating a better installation price or obtaining local rebates can often shorten the payback period more quickly than improving panel efficiency.

Maximizing Return on Investment

A on grid solar system payback calculator can provide buyers with a realistic forecast of when their investment will generate net positive cash flow. However, its accuracy depends on the quality of inputs and the transparency of electricity pricing structures and incentives. Estimated payback periods range from the mid-single digits to the low double digits, depending on your region, utility rates, and incentives. To maximize returns, focus on negotiating the itemized installation price, leveraging available incentives, and sizing and orienting the system to maximize self-use during periods of high electricity prices. Commercial buyers should address demand charges and consider implementing energy storage or load control measures to add value.

Commercial Solar Street Lights: A Better Choice for Commercial Solar Use

Commercial solar street lights are widely used in municipal, campus, retail, and industrial applications. When facility managers or developers purchase commercial solar street lights for use in commercial settings, they must simultaneously analyze multiple performance dimensions: reliable daily energy harvesting, predictable nighttime lumen output, durable hardware that can withstand harsh outdoor environments, and easy maintenance to minimize lifecycle costs. Commercial applications require continuous operation, not only under laboratory conditions but also in harsh environments that include years of weather, dust, and heavy use.

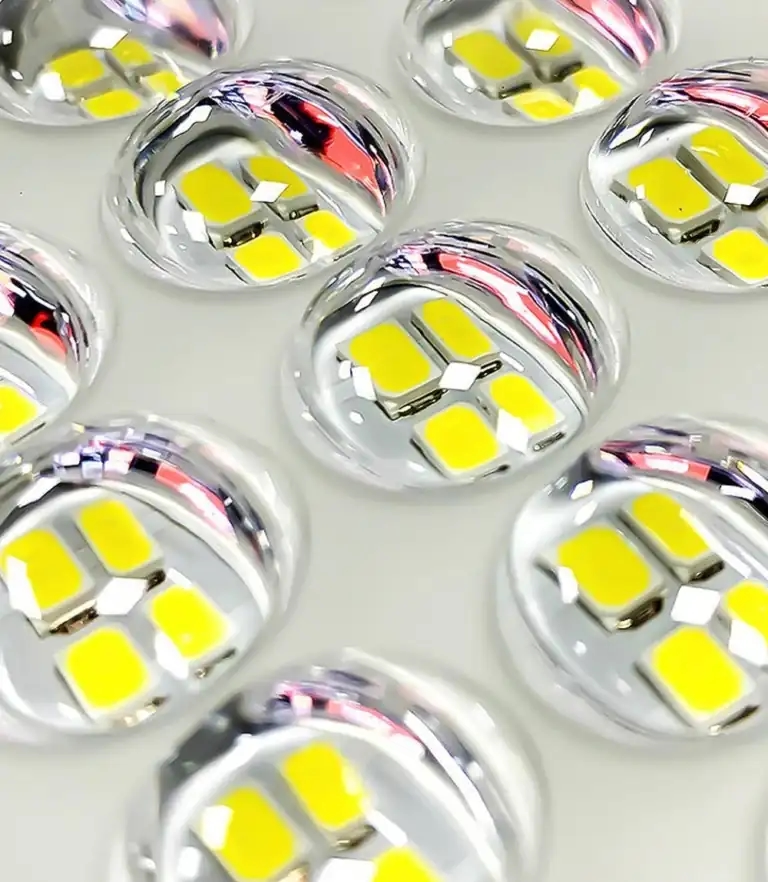
Commercial solar street light supplier PowerDream positions the MJ-LH model as a solar lighting solution for a wide range of commercial applications. The MJ-LH solar street light incorporates key design choices that commercial buyers value. Its LED array features evenly spaced bulbs and optical elements, and its mechanical and electrical designs are designed for outdoor toughness. Paired with high-quality polycrystalline silicon solar panels, it quickly harvests available sunlight and shortens the charging window—all crucial features for commercial applications.

Key Performance Characteristics of Commercial Solar Street lights in Commercial Deployments

For commercial projects, brightness alone is not enough. Efficient commercial solar street light require a combination of photometric performance, electrical performance, and intelligent energy management. First, consider photometric requirements. Commercial solar streetlights for parking lots, sidewalks, and roads typically target an average illuminance of 20-50 lux, with a uniformity ratio of 0.4-0.6 for pedestrian and parking applications. Arterial roads typically require higher-maintained illuminance and stricter uniformity. The MJ-LH solar street light’s uniformly distributed LED architecture and integrated optics help achieve these uniformity targets while reducing glare, making it easier to meet IESNA/IES RP-8 and other regional standards.

Second, consider lumen efficacy. System-level efficiencies for the commercial solar street light should exceed 120-160 lm/W. High efficiency reduces the LED power required to achieve the target lux level, thereby reducing battery capacity and PV array size. The MJ-LH’s low optical loss design embodies this principle: for the same luminous flux output, fewer wasted lumens means smaller balance-of-system components.

Key Performance Characteristics of Commercial Solar Street lights in Commercial Deployments

Durability, Protection Rating, and Environmental Adaptability of Commercial Solar Street Lights

Commercial installations subject luminaires to a variety of stresses: extreme weather, mechanical stress, electrical transients, and vandalism. Therefore, the mechanical and electrical durability of commercial solar street lights is a primary consideration when purchasing. Begin by clarifying the protection rating and mechanical shock standards. IP65 is the benchmark for water and dust resistance, indicating that solar street lights can withstand low-pressure water jets and provide reasonable protection against dust. Therefore, many commercial buyers prefer IP65 ratings for harsher environments. The MJ-LH’s IP65 rating provides robust protection against rain and splashes, while features like sealed cable glands and gaskets ensure the long-term integrity of the luminaire.

Lightning protection and surge suppression are crucial for commercial locations, particularly in areas where buildings, metal poles, and extensive wiring runs increase the risk of power surges. PowerDream’s MJ-LH includes lightning protection, reducing downtime and avoiding costly electronics replacement after storms.

Durability, Protection Rating, and Environmental Adaptability of Commercial Solar Street Lights

Designing the Powertrain

The core of any solar street lighting system is the powertrain: solar panels, battery storage, and charging/motor control. For commercial solar street lights, careful and industrial-grade component selection is crucial to ensure predictable lifetime performance. As a professional commercial solar street light supplier, PowerDream specified high-quality polycrystalline silicon panels for the MJ-LH. Polycrystalline silicon panels offer reliable performance in a wide range of climates and generally provide stable thermal and mechanical properties for the luminaire’s mounting system. Furthermore, battery chemistry determines cycle life, safety, weight, and usable depth of discharge. Lithium iron phosphate batteries have become a mainstream choice for commercial solar street lights due to their long cycle life, wide operating temperature range, and safety. Older lead-acid and gel batteries are less popular in commercial applications due to their shorter lifespan and higher maintenance costs.

Designing the Powertrain

Installation, Siting, and Operational Optimization

Proper site selection and installation are just as important as the hardware. Commercial solar street lights will perform poorly if they are installed at suboptimal tilt, shading, or at suboptimal pole height, regardless of their quality. First, a site survey is required to simulate isolation, shading dynamics, and microclimate. PowerDream utilizes GIS or simple sun path analysis tools to ensure that solar panels receive unobstructed sunlight during most peak hours, taking into account seasonal variations in sun angle and potential shading from future landscaping or development.

Regarding pole height and spacing, height affects illuminance and uniformity. For parking lots and commercial parks, 6-10 meter poles are standard; for main roads, taller poles (10-15 meters) may be required to achieve appropriate beam distribution. Commercial solar street light suppliers’ photometric profiles (IES or LDT) allow you to model spacing based on target lux values ​​and uniformity. Generally speaking, you should orient solar panels due south or north whenever possible; you may find east-west arrays more beneficial for morning and evening use. For year-round optimization, you typically set the tilt angle near the latitude of the location.

Economics, Lifecycle Cost, and Return on Investment

Purchasing commercial solar street lights is not only an engineering decision, but also a financial one. The total cost of ownership (TCO) encompasses initial capital expenditures, installation, maintenance, energy savings, and disposal or recycling costs upon retirement. When these factors are quantified, commercial solar street lights generally offer a competitive return on investment (ROI) compared to grid-powered lighting, especially in situations where grid expansion or ongoing energy costs are high.

Due to the need for solar panels and batteries, commercial solar street light typically have higher upfront costs than traditional lamps with grid connection. However, cost savings can be achieved by avoiding trenching, reducing utility connection fees, and lowering electricity costs. Battery replacement, cleaning, and electronics repair are the primary operating cost items. However, choosing lithium-iron-phosphate batteries and industrialized modules can help reduce annual maintenance costs.

In terms of return on investment and levelized cost of electricity, commercial solar street lights typically have a lifespan of 10-15 years. You can model the energy and maintenance costs avoided over this period to calculate ROI. The levelized cost of electricity for solar street lights considers the system’s kilowatt-hour output and lifecycle costs. High-efficiency LEDs, efficient MPPTs, and longer battery life can reduce LCOE.

MJ-LH Solar Street Lights Are a Better Choice for Many Commercial Applications

Commercial solar street lights are now a proven option for a wide range of commercial locations, including distribution centers, campuses, municipal streets, and retail parking lots. When carefully designed and installed, they provide flexible lighting solutions, simplify installation, lower operating costs, and support sustainability goals. PowerDream’s MJ-LH solar street light perfectly embodies the features commercial buyers seek: uniformly distributed LED optics ensure uniform light distribution with low loss; IP65 weather and lightning protection ensures robustness for outdoor use; and high-quality polycrystalline silicon panels ensure efficient solar energy collection, making it an attractive and low-maintenance solution.

How to Compare Solar Panel Types When Buying an Off Grid Solar Kit?

When purchasing an off grid solar kit, it’s essential to compare different solar panel types based on the energy delivered per unit area, durability in your specific climate, actual lifespan, and system-level compatibility, rather than relying solely on a single specification. For homeowners building an eco-friendly homes off grid solar system, choosing the right solar panel directly impacts the annual kilowatt-hours of energy available and the total cost of ownership over decades. Therefore, it’s crucial to translate technical specifications (efficiency, temperature coefficient, degradation rate, warranty) into site-specific metrics, such as annual energy production per unit of available rooftop area, lifetime cost per kilowatt-hour, and maintenance expectations, to make your selection.

Different Solar Panel Types in Off Grid Solar Kit

When purchasing an off grid solar kit, it is essential to understand the available panel technologies. The main panel types include monocrystalline, multicrystalline, bifacial, and thin-film.

Monocrystalline panels are the mainstay of the residential solar system market. They offer the highest cell efficiency. Because monocrystalline panels deliver higher wattages per square foot, they typically provide the best energy production when rooftop or ground space is limited. Furthermore, monocrystalline silicon panels generally have lower degradation and come with a good warranty, making them more suitable for residential users who require long-term, stable power generation. Multicrystalline silicon panels are slightly less expensive, have lower efficiency (approximately 15-18%), and need a larger footprint for the same wattage. If you have ample mounting space and require a low initial investment, multicrystalline silicon panels are a viable option.

Bifacial modules capture light from both the front and back sides and can generate more energy if mounted above a reflective surface or with sufficient ground clearance. This bifaciality benefits ground-mount installations and some rooftop installations with reflective platforms. For off-grid solar panels, bifacial gain depends heavily on albedo and mounting geometry, requiring careful modeling. Thin-film technologies such as CIGS perform better in diffuse light and at high temperatures, and also have lower temperature coefficients. Their drawbacks include lower efficiency and a generally larger area, but the flexibility of thin-film technology enables customized installations or integration into building surfaces.

Solar Panel Types

Choose based on efficiency, area, and expected annual output.

Efficiency directly determines how much electricity an off grid solar panel can collect from a given rooftop area. When rooftop area is limited, more efficient solar panels can provide greater capacity, resulting in more annual electricity production.

Convert efficiency to actual production by calculating watts per square meter and annual energy production. Calculate the power per square meter of solar panels by ≈ efficiency × 1000 watts/square meter (solar irradiance). For example:

1. 22% efficient panels ≈ , 220 watts/square meter.

2. 18% efficient panels ≈ , 180 watts/square meter.

Suppose your off grid solar system’s annual load demand is 4,000 kWh. In that case, the efficiency of your solar panels will determine whether you choose a single-array solution or require additional racks or more solar panels. Also, consider orientation losses and tilt. A south-facing solar array with the correct tilt can achieve higher annual energy production; an east-west facing solar array may have a flatter daily energy production curve but lower peak midday energy production.

Temperature Coefficient, Actual Performance, and Shading

Solar panel specifications are measured under standard test conditions, but actual performance is highly dependent on temperature and shading. When comparing panels for off grid solar modules, it’s essential to consider the temperature coefficient, particularly in hot climates and for eco-friendly residential off-grid solar systems. The temperature coefficient indicates the power loss of a panel when the cell temperature exceeds 25°C. Typical monocrystalline silicon panels may have a coefficient of around -0.30 to -0.35%/°C, while some thin-film and premium N-type panels may have coefficients closer to -0.20 to -0.25%/°C.

Shading performance and partial sunlight response are also important. Module designs using half-cut cells or multi-busbar layouts can reduce mismatch and losses caused by partial shading. In off-grid solar systems, where arrays may be shaded by trees or obstacles, modules that maintain optimal output under partial shading can reduce the need for additional modules and improve reliability. In installations with significant sunshades, you can also consider using a microinverter or DC optimizer for module-level MPPT.

Temperature Coefficient, Actual Performance, and Shading

Mechanical Durability, Certifications, and Environmental Resistance

In off grid solar kit installations, solar panels are exposed to wind, snow, salt spray, hail, and UV radiation. Therefore, when comparing off grid solar kit options, it’s essential to examine the mechanical and environmental specifications, as well as relevant certifications.

Standard key mechanical specifications include checking the frame and glass. Tempered low-iron glass and a sturdy anodized aluminum frame are both impact- and corrosion-resistant. Thicker glass and a reinforced frame can increase hail and snow load ratings. For areas with heavy winter snow, choose solar panels rated for a wind load of at least 2400 Pa and a snow load of at least 5400 Pa. Installations in coastal areas require modules that are PID-resistant and IEC salt spray-tested to avoid accelerated degradation near seawater.

Also, installing a waterproof (IP65/68) junction box and durable MC4 connectors can reduce points of failure. Finally, ensure certifications for IEC 61215 and IEC 61730, as well as ammonia resistance certifications such as UL 1703 or IEC 62716.

Ensure compatibility with off grid solar systems.

Choosing solar panels is only part of sizing an off-grid solar system. You must also ensure the system is compatible with the inverter, MPPT charge controller, battery chemistry, and mounting method. The electrical characteristics of the solar panels determine the string configuration, which must be kept within the operating range of the MPPT controller or inverter, especially on cold nights when the open-circuit voltage (Voc) rises.

For off grid solar systems, ensure that the off-grid charge controller and hybrid inverter have a maximum open-circuit voltage and input voltage range that matches the system’s requirements. If connecting high-voltage strings to an inverter/charger, ensure the equipment supports the string voltage; otherwise, use a lower voltage configuration or connect strings in parallel. It’s also essential to select a racking system that complies with local structural codes and optimizes the tilt based on seasonal energy conditions. If necessary, ensure the kit includes monitoring capabilities that report PV power generation, battery SoC, and inverter status.

Choosing the Right Panels for Your Off Grid Solar Kit

Comparing solar panel types for off grid solar kits requires translating the solar system supplier’s specifications into site-specific energy and lifespan metrics. First, quantify the available area and daily energy requirements. Then, prioritize panel performance, assess the mechanical durability of the panels for your local environment, and ensure electrical compatibility with the inverter/MPPT and battery system to create a safe, reliable, and environmentally friendly off-grid solar system for your home.

How do solar micro inverter affect the energy yield of a system?

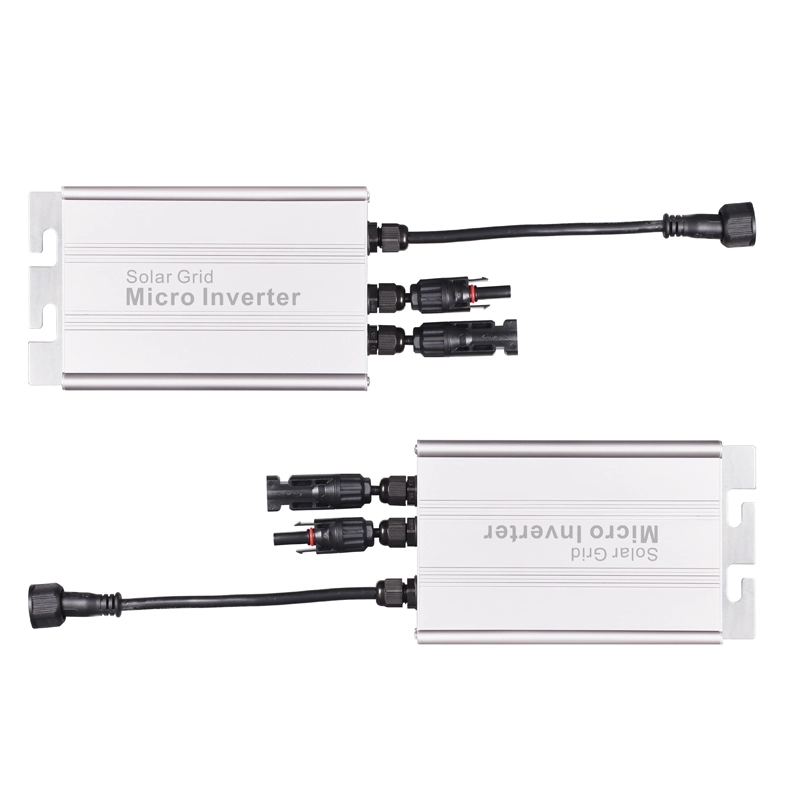
A solar micro inverter transforms energy production from the first rays of daylight to the last kilowatt-hour of output at dusk. Micro inverters perform two key tasks at the module level: extracting the maximum available power from each PV module through MPPT and converting DC power to grid-compatible AC power near module power. Because these functions are performed at the module level, microinverters impact not only instantaneous conversion efficiency but also annual energy production, system reliability, and the economics of the array. Specifically, PowerDream’s micro inverters feature an ultra-wide MPPT voltage range (18–55V) and achieve peak efficiencies of 93%, CEC efficiencies of 92%, and MPPT efficiencies of 99%, maximizing solar energy harvesting.

Solar micro inverters play a fundamental role in energy conversion and module-level optimization.

Solar micro inverter shifts intelligence and conversion functions to each PV module, changing the rules of energy conversion. Unlike centralized inverters that rely on string-level MPPT, microinverters assign an MPPT to each module, independently optimizing its operating point. As a result, even if module output varies due to orientation, contamination, manufacturing tolerances, or partial shading, the overall system can harvest more energy. For this reason, microinverters often outperform string inverters in non-ideal installation environments. Furthermore, on grid micro inverters, in particular, tightly integrate each module’s MPPT performance with DC/AC conversion. This architecture minimizes the Impact of poor performance from a single module on neighboring modules, allowing you to gain incremental energy while mitigating performance risks.

Solar micro inverters play a fundamental role in energy conversion and module-level optimization.

Solar Micro inverter MPPT Voltage Range and Low-Light Start Advantages

To maximize system energy harvesting, PowerDream’s solar micro inverters feature an ultra-wide MPPT voltage range (18-55V). First, the lower startup threshold (18V) allows the solar micro inverter to begin extracting usable power at lower irradiance levels, such as at dawn, dusk, and on overcast days. Second, the higher threshold (55V) supports longer PV strings and a higher number of input modules per microinverter in specific hybrid or paired configurations, reducing wiring and BOS costs.

Why is an 18V startup voltage so important? When irradiance is low, module voltage drops. During these low-voltage periods, the module voltage sits idle, compared to 30V or higher, missing out on the incremental energy that could have been provided during these hours. At the same time, the 55V high-voltage capability frees designers to use strings with more modules in specific system configurations, thereby reducing parallel wiring, plumbing, and labor costs.

The Impact of 99% MPPT Tracking Efficiency on Marginal Revenue

MPPT tracking efficiency determines how closely an inverter extracts the theoretical maximum available power from a solar panel at any given moment. PowerDream’s solar micro inverters offer 99% MPPT tracking efficiency, minimizing energy losses at the point of capture. Compare a microinverter with 97% MPPT efficiency and 92% inverter conversion efficiency to a microinverter with 99% MPPT and 93% peak conversion. The former delivers 5,820 kWh of AC energy. The conversion efficiency is 5,524.2 kW. The latter, on the other hand, produces 5,940 kWh. The difference and relative benefit represent an annual increase of 169.8 kWh, or approximately 3.17%. These data indicate that minor improvements in module-level energy capture combined with modest increases in conversion efficiency can lead to several percentage points of annual energy production growth.

The Impact of 99% MPPT Tracking Efficiency on Marginal Revenue

Conversion Efficiency—Peak Efficiency vs. CEC Efficiency and Their Practical Impact

Conversion efficiency determines how much of the collected DC power can be converted into usable AC power and fed into the grid. Two commonly used metrics are peak efficiency and CEC efficiency. PowerDream’s micro inverter achieves a peak efficiency of 93% and a CEC efficiency of 92%, both demonstrating top-tier conversion performance within the module-level electronics. As previously mentioned, increasing the conversion efficiency from 92% to 93%, combined with a higher MPPT capture rate, can further enhance AC power production. Secondly, weighted metrics like CEC better reflect typical everyday performance because they account for a wide range of operating conditions. High CEC efficiency means the inverter performs well under typical irradiance and temperature cycles, which are key to its lifetime output.

String Length, Cabling Costs, and System Architecture Advantages

The ultra-wide upper MPPT voltage range of solar micro inverters has a tangible impact on the economics of system cabling and overall energy yield. Because the inverter can operate efficiently at higher DC input voltages, designers can configure longer PV strings or connect multiple modules in series to create hybrid configurations. Longer strings reduce the number of parallel connections, shorten wiring lengths, and reduce installation labor and material costs. Furthermore, shorter wiring reduces resistive (I²R) losses, thereby increasing energy output.

Every meter of copper wire reduces resistive losses, especially at higher currents. While the specific value depends on cable size and site geometry, the architectural flexibility afforded by the higher permissible string voltage is significant. Combined with the micro inverter’s module-level optimization and high MPPT efficiency, the net effect is increased AC output power per watt of installed power.

Greater Energy Yield for Homes

Solar micro inverters impact energy output through multiple interlocking mechanisms: module-level MPPT optimization, low-light startup, and an extended MPPT window, improved MPPT tracking efficiency, high conversion efficiency (93% peak / 92% CEC), and architectural flexibility that reduces BOS losses. These features work together to achieve compound gains in AC output—gains that are both measurable and substantial, accumulating over the entire installation and decades of operation.

Micro inverter FAQs

Q1. How much additional energy does a solar micro inverter with 99% MPPT deliver compared to a typical 97% MPPT?
A1: Compared to 97% MPPT, the increase is approximately 3.17%. The specific results will vary by site, but how does a small percentage improvement add up over time?

Q2. Does an 18V startup voltage really matter in my location? A2: Yes, especially if your location has a long twilight period, frequent cloudy days, or you want to capture marginal energy at dawn and dusk. An 18V startup voltage allows the microinverter to start generating power earlier and stop generating power later in low-light conditions.

Q3. Which is more important, peak efficiency or CEC efficiency?
A3: CEC efficiency is generally more representative of actual long-term performance because it accounts for variations in irradiance and temperature. Peak efficiency represents the absolute maximum under ideal conditions, whereas CEC efficiency more accurately reflects daily output.

The Most Detailed Buyer’s Guide to Hybrid Solar Solutions to 2025

Hybrid solar solutions offer predictable savings, long-term value, and energy independence. For most clients we work with, we see a return on investment in under four years, with significantly lower electricity costs, allowing you to reap the benefits of renewable energy quickly. PowerDream’s hybrid solar solutions include a comprehensive warranty package to protect your investment, with an expected lifespan of over 25 years. Furthermore, these systems are delivered ready for installation. Each hybrid solar system is plug-and-play, allowing safe and easy connection to your home’s main AC distribution panel. Whether your local grid uses 230V or 120/240V split-phase power, PowerDream’s hybrid solar solutions are globally compatible.

Hybrid Solar Solutions: How Resilience Leads to Higher Efficiency

At the heart of a hybrid solar solution lies a comprehensive architecture. At the heart of every hybrid solar system is a photovoltaic array, which collects sunlight and generates direct current (DC) electricity. This DC feeds a hybrid inverter, which simultaneously manages PV conversion, battery charging, and AC loads. This integrated approach reduces conversion losses and improves system efficiency compared to using separate, discrete components.

Furthermore, intelligent energy management software optimizes when to store, consume, or export energy based on time-of-use rates, battery state of charge, and household needs. This allows you to save even more when electricity prices spike and your energy storage replaces expensive grid power. Because the PowerDream hybrid inverter and battery management system are designed to work together, the system seamlessly coordinates under various conditions to ensure critical circuits remain powered.

Determining and Planning a Hybrid Residential PV System

With hybrid solar solutions, the right size determines whether a hybrid solar system meets your goals. First, analyze recent utility bills to determine daily electricity usage and peak demand. Next, assess rooftop orientation, shading, and available area to estimate realistic PV output. For many American households, a system that offsets 60% to 100% of their annual electricity use strikes a balance between costs and benefits.

The PowerDream system’s modular design allows you to start with a basic configuration and expand as your needs or budget change. During planning, we select the appropriate battery capacity based on backup goals. Smaller batteries (5-10 kWh) are typically used to power baseloads during short outages, while larger batteries (10-20 kWh and above) support more extended periods of autonomy or whole-house power. In short, careful planning before finalizing a hybrid solar system ensures your hybrid solar solution is cost-effective and compliant.

Determining and Planning a Hybrid Residential PV System

Installation, Assembly, and Site Preparation

Installation quality is just as important as component selection. PowerDream’s hybrid solar systems utilize an all-aluminum solar racking system that is durable, corrosion-resistant, and compatible with nearly all roof types. Thanks to standardized mounting hardware with rails and clamps, installers can quickly and safely achieve consistent, waterproof connections.

This plug-and-play system simplifies on-site wiring. Furthermore, PowerDream’s hybrid inverters are pre-configured for standard grid voltages (230V or 120/240V), and labeled connectors simplify AC and DC termination. During installation, our technicians inspect the roof’s integrity and assess wind and snow loads by local codes. Post-installation, commissioning confirms PV output, inverter settings, and battery health. Finally, because PowerDream supports remote commissioning and monitoring, installers can verify system performance and deliver complete documentation.

Hybrid solar system installation, assembly and site preparation

Ensuring a Longer Lifecycle for Hybrid Solar Solutions

Hybrid solar systems can last for decades if proactively maintained. Regular inspections, cleaning the PV glass, checking mounting fasteners, and verifying inverter ventilation ensure system performance close to nameplate ratings. Batteries require regular monitoring of their health, but the lithium-ion batteries used in PowerDream installations are generally low-maintenance.

PowerDream offers an explicit warranty covering the PV panels, inverter, and battery pack in its hybrid solar solutions. Most of our customers see a return on their investment within four years, thanks to lower electricity costs, incentives, and the avoidance of peak rates. Over a 25-year lifespan, the accumulated savings often multiply the initial investment, especially with time-of-use rates and robust net metering or export credits. Strict maintenance practices coupled with a firm warranty policy preserve the system’s value and maximize the return on investment (ROI) for hybrid solar systems.

Enjoy a Better Clean Energy Future

As an experienced solar system provider with comprehensive specifications and strong after-sales support, PowerDream offers carefully designed hardware, tested components, and consistent quality in our hybrid solar solutions. We offer hybrid solar solutions with modular expansion, firmware upgrades, and open communication protocols. This allows you to add more PV systems, larger batteries, or smart home integration as technology and energy needs evolve. This offers a more sustainable energy future and a higher return on investment for those who opt for this solution.

Frequently Asked Questions (FAQs) about Hybrid Solar Solutions

Q1. What is the difference between a hybrid solar system and a traditional grid-tied system?
A1: A hybrid system includes batteries and a hybrid inverter to manage PV generation, energy storage, and AC loads. A grid-tied system without a battery can import or export power but cannot provide backup power during a power outage.

Q2. How long does it take to see a return on investment with a PowerDream hybrid solar solution?
A2: Most customers see a return on investment in less than four years, depending on local electricity prices, incentives, and system size. Over the course of 25 years, the cumulative savings can be substantial.

Q3. Can the PowerDream system be installed on any type of roof and in any country?
A3: Yes. The all-aluminum mounting system is compatible with most roof types, and the PowerDream inverter supports both 230V and 120/240V grid voltages, making it suitable for many international installations.

Q4. What warranty and support are included with the hybrid solar solution?
A4: PowerDream offers a comprehensive warranty covering the modules, inverter, and battery.

How to choose the right monocrystalline solar panels for your home?

How do I choose the right monocrystalline solar panels for my home? Choosing the right monocrystalline solar panels is crucial for homeowners seeking reliable electricity, optimal return on investment, and a durable roof. This requires balancing efficiency, actual performance in local climate conditions, mechanical durability, system architecture, aesthetics, cost, and product warranty and support. Carefully selected solar panels can lower your electricity bill, maximize power generation from limited roof space, and enhance the appearance of your home.

Determining the Efficiency and Power Rating of Monocrystalline Solar Panels

When roof space is limited, efficiency is the most important technical parameter. Monocrystalline solar panels are widely used in homes due to their higher cell efficiency than other mainstream technologies. Typical high-efficiency monocrystalline solar panels have an efficiency range of approximately 10% to 20%. Simply put, higher-efficiency panels generate more electricity per square foot, thus producing more energy from the same roof area.

First, estimate your available unobstructed roof area and your annual electricity consumption. If your roof area is limited, prioritize solar panels with the highest efficiency rating. Second, compare rated power ratings. A 370-watt, high-efficiency monocrystalline silicon solar panel occupies less space than a 310-watt panel of the same power, which is important when fitting solar panels around vents and skylights. Efficiency is crucial when roof space is limited. If your roof is vast, you can use lower-efficiency panels. However, most homeowners will benefit from the space savings and long-term performance of high-efficiency monocrystalline solar panels.

Determining the Efficiency and Power Rating of Monocrystalline Solar Panels

Temperature Coefficient and Real-World Thermal Performance of Monocrystalline Solar Panels

Solar panels perform differently in real-world conditions than the perfect laboratory values on the datasheet. Monocrystalline solar panel performance changes as cell temperature rises; the lower the temperature coefficient, the less energy the panel loses to heat. Therefore, check the Pmax temperature coefficient on the datasheet. High-quality monocrystalline modules have a Pmax temperature coefficient of approximately -0.30%/°C to -0.35%/°C, and premium modules may have higher Pmax temperature coefficients.

Then estimate the average operating temperature for your roof area. Multiply the temperature coefficient by any temperature rise above 25°C to predict the drop in actual output power. Consider installation and airflow. Raised and well-ventilated mounting rails can lower operating temperatures and help reduce heat loss. Furthermore, white or reflective roofing beneath the mounts can reduce heat soak compared to dark shingles. In short, if you live in a hot region, choose monocrystalline panels with a more favorable (less negative) temperature coefficient.

Temperature Coefficient and Real-World Thermal Performance of Monocrystalline Solar Panels

Evaluate degradation, performance, and reliability.

Long-term performance is more important than short-term price. Monocrystalline solar panel typically come with a performance guarantee, which guarantees a certain percentage of the rated capacity over 25 years. However, it is still important to evaluate the annual degradation rate and the terms of the written warranty. Most modern monocrystalline solar panels have a degradation rate of approximately 0.3% to 0.8% per year, while many high-quality panels have a degradation rate of approximately 0.25% to 0.50% per year. A lower degradation rate results in a higher energy yield over the system’s lifetime.

Warranty terms. A typical warranty guarantees approximately 80-87.5% of the rated output after 25 years. A more stringent warranty might guarantee 92% output after 10 years and 82% output after 25 years. Some quality monocrystalline solar panels can typically generate electricity for 25-30 years with proper maintenance. Therefore, when selecting solar panels, prioritize monocrystalline solar panel manufacturers that offer competitive guaranteed output retention and transparency degradation indicators.

Mechanical Durability, Certifications, and Environmental Resistance

Depending on the region and environment, your solar panels may be subjected to wind, snow, hail, and coastal salt spray. Monocrystalline solar panels vary in frame strength, glass quality, junction box protection, and certifications. These characteristics determine how well the solar panel withstands real-world stresses and reduces the risk of premature failure.

Check the datasheet for wind and snow load ratings. The higher the rating, the thicker the frame and the more robust the cell/glass connection. Also, ensure that the product complies with IEC 61215, IEC 61730, UL 61730, or UL 1703, as well as any applicable local certifications. Testing for PID, salt spray, and ammonia resistance is also important in coastal or agricultural areas. Additionally, tempered low-iron glass, a sturdy anodized frame, and an IP-rated junction box (e.g., IP65/68) can extend the lifespan. In short, choose a monocrystalline solar panel that is mechanically strong and meets the environmental certifications required for your region.

Aesthetics, Size, and Roof Compatibility

Most homeowners are concerned not only with the performance of their solar panels, but also with their appearance. Monocrystalline solar panels are available in a variety of finishes, including black panels, framed/frameless, and various cell patterns (full-cut, half-cut, or shingled), all of which impact both appeal and performance.

A black frame, black backsheet, and black cells create a uniform, understated look preferred by many homeowners. A silver frame can contrast with dark shingles. Panel sizes and weights also vary. You need to ensure that the roof structure can support the weight of the panels and mountings, especially on older roofs. Half-cut and shingled cell designs offer improved shade tolerance and slightly reduced resistive losses. They generally offer better low-light performance and reduce the risk of hot spots. If aesthetics are key, shingled panels offer a modern, mosaic-like visual pattern. Low-profile brackets and flush mounting can reduce wind lift and improve appearance. Standing seam metal roofs require clamps. Asphalt shingle roofs require flashing for waterproofing.

Aesthetics, Size, and Roof Compatibility

Choosing the Right Solar Panel

Selecting the right monocrystalline solar panel requires a comprehensive consideration of efficiency, actual performance in local climate conditions, long-term warranty and performance degradation, mechanical durability, aesthetics, and total cost of ownership. Contact us for a quick on-site assessment and a customized solar panel and inverter solution based on your roof layout and energy goals.

Related FAQs

1. Are monocrystalline solar panels better than multicrystalline for my home?
Generally speaking, monocrystalline panels are more efficient and space-efficient, making them a better fit for most residential rooftops.

2. How do I choose between string inverters and microinverters for monocrystalline solar panels?
If your roof has shade, multiple orientations, or complex geometry, a microinverter or optimizer will generally produce more energy. For simple, uniformly oriented roofs, a string inverter generally offers the best price/performance ratio.

3. How will hot summer temperatures affect my solar panel selection?
If you live in a hot climate, consider monocrystalline solar panels with a lower temperature coefficient (less negative).

4. Can I buy a complete solar panel kit that includes monocrystalline panels and all required components?
Yes, our solar system solutions offer pre-configured solar panel kits that include panels, an inverter, mounting, and wiring.

What features do professional-grade solar security camera have?

A professional-grade solar security camera must integrate sophisticated optics, a reliable power source, intelligent sensors, and rugged hardware to protect assets day and night with minimal maintenance. It allows you to survey vast areas and check for license plates, faces, or package deliveries while maintaining situational awareness. The Power Dream solar security camera embodies these principles. Its dual-lens optical layout and active illumination deliver vivid HD colour images in low-light conditions and sharp black-and-white infrared images when needed. It also integrates PIR human detection and visible red/blue light warnings to deter intruders and reduce false alarms. Furthermore, two-way audio enables field personnel or homeowners to communicate through the camera. At the same time, an IP65 rating ensures it is waterproof, dustproof, and resistant to sunlight, making it suitable for outdoor deployment.

Using a dual-lens design in a solar security camera

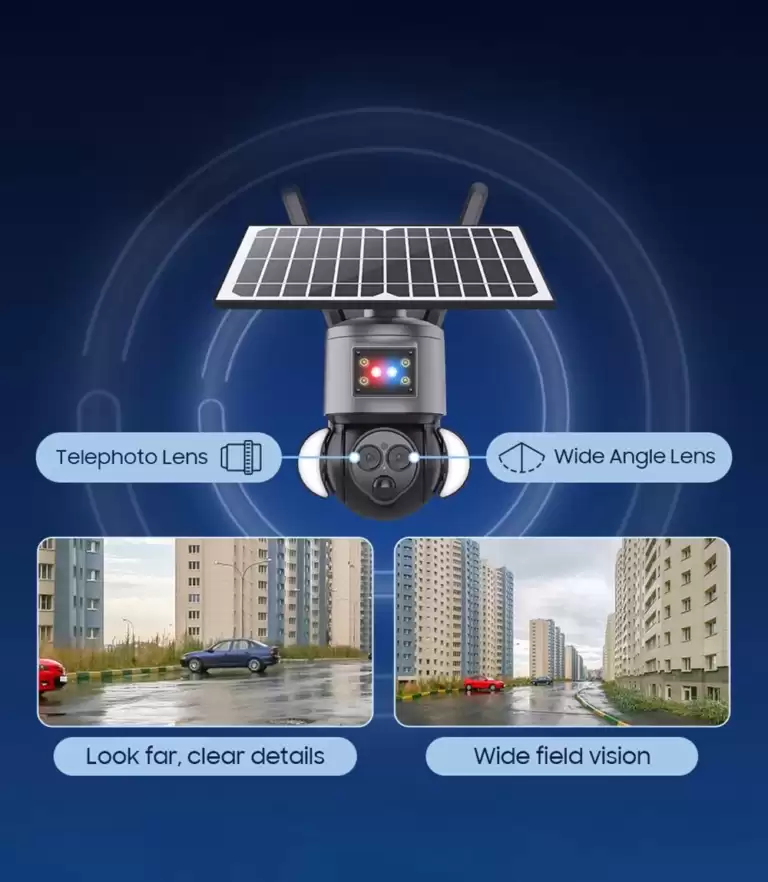
A professional solar security camera typically features a dual-lens system, striking a balance between coverage and resolution. The ultra-wide-angle lens captures the scene’s context, including the approach, perimeter, and multiple points of interest. In contrast, the telephoto lens offers optical zoom, allowing for the capture of details on faces, license plates, or ID cards. Optical zoom maintains image quality, which is crucial when providing admissible evidence in investigations or insurance claims.

Furthermore, Power Dream’s solar security cameras combine an optical system with active lighting, utilising eight infrared LEDs for discreet, long-range black-and-white imaging and four white LEDs, along with two floodlights, for colour night vision. Intelligent control of the floodlights enables them to be turned on or off in response to motion, thereby avoiding light pollution and providing clear, colour-accurate images, which simplifies identification. This results in a solar-powered security camera with true optical zoom, balanced wide-angle coverage, and intelligent lighting modes.

Dual-lens Design

Ensure continuous operation of solar-powered security cameras.

Professional solar security cameras pair a high-efficiency camera with a solar panel, charge controller, and energy buffer. The size should be determined based on the site’s sunlight exposure and the camera’s power consumption. The user’s requirement is “connect it to a solar panel for uninterrupted power 24/7.” This is achievable if we correctly specify the panels, angle, and energy management. In practice, our installers will calculate the panel power and battery capacity based on the location, seasonal sunlight variations, and camera functionality. Well-designed solar-powered security cameras also feature power-saving modes, efficient LED lighting, and smart charging to extend battery life. During installation, we typically provide site sizing tools and verify expected uptime based on local irradiance data.

Intelligent Detection, Alerts, and False Alarm Reduction

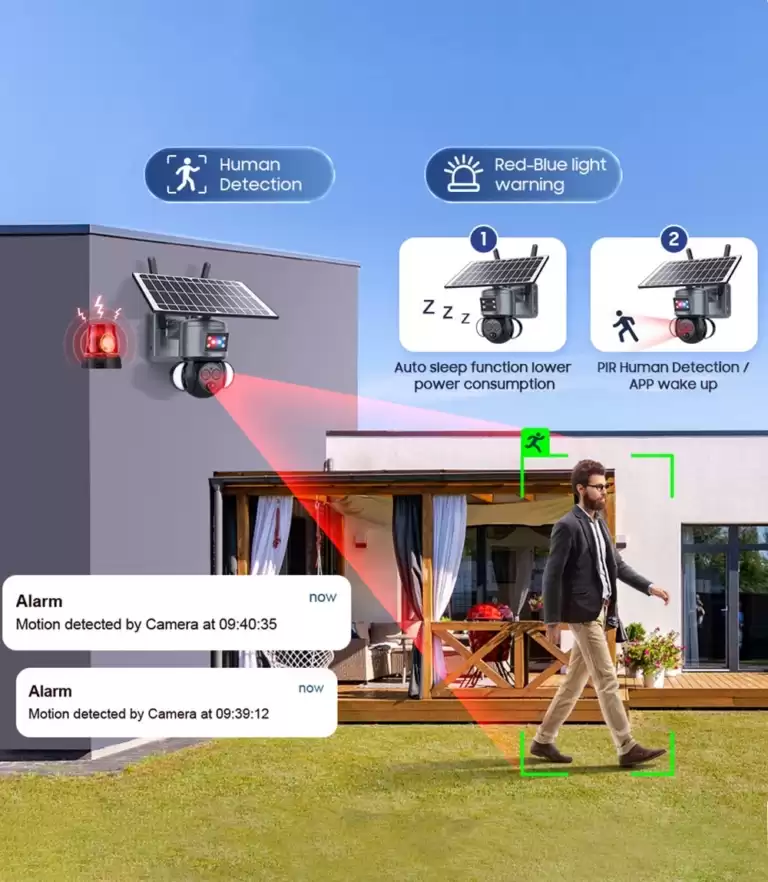
A professional surveillance system encompasses more than just cameras and power supplies; it is an event management platform capable of identifying real threats and filtering out noise. Therefore, we have incorporated PIR human detection into our solar-powered security cameras, enabling them to respond to both body temperature and motion, significantly reducing alerts caused by branches, shadows, or small animals. The Power Dream’s PIR functionality, combined with video analytics, can distinguish between human silhouettes and other motion signatures, improving alert fidelity.

Layered intelligence encompasses boundary crossing detection, intrusion detection, object left/removed detection, and, where permitted by privacy regulations and processing power, facial or vehicle classification. Intelligent lighting and red/blue light warnings serve as both detection and deterrents: when the camera confirms the presence of a person, lighting and visible warnings deter wrongdoing while producing clearer video.

PIR Human Detection &Red-Blue light warning

Mechanical Controls, Installation, and Environmental Adaptability

Mechanical design impacts coverage, durability, and lifespan. Compared to fixed lenses, pan/tilt control expands the camera’s effective field of view. Power Dream surveillance cameras offer app-adjustable 35° horizontal and 90° vertical scanning, providing robust vertical scanning and moderate horizontal correction. This is useful for tracking tall objects, scanning doorways, and adjusting framing after installation. Furthermore, the IP65 rating ensures the camera is effectively waterproof and dustproof. During installation, the installer determines the appropriate height, tilt, and solar panel orientation and conducts a site survey to verify sun angle, light pole position, and line of sight.

Keep your home safe and secure.

Professional-grade solar security cameras combine specialised optics, a highly resilient power system, intelligent analytics, and a reinforced mechanical and software design to provide reliable surveillance without the need for ongoing maintenance. Power Dream’s solar-powered security cameras feature a dual-lens design that balances panoramic views with detailed footage. Active illumination and a combined infrared/white light LED array deliver clear, actionable images day and night. Furthermore, PIR human detection, red/blue warning lights, and app-controlled pan/tilt functionality make the system proactive rather than reactive. Built-in two-way audio supports real-time communication, and the IP65 rating ensures the device can withstand harsh outdoor environments.

Detailed product: https://homesolar.cn/product/solar-cctv/

How to determine the corresponding configuration before purchasing solar energy street light?

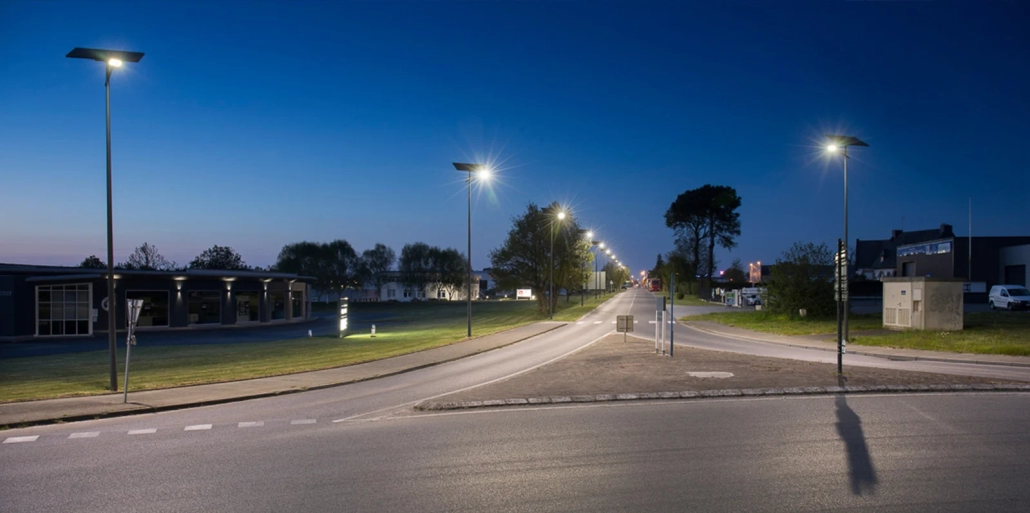
Before purchasing a solar energy street light, it’s important to understand the basic lighting conditions in your area. For example, a north-facing suburban area located at 45° north latitude experiences an average of 2.8-3.4 hours of peak sunshine in winter, while a site situated at 15° north latitude experiences an average of 5-6 hours of peak sunshine year-round. These figures influence the size of your PV array, the required battery capacity, and even the tilt and azimuth of the solar panels. Therefore, the first step in planning your solar street light purchase is to gather local site data. Next, align the climate benchmarks with your lighting specifications. This helps you determine the size of the solar panels, batteries, controller, and supporting hardware.

Site Assessment and Solar Resource Analysis for solar energy street light

First, determine the precise latitude and longitude of each solar energy street light pole location. This determines the annual solar altitude and the duration of daylight. Next, collect local meteorological data, including the monthly average global horizontal irradiance or peak sunshine hours, the monthly average temperature range, and the prevailing wind speed. You can obtain this data from national meteorological services, satellite solar radiation maps, or industry databases.

Why are these figures important? Because solar yield tells you how many hours of sunshine are needed, on average, to produce the equivalent of full sun. For example, a site with a solar yield of 4 means a 100-watt solar panel can generate the equivalent of 400 watt-hours of electricity per day under standard conditions. Next, document shading and orientation. Map any trees, buildings, or overhead obstructions that could cast shadows during peak sunlight hours. Even partial shading of a single string can significantly reduce output power. Finally, if the panels can receive reflected light, document the ground reflectivity.

Site Assessment and Solar Resource Analysis for Solar Street Lights

Determine the lighting requirements for a solar energy street light

First, determine whether you need lighting based on lux levels or lumen output. Target parameters include the average maintained illuminance required on the road surface, uniformity, pole spacing, and nightly operating hours. Select appropriate LED lumen output and efficacy. The current LED lumen output for solar street lights ranges from 120 to 180 lm/W, but actual luminaire efficacy depends on driver losses, the optical system, and environmental factors. A 30 W LED module, with a raw efficacy of approximately 130 lm/W, produces a raw luminous flux of roughly 3,900 lumens. Consider lumen maintenance: specify LEDs with good light decay characteristics.

Also, define nighttime operating modes: continuous full power, scheduled dimming, motion-triggered boost, or adaptive dimming based on battery status. Dimming strategies can significantly reduce energy consumption, thereby reducing demand on photovoltaics and batteries.

solar energy street light 2

Battery Sizing and Autonomy Considerations

After determining daily power requirements, adjust the battery capacity based on the desired endurance. Typical designs are designed for 2-3 days of continuous operation in urban areas and 4-7 days for remote areas or safety-critical applications.

Battery Sizing Process:

1. Determine average daily energy usage.

2. Multiply by the desired number of days of autonomy to determine the required energy reserve.

3. Apply the allowed DoD and battery temperature derating.

After sizing, pay attention to battery temperature. Battery capacity decreases at low temperatures, and cycle life is shortened at high temperatures. Temperature compensation should be provided, or lithium-iron-phosphate batteries should be used to achieve optimal battery performance over a wide temperature range. Finally, ensure that the charge controller supports the appropriate battery charging algorithm and includes a battery management system (BMS) for cell balancing and protection.

PV Array Sizing and Panel Configuration

PV system sizing converts energy requirements into panel area and power based on the local solar system power factor and system losses. A conservative energy balance approach can be used:

Required daily energy ÷ PSH = Required PV wattage before losses.

Then consider system losses: temperature, pollution, cabling, MPPT efficiency, mismatch, and tilt deviation. Industry practice generally uses a system efficiency factor of 0.7-0.8 (i.e., 20-30% losses), depending on local conditions. The panel tilt and azimuth should also be determined. For year-round performance, the tilt should be roughly equal to the latitude; in summer climates, the tilt can be lowered; for winter performance, the tilt can be increased.

Regarding panel orientation and series connection, consider the following points. For single-pole solar energy street light installations, monolithic panels are typically mounted at an optimized tilt. For urban lighting fixtures, low-profile frameless panels are integrated to reduce wind loads. Furthermore, for multi-panel arrays, the MPPT charge controller should support the selected array voltage and maximum power point. Finally, ensure that the PV array can charge the battery after periods of continuous overcast skies. To increase resilience, you can specify a larger variety or accept a lower level of autonomy.

PV Array Sizing and Panel Configuration

Holistic Design and Environmental Protection

Solar street light design ensures longevity in the field. Pole selection, mounting brackets, and enclosure engineering must comply with local regulations and environmental loads. Structurally, the solar street light pole strength and wind resistance rating must be determined, and the pole size should be able to withstand the local base wind speed and gusts. Furthermore, during installation, ensure the use of shock-absorbing brackets and fixing fasteners, as well as stainless steel fasteners and anti-seize compound to prevent wear and corrosion. Furthermore, the battery and electronics must be housed in an enclosure with good thermal management, adequate ventilation, and IP protection. Ensure an IP65/66 enclosure and powder-coated or hot-dip galvanized steel poles for enhanced corrosion resistance. For environmental protection, add lightning and surge protection to the PV input and DC distribution points. Use UV-resistant cable sheathing and portable connectors for outdoor use.

Choosing a Resilient Solar Lighting System

To determine the appropriate configuration for solar energy street lights, first gather site-specific data, including latitude and longitude, monthly peak power, temperature, and wind conditions. Convert your lighting needs into daily watt-hour loads. Then, choose the battery capacity based on the desired operating time. Also, size the PV array based on local isolation conditions to allow for battery charging while accounting for actual losses. This selection process can help you avoid system undersizing, reduce field failures, and ensure reliable and efficient lighting.