High-Power Solar LED Street Light: Municipal Road Safety with 12000lm Brightness

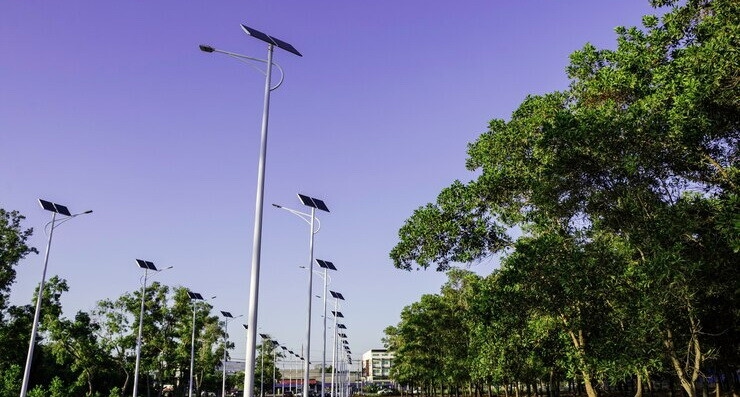
In many cities around the world, residents consider insufficient street lighting their primary safety concern. Meanwhile, some respondents cited rising electricity costs for traditional streetlights; 59% said they lacked the budget for expensive grid-connected lighting upgrades. On average, each municipality spends thousands of dollars annually (electricity + maintenance) on each traditional streetlight, money that could be used for other safety measures. Therefore, we’ll show you how PowerDream’s 400W high-power solar LED street light meets municipalities’ needs for both safety and energy efficiency. This streetlight boasts 12,000 lumens of brightness, intelligent motion detection, and is grid-independent. You can integrate it into your road system to achieve brighter, safer street lighting.

Traditional Solar LED Street Lights Fail to Provide Good Street Lighting

Most municipalities continue to use traditional street lights (sodium lamps, metal halide lamps) out of habit, not because they are effective. These outdated systems are deficient in three key areas: safety, cost, and sustainability. Even low-quality solar LED street lights (100W-200W) cannot meet the requirements.

First, there are safety hazards due to insufficient brightness. Sodium lamps have a maximum brightness of only 8,000 lumens, and their yellow light distorts colors, making it difficult for drivers to distinguish pedestrians’ dark coats and shadows. A suburban Detroit area found that intersections lit by sodium lamps had 42% more nighttime traffic accidents than those illuminated by high-power solar LED lights. Second, there are high long-term costs. Traditional streetlights require grid power, costing $80 to $120 per lamp per month—plus an additional $300 to $500 per year for maintenance. Third, they lack flexibility and pose environmental hazards. Sodium lamps cannot adapt to changing environments—they remain dim all night, even during peak pedestrian hours. They also waste energy.

12,000 Lumens Brightness + Motion Detection for Enhanced Safety

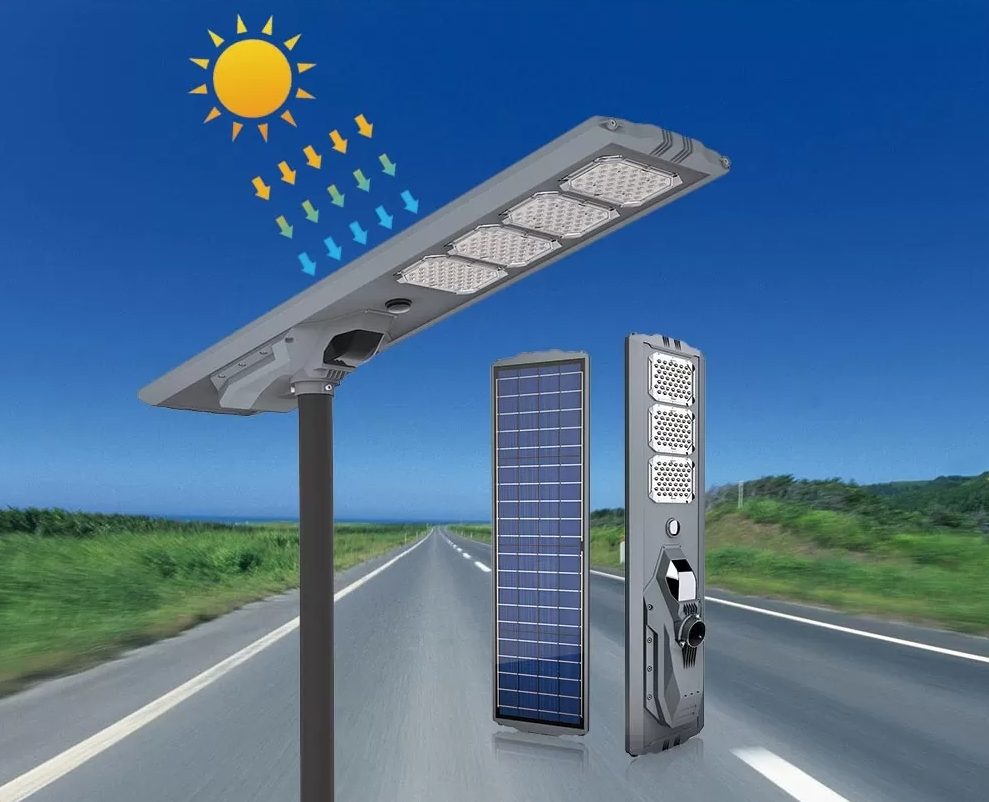
PowerDream’s 400W high-power solar LED street light is more than just a “brighter bulb”; it’s a smart safety system designed specifically for municipal roads. We’ve combined stadium-grade brightness of 12,000 lumens with a proprietary motion detection system to achieve a perfect balance between safety and sustainability.

1. 12,000 Lumens Brightness: Clear, Uniform Light, Eliminating Blind Spots

This streetlight uses high-efficiency LEDs to produce 12,000 lumens of 5000K cool white light—the same brightness standard used for highway ramps by the U.S. Department of Transportation. Unlike sodium lamps, which produce uneven “spots” and shadows, our optical lens design evenly distributes light across a 1,500-square-foot area, covering both lanes of traffic and sidewalks on both sides of the road.

2. Smart Motion Detection: Bright When Needed, Always Efficient

This light’s built-in passive infrared (PIR) motion sensor detects motion within a 30-foot (approximately 9-meter) radius and a 120-degree field of view, covering pedestrian crossings, bike lanes, and road edges. This intelligent feature saves up to 50% on energy compared to solar streetlights that maintain 100% brightness all night.

3. Safety Beyond Brightness: Durability for Municipal Applications

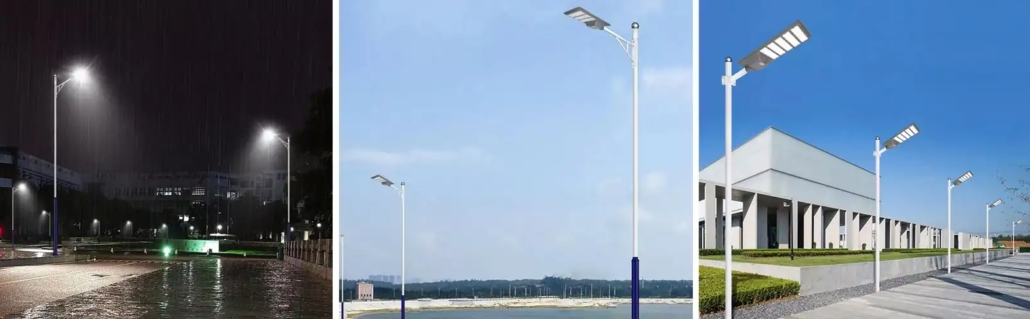
Municipal streetlights face harsh weather conditions—rain, snow, strong winds, and even vandalism. PowerDream’s high-power solar LED street lights are durable, with a lifespan of several years and extremely low maintenance costs:

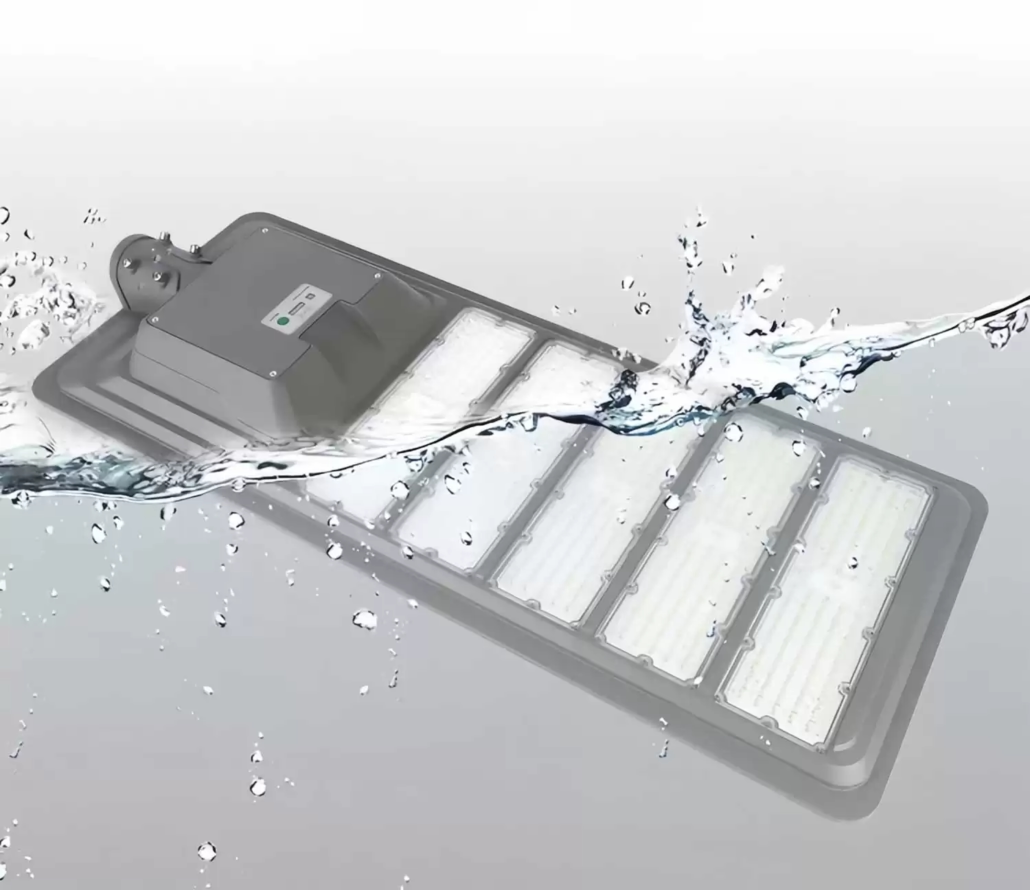
– IP65 Waterproof Rating: Effectively protects against rain, snow, and dust.

– Wind Resistance: Withstands hurricane-force winds.

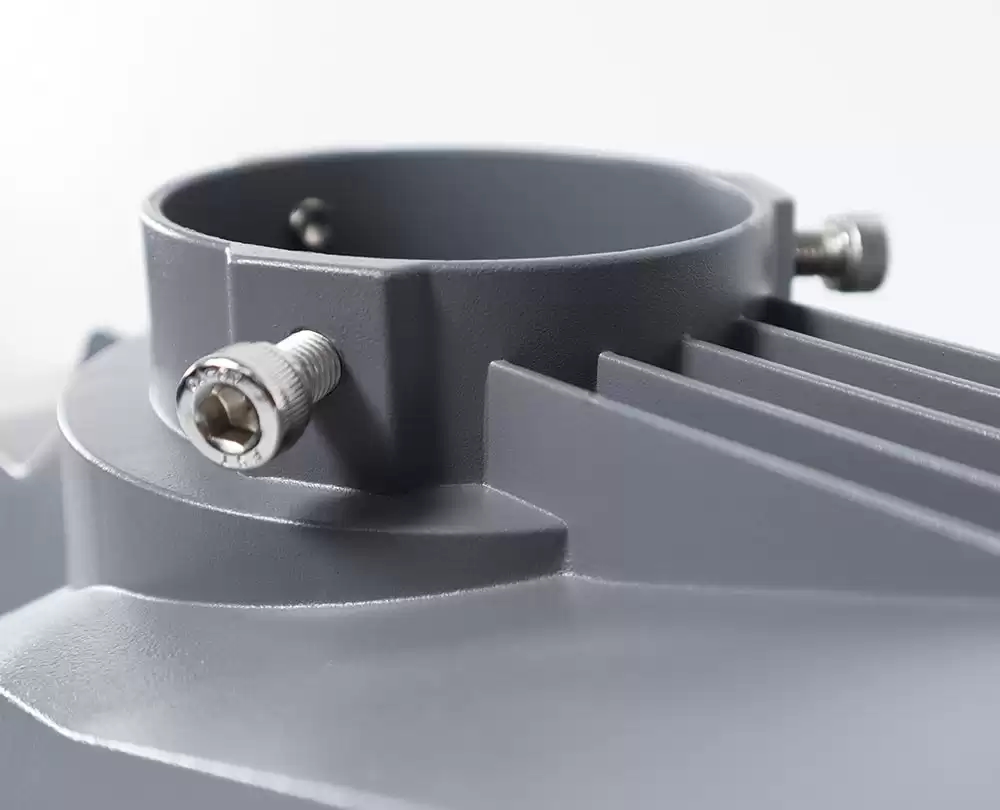
– Vandal-resistant design: A 3mm thick aluminum casing and tamper-proof screws prevent theft or damage.
12,000 Lumens Brightness Motion Detection for Enhanced Safety

Core components of the solar LED street light ensure reliability

The performance of a high-power solar LED streetlight depends on the quality of its components. PowerDream’s proprietary components in its solar LED street lights ensure 99.2% uptime, even during weeks of continuous cloudy weather.

1. 110W Monocrystalline Silicon Solar Panel: Maximizes Sunlight Absorption

This battery uses monocrystalline silicon cells, effectively absorbing sunlight even on cloudy days. A 6-hour charge stores enough energy to operate for 72 hours at 30% brightness or 24 hours at 100% brightness.

2. 140Ah Lithium-ion Battery: Long Lifespan, Maintenance-Free

We use deep-cycle lithium-ion batteries, which outperform lead-acid batteries in all aspects:

– Lifespan: 10 years, compared to only 3-4 years for lead-acid batteries.

– Depth of Discharge (DoD): 80% (using 80% of the capacity without damage), compared to only… 50%.

– Weather resistance: Usually operates in temperatures ranging from -40°F to 140°F – will not freeze or overheat.

The battery is installed in a weatherproof compartment at the base of the pole, making replacement very convenient (no climbing required).

3. AL6063+Teijin PC: Robust and durable, corrosion-resistant

The luminaire is mounted on a rust- and corrosion-resistant aluminum alloy pole. The steel pole comes with a base for easy installation and a cable management system to conceal wiring.
Core components of the solar LED street light ensure reliability

How to choose the right lighting solution for your municipal area?

Not every road needs the exact lighting solution – the required brightness and pole height vary between residential streets and industrial corridors. PowerDream’s team of municipal lighting experts will help you customize high-power solar LEDs to meet your specific needs. Streetlights should avoid unnecessary functions and ensure sufficient brightness in key areas.

First, the road type needs to be analyzed: residential, main road, commercial, or industrial. Traffic flow should be considered: peak pedestrian/cyclist/driver times. Sunlight and weather conditions should be assessed: average daily sunshine hours, average rainfall/snowfall. Simultaneously, existing infrastructure should be identified, including the availability of utility poles. If poles are in good condition, they can be reused and connected to the power grid. Next, the pole height and spacing should be selected, as these determine the uniformity of street lighting. We recommend: Residential streets: 12-foot poles, 50-foot spacing; Commercial/main roads: 15-20-foot poles, 75-foot spacing; Industrial/warehouse areas: 20-foot poles, 100-foot spacing. Feet. Finally, there’s customizable motion detection and brightness, allowing you to adjust the light settings to suit your area’s needs.

Brighter and Safer Street Lighting for You

PowerDream’s 400W high-power solar LED street light solves this problem. With 12,000 lumens of brightness, intelligent motion detection, and no grid charges, it provides the safety your community needs while saving you money. The 12,000 lumens, intelligent motion detection, and grid independence allow you to integrate it into your road system for brighter and safer street lighting.
Break free from grid dependence: Achieving energy independence through a solar hybrid system

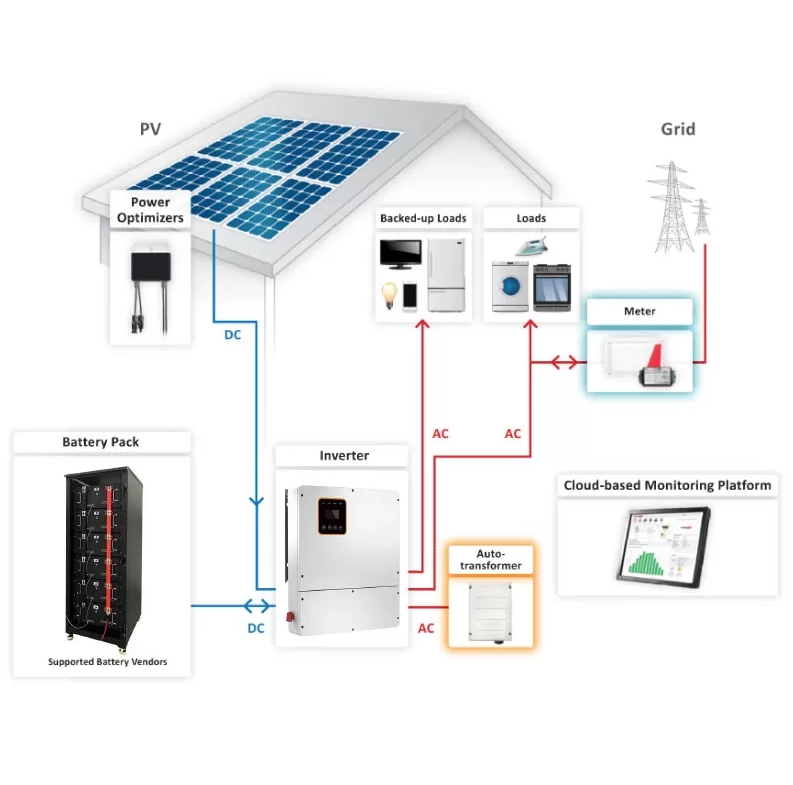
A solar hybrid system integrates photovoltaic power generation, battery storage, intelligent control, and grid-connected or generator power supply, providing reliable electricity, reducing electricity bills, and offering power backup during grid failures. In many regions and countries, residents are affected by power outages caused by severe weather and other environmental factors. To ensure reliable electricity and energy access for users in these areas, we will explain how a hybrid solar system reduces dependence on the grid, its advantages over traditional solar systems, and how to choose the right system for your needs.

Why a Solar Hybrid System is Superior to Individual Grid-Connected or Off-Grid Systems?

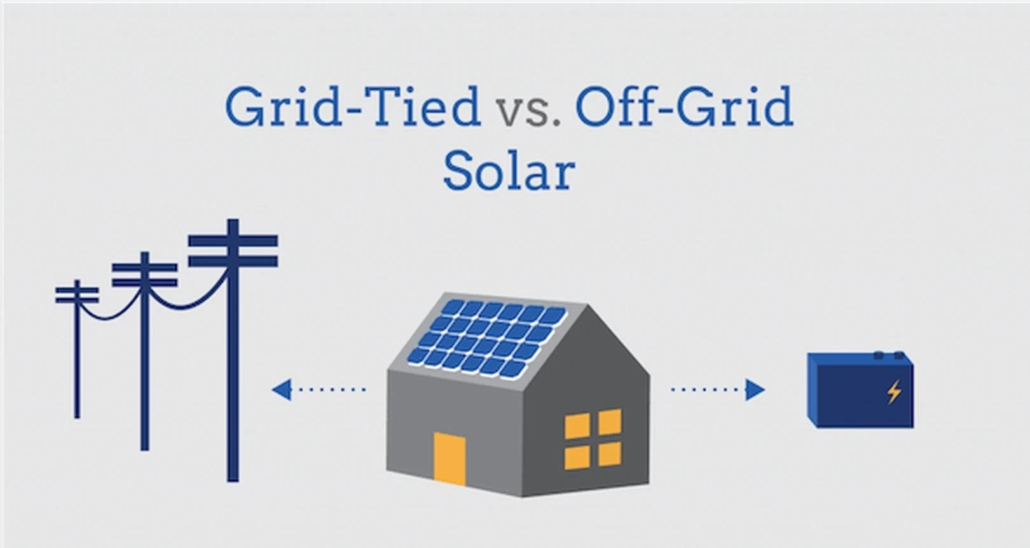
First, the most common solar systems are grid-connected and off-grid, but neither solves the core problem of grid dependence. A hybrid solar system combines the advantages of both, creating a reliable, self-sufficient energy source with a degree of security.

1. Grid-Connected Solar: Ineffective During Power Outages

Grid-connected systems use solar panels to power your home and feed excess energy back into the grid to offset your electricity bill (net metering). But the problem is: they stop working during power outages. Why? To protect power workers repairing transmission lines from reverse power generation. This means that even when it’s sunny, you’ll still be in darkness when the grid is down.

2. Off-Grid Solar: Independent, but Unreliable

Off-grid systems use solar panels and batteries to power your home without a grid connection. However, they carry risks: if your electricity consumption exceeds the battery’s storage capacity (e.g., a week of consecutive cloudy days), you’ll experience a power outage. They also require larger batteries to handle insufficient sunlight.

3. Solar Hybrid Systems: The Best Option for Independence

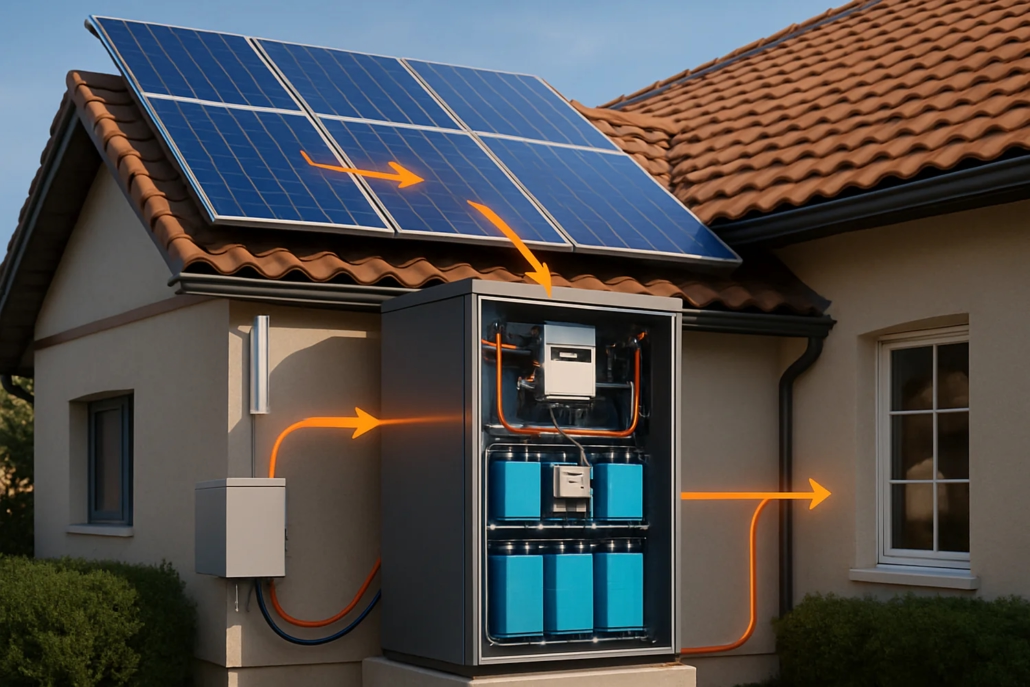
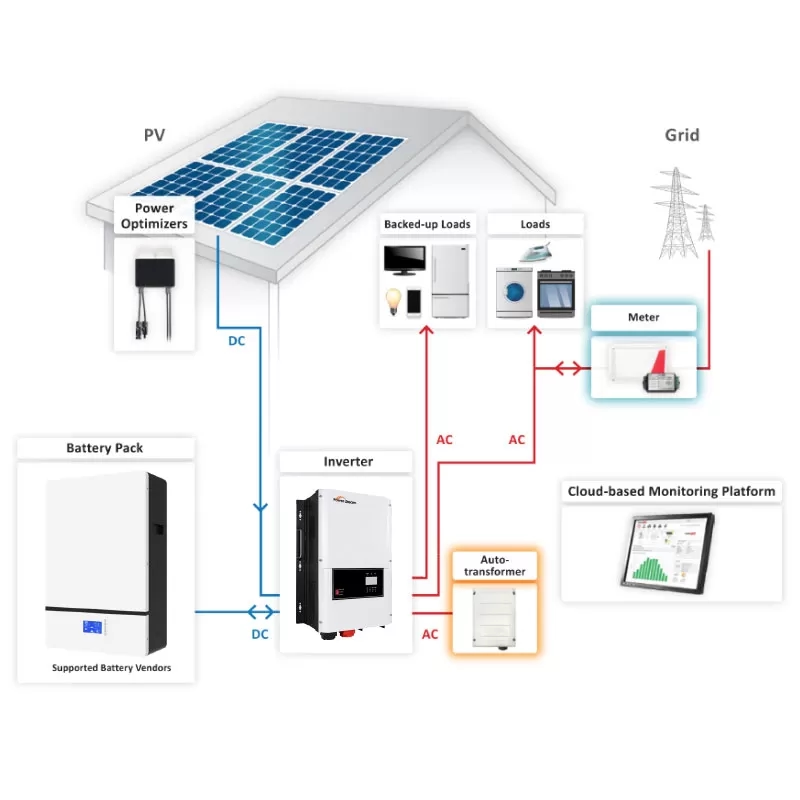
Solar hybrid systems combine solar panels with battery banks while maintaining grid connectivity. They work as follows: On sunny days, solar energy powers your home, and excess energy charges the batteries. On cloudy days or at night, the batteries supplement solar energy, reducing reliance on the grid. During power outages, the system automatically switches to battery power to keep the house running. The grid serves as a backup power source, only activated when the batteries are depleted.

Why a Solar Hybrid System is Superior to Individual Grid-Connected or Off-Grid Systems

Key Components for True Energy Independence in Hybrid Solar Systems

The power of hybrid solar systems lies in their components—each meticulously designed to work together to ensure reliability and energy self-sufficiency. PowerDream’s solar hybrid systems consist of three core components, all optimized for energy independence.

1. High-Efficiency Solar Panels: Maximizing Sunlight Capture

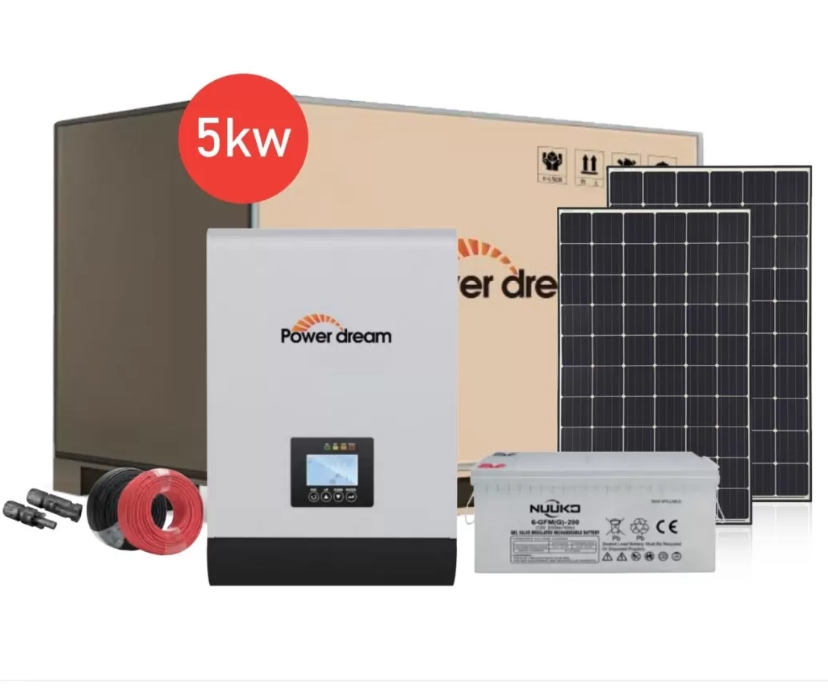
We use high-efficiency monocrystalline silicon solar panels that capture more sunlight, even on cloudy days. A 5kW system (10-12 panels) is suitable for most residential rooftops, generating 600-750 kWh per month in sunny areas and 400-550 kWh per month in less sunny regions.

2. Hybrid Inverter: The Core Control of the System

The hybrid inverter is key to the system’s “intelligence.” It converts the direct current (DC) generated by the solar panels into alternating current (AC) for home use, manages battery charging and discharging, and seamlessly switches between solar power, batteries, and the grid. PowerDream inverters feature two key functions for independent power generation:

– Dual MPPT: Optimizes power generation even when some solar panels are partially shaded.

– Zero Output Mode: Allows you to store all excess solar energy in the battery for use during power outages.

3. Lithium-ion Battery Pack: Stores electricity on demand to meet your needs

Batteries are key to energy independence—we use only high-quality lithium-ion batteries to ensure their long lifespan and superior reliability. Our 10kWh battery stores enough energy to power a 2000 sq ft home for 1-2 days of everyday use, or 3-4 days if you prioritize essentials.

Key Components for True Energy Independence in Hybrid Solar Systems

Smart Energy Controller: Monitor energy management via your smartphone

You can connect to your hybrid solar system via an app to track energy usage, battery level, and solar power generation in real time; you can also set priority modes, such as a “standby mode” during storms or an “energy-saving mode” during peak hours. Beyond its core appeal, the authentic charm of a hybrid solar system lies in its user-friendliness and ease of operation—you don’t need to toggle switches or manually adjust settings, as it automatically adapts to sunlight, your electricity consumption patterns, and grid conditions, thus maintaining your energy independence.

Furthermore, excess energy is stored in the battery, which starts at 70% after nighttime use and rises to 85% by 10 AM. Solar power peaks between 10 AM and 3 PM, while the home’s HVAC, dishwasher, and children’s tablet consume approximately 1.5 kW; this means there’s a surplus of 1.5-2.5 kW to charge the battery, which reaches 100% capacity by 1 PM. The system then switches to “zero-output mode,” storing all excess solar energy instead of feeding it into the grid for later use.

How to Choose a Hybrid Solar System for Your Energy Independence Goals?

Not all hybrid solar systems are created equal—size, components, and design are all crucial. The right system for you depends on your energy consumption, location, and priorities. Find the perfect system for you by following these four steps—the PowerDream team will handle the rest:

Step 1: Calculate Your Energy Needs

First, review your electricity bills from the past 12 months. Find your average monthly electricity consumption and peak consumption. A household using 600 kWh per month needs a 5 kW system; a small business using 1200 kWh per month needs a 10 kW system.

Step 2: Assess Your Sunlight and Space

The orientation, shading, and area of ​​your roof determine how many solar panels you can install. South-facing roofs receive the most sunlight, but east-west facing roofs can also work with PowerDream’s dual MPPT inverters. A 5kW system requires 150–200 square feet of unshaded roof space; a 10kW system requires 300–350 square feet. If you have limited roof space, we offer ground-mounted solar panels.

Step 3: Choosing Battery Capacity

Battery capacity depends on how long you want to maintain independent power during a power outage:

10kWh (most popular): Powers a home for 1-2 days or 3-4 days.
15kWh: Powers a home or small business for 2-3 days or 5-6 days.
20kWh and above: Suitable for rural homes or businesses requiring longer backup power.

Key Components for True Energy Independence in Hybrid Solar Systems

Installation, Operation, and Maintenance Best Practices

Proper installation and operation of a solar hybrid system ensures efficient and safe operation. Obtaining the necessary permits and inspections before installation, and complying with local building, electrical, and fire regulations, will protect your legal and financial interests. Furthermore, plan for an easy-to-install location, placing the batteries and inverter in a well-ventilated, temperature-controlled area to maximize lifespan and ensure safety. Utilize real-time monitoring technology to monitor power flow, battery health, and alarm status. Remote diagnostics reduce downtime and streamline support processes. Then, schedule preventative maintenance, check electrical connections, test generator starting functionality, verify battery voltage, and update system software annually or as directed by the manufacturer. Most importantly, install appropriate fire extinguishers where needed, label critical circuits, and ensure emergency personnel can quickly disconnect circuits.

Achieve Energy Independence for Your Home

Solar hybrid systems not only save you money but also enable you to achieve energy independence. At PowerDream, we design solar hybrid systems around three key engineering priorities: reliability, efficiency, and user-centric operation. First, we use integrable components, long-life photovoltaic modules, hybrid inverters with intelligent EMS, and battery systems seamlessly with predictable cycle life. Second, our systems include flexible operating modes: grid-connected, self-consumption maximization, and safe islanding with load priority. Third, we provide comprehensive commissioning, monitoring, and warranty services for installations.

On Grid Solar System with MIN inverter: suitable for small space applications

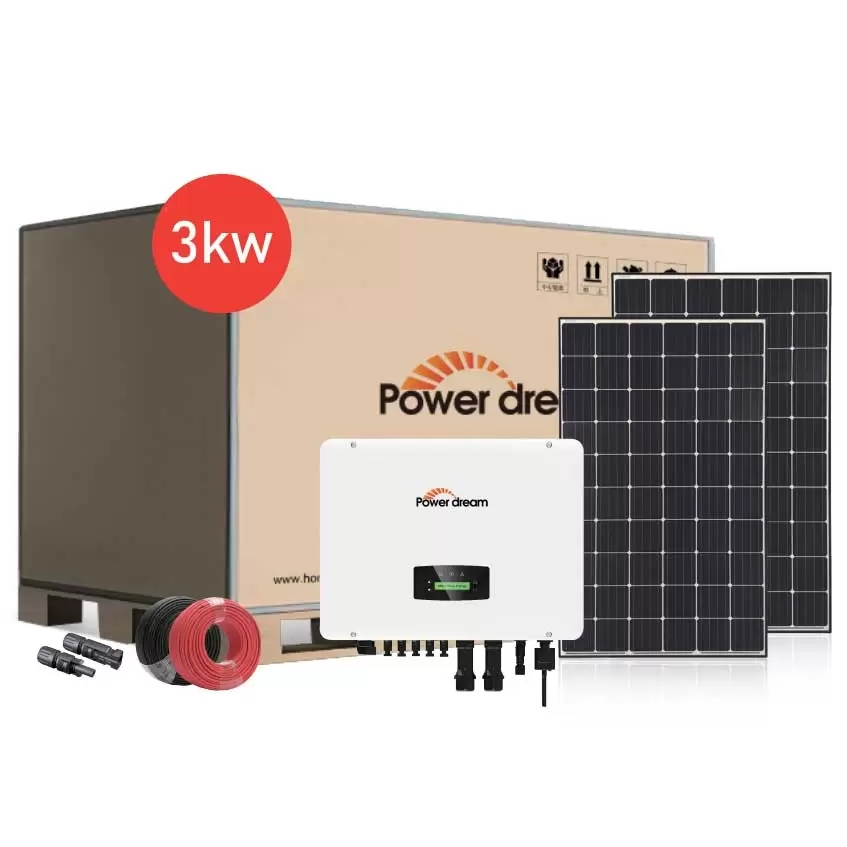
In many countries and cities, homeowners cite limited space as the primary reason they haven’t installed on grid solar systems. To address this issue, we’ve designed 3kW and 10kW on grid solar systems based on the MIN series inverters (3kW systems use the 3000TL-X, and 10kW systems use the MIN10000TL-X/XE). These compact, energy-efficient systems are designed to transform even the smallest spaces into energy hubs. Therefore, we will detail how our grid-connected solar systems equipped with MIN inverters solve the challenges of small spaces and which users each system is best suited for.

The Obstacle of Small Spaces and Why An On Grid Solar System Can’t Solve It?

Why has the small space remained a bottleneck for solar energy applications? First, on grid solar systems consist of two indispensable components: solar panels and inverters. Traditional systems fail in confined spaces primarily for two reasons.

First is the bulky inverter. A standard 10kW on grid inverter is about the size of a mini-fridge and requires additional ventilation space. This equates to a waste of over 3 square feet of valuable space, often forcing solar panels to be installed in less efficient areas. For a 3kW system, a traditional inverter is still as large as a microwave oven, taking up space that could have accommodated more solar panels.

Secondly, the panel layout is fixed. Traditional inverters use a single MPPT technology, meaning all panels must face the same direction and angle. In confined spaces, this wastes available space—you can’t utilize narrow corners or multiple orientations to install more panels. Therefore, the issue isn’t just about space, but about balance. Users in small spaces need a compact yet powerful grid-connected system.

The Obstacle of Small Spaces and Why An On Grid Solar System Can't Solve It 2-3 (1)

MIN Inverters in On Grid Solar System—Compact and Powerful

PowerDream’s MIN inverters (3000TL-X for 3kW systems, MIN10000TL-X/XE for 10kW systems) are at the heart of our small-space on grid solutions.

1. Unbelievably Large Size

The 3000TL-X inverter (for a 3kW on grid solar system) measures approximately 15.75 x 22.41 x 6.98 inches, allowing wall mounting, under-eave installation, or even installation in a power room without a dedicated outdoor space. The 10000TL-X/XE inverter(for a 10kW on grid solar system) is only slightly larger, measuring approximately 15.8 x 25.2 x 7.4 inches. This represents a 70% space saving compared to conventional inverters.

2. Dual MPPT: Flexible Layout for Irregular Spaces

The MIN series inverters all feature Dual MPPT technology—meaning they can control two sets of solar panels with different orientations. This is a revolutionary feature for small spaces. For example, suppose your roof has a section facing south and a narrow wall facing west. In that case, you can install solar panels in both areas separately. Furthermore, PowerDream’s tests show that dual MPPT technology can increase power generation by 15-20% in irregularly shaped, small spaces.

3. High Efficiency and Energy Saving: Small Space, High Power

Compact size doesn’t mean compromised performance. The 3000TL-X boasts a conversion efficiency of up to 97.5%. In comparison, the MIN10000TL-X/XE achieves an even higher 98%, meaning your solar panels can convert more sunlight into usable electricity. In small homes, homeowners must fully utilize every square foot of solar panel space.

3kW and 10kW: Tailored for Small Spaces

PowerDream’s MIN inverter solar systems are available in two configurations—3kW and 10kW—each designed for specific small space needs. Whether you’re a homeowner with a small roof or a small business owner with a terrace, there’s a grid-connected solar system to choose from.

on-grid-solar-system-1

3kW and 10kW: Suitable for Residential and Small Apartments

Ideal Applications: Detached houses, apartments with balconies/terraces, or home offices. Required Space: 40–60 square feet (5 monocrystalline 550W solar panels).

Key Features: 3000TL-X inverter, dual MPPT controller, up to 97.5% efficiency, 5-year warranty.

10kW On Grid Solar System: Suitable for small businesses and multi-unit buildings.

Ideal Applications: 2-4 unit apartment buildings or small offices (500-2,000 square feet).

Required Space: 100-120 square feet (18 monocrystalline 550W solar panels).

Key Features: MIN10000TL-X/XE inverter, dual MPPT controller, 98% efficiency, built-in surge protection, 5-year warranty.

Flexible Installation Options

Both systems are suitable for non-traditional installations—crucial for small spaces. We offer wall-mounting options that allow panels to be installed on exterior walls or awnings, enabling them to double as awnings for outdoor spaces. Ground-mounted installations utilize a low-profile design suitable for small patios or side spaces.

3kW and 10kW Suitable for Residential and Small Apartments (2) (1)

High Efficiency, Reliability, and Seamless Grid Integration

A compact size is a significant highlight, but our on grid solar systems equipped with MIN inverters continue to generate value even after installation. These systems are carefully designed to be efficient, reliable, and seamlessly integrated with the grid—addressing the main concerns of small-space users regarding grid-connected solar systems.

As a on grid system, it connects directly to your local power grid. When your solar panels generate more electricity than you consume, the excess power flows back to the grid, and your electricity company deducts it from your account. For small-space users, this can turn limited space into extra income. Furthermore, MIN inverters allow you to monitor power generation, track energy savings, and receive alerts when the system requires maintenance via your mobile phone. MIN inverters also have an IP65 weatherproof rating, meaning they can withstand rain, snow, dust, and extreme temperatures. Furthermore, our on grid solar systems comply with all US utility standards (UL 1741, IEEE 1547). 98% of US utility companies approve them. We handle the permitting and grid connection process for you, saving you time and effort.

Having the Right System

Many solar product manufacturers tend to overlook small spaces, either offering small, low-performance systems or simply telling customers “it’s not possible.” PowerDream’s 3kW and 10kW on grid solar systems, using MIN inverters, completely solve these problems, specifically designed for small spaces, rather than ignoring them. The 3000TL-X and MIN10000TL-X/XE inverters are not only compact but also more innovative, more efficient, and more flexible than traditional models. Combined with our high-efficiency solar panels and flexible mounting brackets, you can transform a small rooftop, balcony, or patio into a cost-effective solar asset.

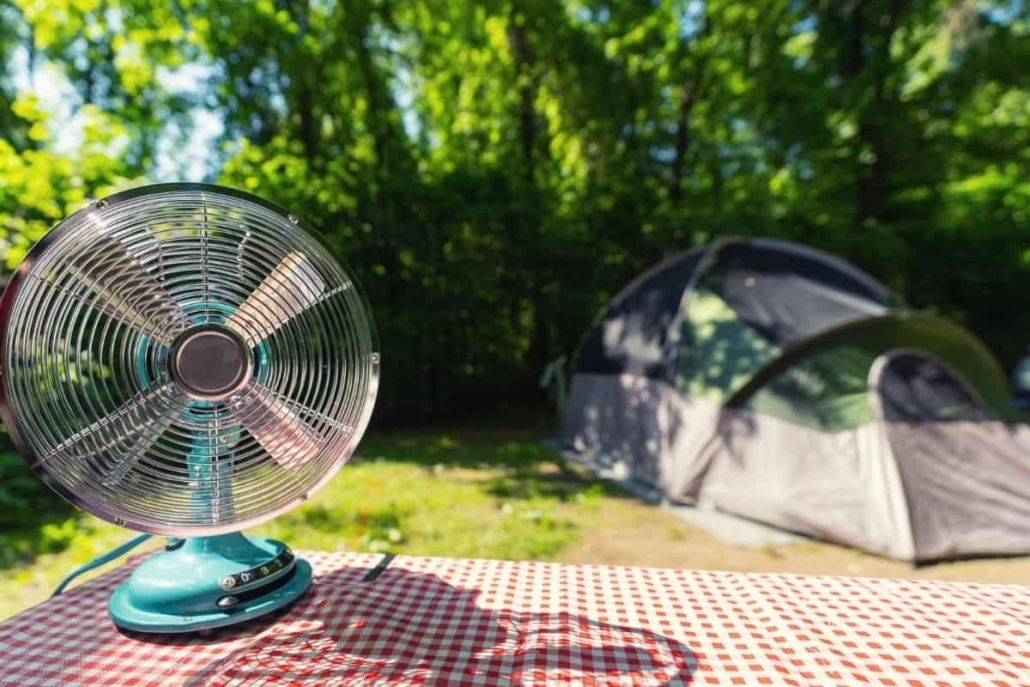
The perfect solar-power fan for camping: intelligent human detection technology

78% of campers report battery anxiety with traditional camping fans—either the fan suddenly runs out of power, or it wastes electricity when no one is in the tent. Worse still, these campers say they forgo bringing a fan altogether, sacrificing comfort for convenience. That’s why our PowerDream is the perfect camping solar-power fan: it’s the first fan to use Intelligent Human Detection technology, allowing it to “sense” your needs. Our solar fan is 65% more energy-efficient than traditional fans, lasts 3 times longer on a single charge, and requires no manual adjustments. This enhances your camping comfort and transforms your outdoor camping experience.

Traditional camping fans suffer from continuous operation issues

Whether battery-powered or basic solar-powered, they have three fatal flaws that not only undermine camping comfort but also waste resources. First, unnecessary battery drain. Traditional fans run at full power all day, even when no one is in the tent. Our tests show that a standard 10,000 mAh battery will run out of control in 5-7 hours if left on continuously. Secondly, manual adjustment compromises convenience. Waking up at 2 AM to lower the fan’s power diminishes the camping experience. Thirdly, solar energy utilization is low. Ordinary solar fans charge during the day but don’t prioritize energy saving at night. Furthermore, traditional fans are not only uncomfortable but also unsafe when temperatures rise.

Traditional camping fans

Solar-Power Fan with Smart Human Detection Technology

The PowerDream camping solar-power fans solve these problems with a core innovation: innovative human detection technology.

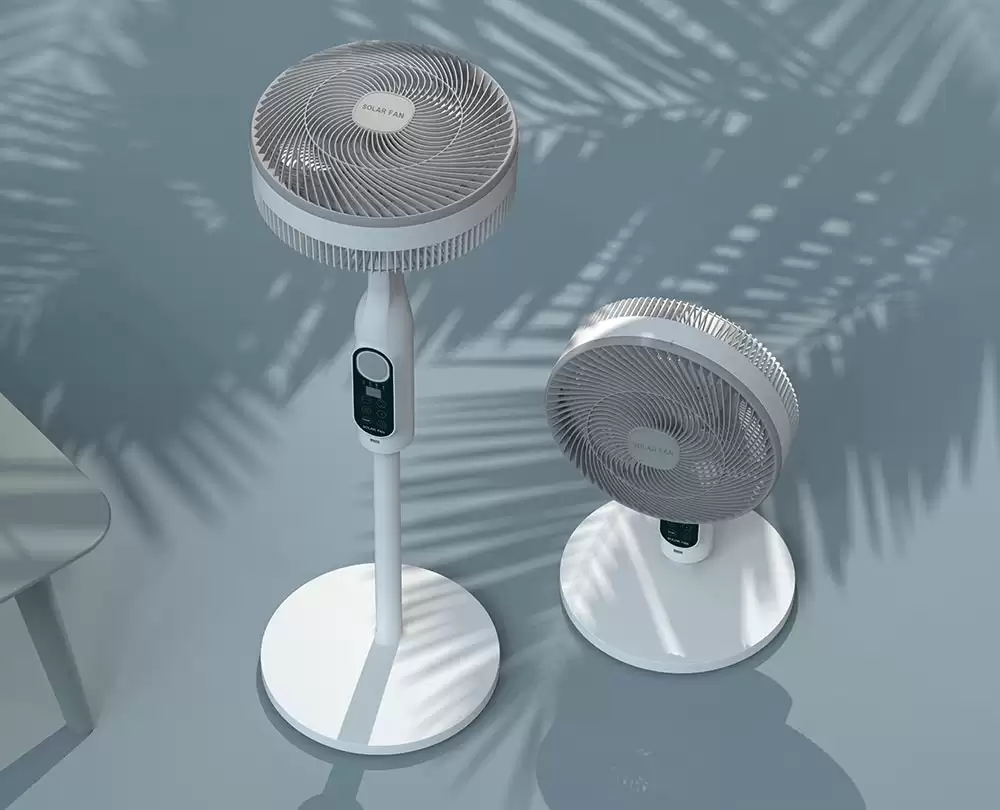
Simply put, it works like this: The fan has built-in sensors that detect body temperature and movement within a 10-foot radius. When you enter the tent, the sensors trigger the fan to immediately switch to your preset airflow level and turn on the built-in LED light in low light conditions. When you leave the tent, whether to get water or go to the restroom, the sensors detect the absence of heat and human movement, and the fan performs two actions: adjusting the light brightness to 10% and switching to a silent, energy-saving mode. In our tests, we found that this solar fan runs for an average of 18-22 hours on a full charge, while traditional fans last only 5-7 hours. Best of all? It requires absolutely no manual operation. This is the power of intelligent human-detection technology: your fan will work for you, not against you.

Solar-Power Fan with Smart Human Detection Technology

Key Features of a Solar-Power Fan Essential for Camping

Intelligent human detection technology is at the heart of this solar-powered fan, but it was designed with the outdoor environment in mind from the outset. We’ve equipped it with several features specifically designed for camping. First, it delivers airflow on demand, offering three speed settings: low for sleeping, medium for daytime tent cooling, and high for hot afternoons. Second, it integrates LED lighting with three modes: full brightness, low brightness, and strobe. Unlike separate camping lights, this solar fan’s LED lamp is integrated into the fan, eliminating the need for an individual device. It also features dual charging via solar power and USB, making it easy to handle various weather conditions. The 5W monocrystalline silicon solar panel can fully charge the fan in 6-8 hours of direct sunlight, and you can charge it via USB on cloudy days.

Best Practices for Real-World Camping

Good camping gear solves specific problems—and our solar fan excels in the scenarios campers encounter most often. Family camping is always busy, with children playing outside or going to the bathroom. Innovative sensing technology means the fan never wastes electricity when the tent is empty. For group camping, everyone’s comfort needs are different. Our fan has three speed settings for campers to adjust to their preferences, while a PIR sensor ensures it only consumes power when someone is using it. For solo camping, the built-in LED light eliminates the need for a separate camping light, and the strobe mode adds peace of mind.

Best Practices for Real-World Camping (1)

Your camping comfort deserves “on-demand” intelligence.

The point of camping is to escape the hustle and bustle of daily life, not to struggle with a broken fan or waste energy. The PowerDream camping solar-power fan uses human body-sensing technology to automatically start when you need it and automatically conserve energy when not in use, keeping you comfortable and safe outdoors. Compared to traditional fans, our fan runs for 3 times longer, consumes 65% less energy, and requires no manual adjustment. It’s more than just a fan; it’s a two-in-one tool that combines comfort and safety, making your trip easier and more convenient whether you’re camping with family, friends, or alone.

Complete Guide to Choosing a Solar Mounting System: Rooftop vs Ground-Mounted

Most homeowners and business owners allocate 90% of their solar budget to solar panels and inverters. However, the solar mounting system, which supports these panels, determines 30% of the system’s efficiency and 40% of its long-term reliability. Therefore, choosing the correct installation method maximizes sunlight utilization, reduces maintenance costs, and protects your investment. An inappropriate choice can lead to performance degradation, repairs, or even the replacement of the entire system. As a solar product supplier, we understand that the choice between rooftop and ground-mounted installations ultimately depends on five factors: space, sunlight conditions, budget, roof condition, and long-term goals. Therefore, we combine on-site testing and customer case data to analyze the advantages, disadvantages, and ideal application scenarios of each option in detail.

The Core Difference Between Rooftop and Ground-Mounted Solar Mounting System

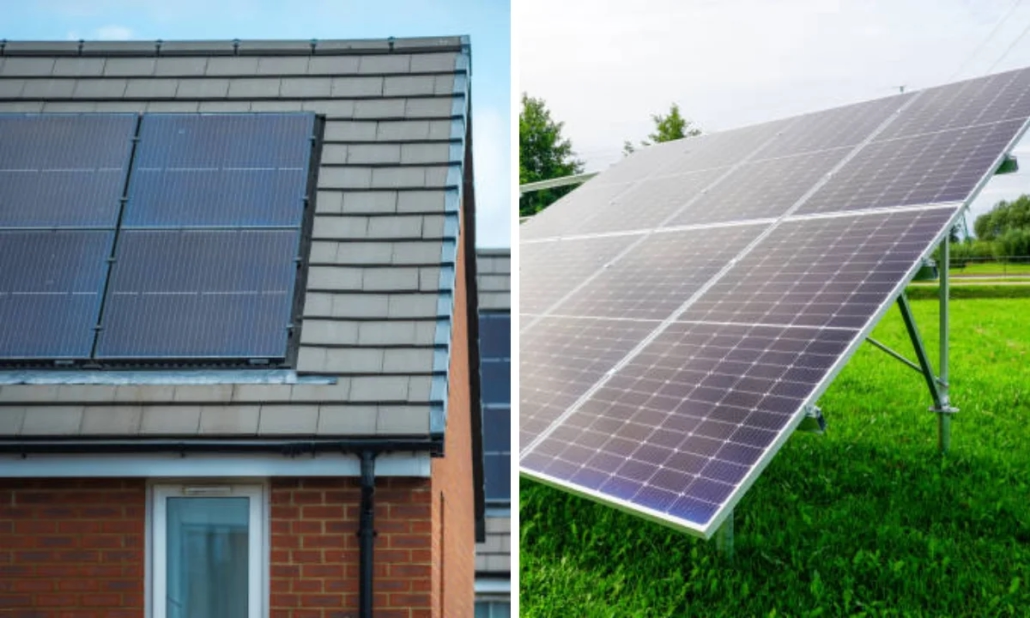
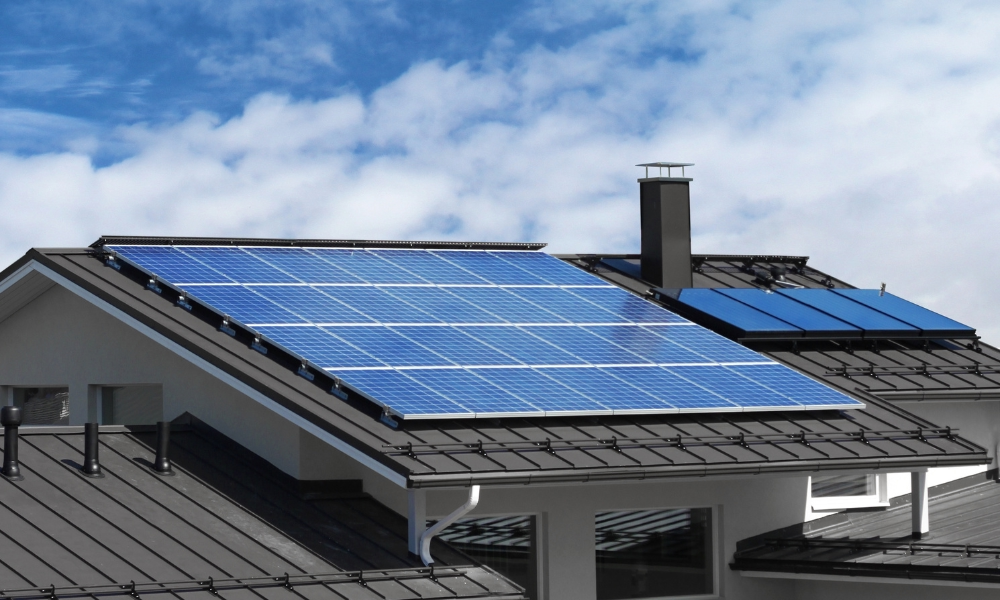
Both solar mounting systems can mount solar panels, but their design, installation, and performance differ. First, there’s their compatibility with your home. Rooftop solar mounting systems use solar mounting brackets, rails, and anchors to secure the panels directly to the roof. It makes full use of existing roof space, thus not taking up yard or land area. Common rooftop solar installation systems include:

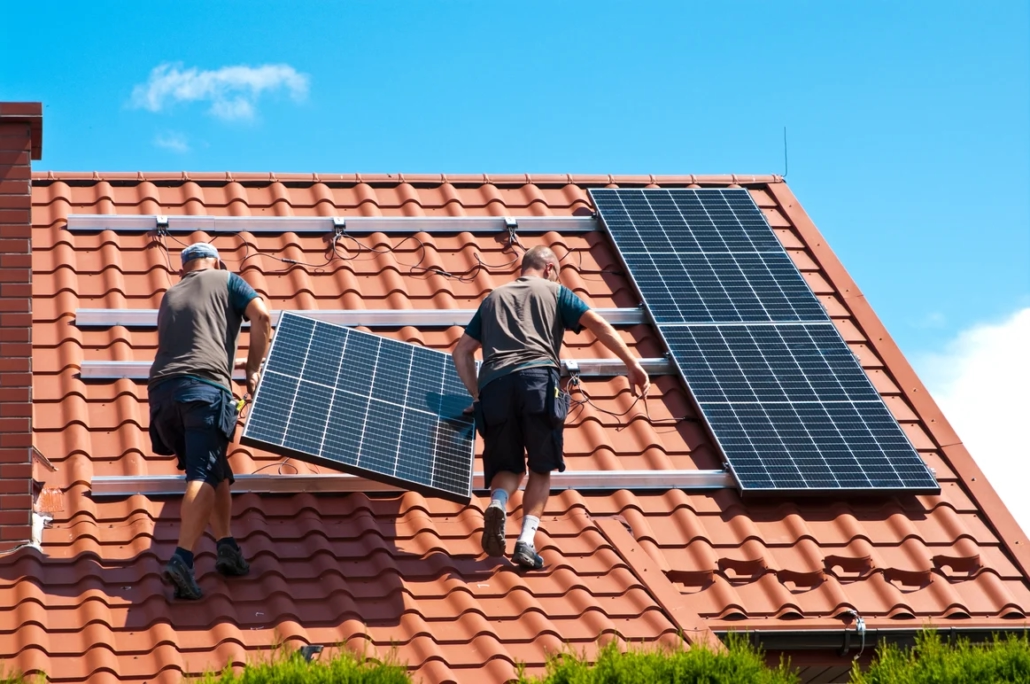
Pitched roof mounting: Suitable for sloping roofs (asphalt, metal, tile); Flat roof brackets: Suitable for commercial buildings or residential flat roofs, these brackets use counterweights instead of drilling for fixation; Adjustable tilt brackets: These brackets allow you to adjust the angle of the solar panels according to the season to increase sunlight exposure.

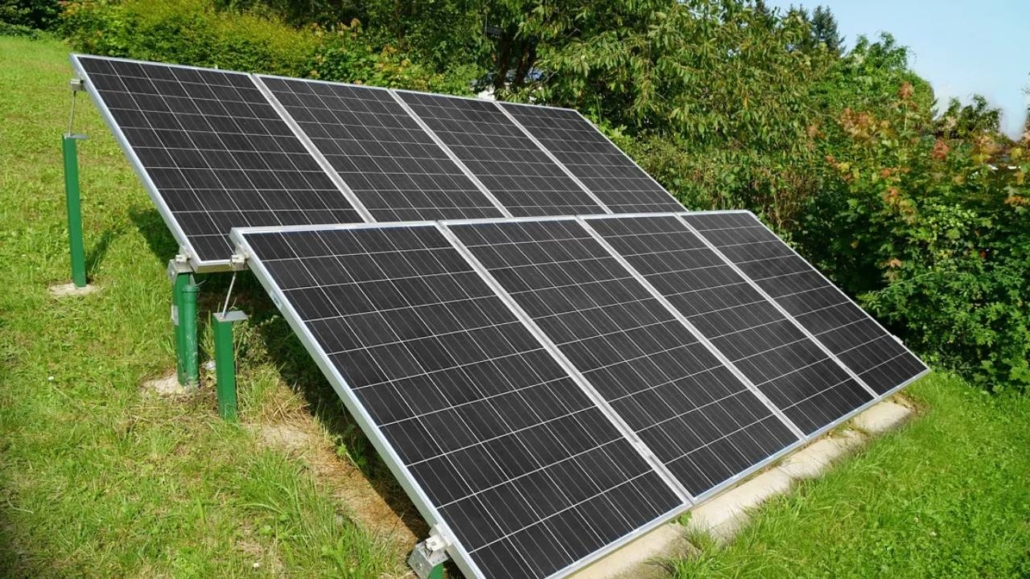
Ground-mounted solar mounting systems mount solar panels on poles or frames fixed to the ground, typically installed in patios, fields, or vacant land. It offers greater flexibility in terms of installation location and tilt angle, but requires ample open space.

The Core Difference Between Rooftop and Ground-Mounted Solar Installation Systems

Advantages of Rooftop Solar Mounting System and When to Choose Them

Rooftop solar mounting systems are the most popular choice for residential customers—most of PowerDream’s residential installation projects use rooftop mounting—because they solve two significant problems: limited space and budget constraints.

Space Saving: Ideal for urban and suburban homes

If your patio area is small or used for gardening, play, or parking, a rooftop solar mounting system can make the most of the space on your roof. A 5kW system only requires 35-40 A of square footage of roof space, roughly equivalent to the size of a small patio.

Lower Cost: Faster Installation, Less Material

Rooftop solar systems cost 20% to 30% less than ground-mounted systems because they use less material, have shorter installation times, and lower installation costs.

No Land Permit Required:

Ground-mounted solar systems typically require a land-use zoning permit, especially in communities governed by a Homeowners Association (HOA) or a historic district. Rooftop solar systems are usually covered by standard solar licenses, which result in faster approval processes.

Advantages of Rooftop Solar Installation Systems and When to Choose Them

Advantages of Ground-Mounted Solar Systems

Ground-mounted solar systems are uncommon in urban residences but are common in commercial projects and rural homes. Their flexibility and efficiency make them worthwhile if you have enough space.

Maximum Efficiency: Optimal Tilting Angle and Sun Coverage

Unlike rooftop installations, ground-mounted solar systems allow you to set the optimal tilt angle based on your location. Power generation can be increased by 8-10% compared to a 25° tilt rooftop installation. Power generation can be further improved by adding a tracking system. 15-20%.

Easy Maintenance

Cleaning, inspecting, or repairing ground-mounted solar panels is safer and more economical—no ladders or roof work required. For homeowners with limited mobility, ground-mounted solar panels eliminate the risk of falls when cleaning panels themselves.

Scalability: Expand Your System Over Time

Ground-mounted systems are easy to expand if you plan to add more solar panels, for example, to power electric vehicles or for home extensions. PowerDream’s modular ground-mount design allows you to add 1-2 solar panels at a time without significant modifications.

No Roof Risk

Old, fragile tiled, or structurally complex roofs are not suitable for rooftop solar systems. Ground-mounted solar systems avoid roof damage, leaks, and load-related issues.

Advantages of Ground-Mounted Solar Systems

Key Factors to Help You Choose the Right Solar Mount

The choice between rooftop and ground-mounted is not about “which is better,” but about “which is better for your home.” PowerDream engineers use a 4-factor evaluation method to recommend the right solar mounting system for each customer. You can use this process to narrow down your choices.

1. Space Availability: Careful Measurement and Decision-Making

First, measure two dimensions: roof space and patio space. For rooftop installation: calculate the available roof area (excluding skylights, chimneys, and shaded areas). For ground-mounted installations, mark shaded areas and ensure at least 30 square feet of space per kilowatt.

2. Budget: Balancing Upfront Costs and Long-Term Savings

Rooftop solar systems have lower upfront costs, but ground-mounted systems may be more cost-effective in the long run due to their higher efficiency. If you plan to live in your current residence for more than 10 years, the higher savings from a ground-mounted system may outweigh the longer payback period. If you plan to sell your home in 5 years, the lower cost of a rooftop solar system is more beneficial to your property’s resale value.

3. Local Regulations and Homeowners Associations (HOAs)

Check the planning regulations and homeowners’ association (HOA) rules in your city. Some homeowner’s associations prohibit ground-mounted solar systems or restrict the color of roof panels.

4. Climate and Weather

In snow-prone areas (such as the northeastern and midwestern United States), rooftop installations are easier to clear of snow (due to gravity) than ground-mounted installations, but ground-mounted installations are easier to clear. In hurricane-prone areas, PowerDream’s wind-resistant solar mounting brackets (capable of withstanding 150 mph winds) are suitable for both rooftop and ground-mounted installations, but ground-mounted installations require deeper bases.

Key Components – Solar Mounting Brackets and More

The quality of a solar mounting system depends on its components. Cheap solar mounting brackets, rails, or anchors are prone to damage, leading to solar panel displacement, leaks, or even detachment. PowerDream systems use commercial-grade components designed for a lifespan of over 20 years, and we prioritize the following three key components:

1. Solar Mounting Brackets: The Foundation of Stability

Brackets secure the solar panels to rails (roof mounting) or frames (ground mounting) and must withstand wind, snow, and the weight of the solar panels. We use two materials:

– Aluminum Brackets: For roof mounting systems, aluminum is lightweight (reducing roof load by 40%) and rust-resistant. Our brackets undergo a powder-coated process to resist rain and UV radiation.

– Stainless Steel Brackets: For ground mounting systems, steel is stronger and ideal for movable tracking brackets. These steel brackets undergo hot-dip galvanizing, which effectively prevents rust even in coastal or humid areas.

2. Rails: Even Load Distribution

The rails run horizontally across the panel, evenly distributing weight. Our extruded aluminum rails (roof mount) and steel rails (ground mount) feature a hollow construction—lightweight yet robust. The rails are pre-drilled for easy installation and are compatible with all panel sizes.

3. Anchors and Fasteners: Preventing Leaks and Displacement

Roof anchors are bolted to the roof rafters (not just the cladding), and the holes are sealed with EPDM rubber gaskets—100% leak-proof. Ground mount anchors use concrete bases or helical piles.

All our solar mounting system components come with a 25-year warranty, and every batch of brackets and rails is tested in our in-house laboratory to ensure they meet our standards.

Choose the right installation system for you.

The key to choosing between roof- and ground-mounted systems is matching the system to the unique characteristics of your property, including space, roof condition, budget, and climate. For urban/suburban homes with good roof conditions, roof mounting can save money and space. For rural homes and commercial properties with open land, ground mounting offers the highest efficiency and scalability.

How to resolve power inconsistencies in an off grid solar kit for small residential homes?

In the United States, small homes are the fastest-growing housing type, with 63% of homeowners opting for an off grid solar kit for sustainability and cost savings. However, small homes present unique limitations, including limited roof space, unpredictable energy demand, and tight budgets, making power instability a common problem. Consequently, many homeowners frequently experience fluctuating power levels. This power instability is not part of off grid living, but a solvable issue rooted in four key factors: incompatible off grid solar kits, improper installation, inadequate maintenance, and outdated control systems. Therefore, this guide will utilize our field test data to explain in detail how to diagnose, repair, and prevent these problems.

Why Off Grid Solar Kit’s Power Instability Has the Greatest Impact on Small Homes

Small homes are more susceptible to power instability than traditional homes. This is primarily due to three unique characteristics of using off grid solar systems in small homes, each of which can amplify minor flaws into serious malfunctions.

First, limited energy storage and generation capacity. Small homes typically have only 10-20 square feet of available roof space for solar panels, while standard homes have over 100 square feet. This means that most small off-grid home solar systems have a daily power generation limit of 1-6 kWh and a battery storage capacity of 5-10 kWh. Even a small drop in panel output or a sudden surge in load can deplete the battery or trip the inverter.

Secondly, energy use is variable and concentrated. Small homes concentrate all living needs in a small space: cooking, heating, charging appliances, and other household appliances all rely on the same small off grid solar system. These appliances combined can exceed the inverter’s power limits, causing the system to shut down. Thirdly, 58% of small homeowners build their own off-grid solar systems, often using a mix of cheap and incompatible components. Such combinations can result in the battery not being able to store enough energy generated by the solar panels, or the inverter being unable to handle the battery’s output power.

Why Off Grid Solar Kit's Power Instability Has the Greatest Impact on Small Homes

Power Instability Troubleshooting – Three Steps to Find the Root Cause

Before replacing parts or upgrading your off grid solar system, you need to diagnose the problem. Power instability is rarely caused by a problem with the solar panels themselves; it’s almost always a failure of a specific component or setup. We offer a three-step diagnostic process for every customer, which you can also complete yourself in 30 minutes.

Step 1: Test Solar Panel Output – Is Your Energy Reliable?

Solar panels are the foundation of an off grid solar system – if they don’t perform well, everything else will fail. Between 10 AM and 2 PM, connect a multimeter to the solar panel’s positive and negative terminals and measure its output. For a 300W panel, under direct sunlight, you should see 18-22V (open circuit voltage) and 13-15A (current). If the output power is more than 20% lower than the rated power, the problem may be due to shading, dust or debris, aging, etc.

Step 2: Check Battery Health – Does Your Battery Pack Still Have Power?

Batteries store energy for use on cloudy days and at night – if the batteries are low, your off grid solar system will fail when it’s most needed. After fully charging, use a multimeter to test the battery voltage. Lithium-ion batteries: Voltage should be 13.2–13.6V (12V system). A reading below 12.8V indicates degraded battery performance. Lead-acid batteries: Voltage should be 12.6–12.8V (12V system). Below 12.4V indicates reduced capacity.

Step 3: Verify Inverter and Controller Performance – Is the Power Conversion Correct?

The solar inverter converts DC battery power to AC, while the charge controller regulates the power flow from the solar panels to the batteries. Both are common points of failure. To test the inverter output, plug a multimeter into a 120V outlet powered by the off grid solar kit – the voltage should be 115–125V. If the voltage is below 110V or above 130V, the inverter is faulty. For the charge controller, check if the battery is in a “float charge” state after being fully charged. If the battery remains in a “constant current charging” state after 8 hours of sunlight, the controller cannot adjust the power, leading to overcharging or undercharging.

Ensure Component Matching in Off Grid Solar Kit

The biggest reason for unstable power in small home off grid solar kits is component mismatch. For example, a 400W solar panel paired with a 50Ah battery won’t work together. PowerDream’s off-grid solar systems are meticulously designed to match generation, storage, and conversion ideally.

Here is our formula for matching components to small homes based on daily electricity consumption (DEU):

1. Calculate your daily electricity consumption: Use a smart energy monitor to track your consumption. Most small homes consume 2-5 kWh per day.

2. Solar Panel Size: Multiply your daily electricity consumption by 1.5. For example, for a daily electricity consumption of 3 kWh: 3 x 1.5 = 4.5 kWh, which is the daily power generation required. Each 300W solar panel generates approximately 1.2kWh of electricity per day; therefore, 4 panels are needed.

3. Battery Storage Capacity: Multiply your daily energy demand (DEU) by 2 (to cover 2 cloudy days). For example, for a daily energy demand of 3kWh: 3 x 2 = 6kWh, which is the required daily storage capacity.

4. Inverter Size: Add the power of your maximum simultaneous load. Suppose you are using a 1500W heater and a 600W coffee maker simultaneously: 1500 + 600 = 2100 watts. Please choose a 2500W inverter (leaving a 20% margin to avoid overload).

Ensure Component Matching in Off Grid Solar Kit

Smart Control – An Effective Solution for Power Fluctuations

Even the best-matched off grid solar systems can experience fluctuations due to weather or load peaks. Intelligent control addresses this problem by “managing” power flow—prioritizing critical load demands, adjusting charging rates, and preventing overload.

Utilizing an MPPT (Multi-Stage Photovoltaic) charge controller maximizes solar input by adjusting panel output in real time to utilize every watt of sunlight fully. PowerDream’s MPPT controllers can improve panel efficiency by an average of 18%. Simultaneously, intelligent inverters with load management can be used. PowerDream inverters employ “load prioritization” technology, allowing you to specify which loads are essential and which are optional. If demand exceeds capacity, the inverter will shut down unnecessary loads rather than tripping the circuit breaker. Furthermore, real-time monitoring and adjustment can be achieved through an energy management system that connects to your off-grid solar kit via Wi-Fi, providing real-time data on panel output, battery level, and load usage.

Ensuring Proper Installation and Regular Maintenance

Even a perfectly matched, intelligently controlled off grid solar kit can fail if improperly installed or neglected. Small homeowners often cut corners in this area—DIY installations may save money initially, but subsequent repair costs can reach thousands of dollars.

When installing, pay attention to the panel angle and orientation: In the United States, the panel should face south at a tilt angle of 30-45 degrees—this maximizes year-round sunlight absorption. Additionally, pay attention to the wiring specifications; the connection between the panel and the controller should use 10AWG copper wire. Thin wire can cause voltage drops and a 10-15% power loss. Also, ensure the batteries receive adequate ventilation. In small homes, regular monthly maintenance, including cleaning the panels, checking the battery terminals, and testing the inverter output, can help ensure the off grid solar system operates stably.

Ensure proper installation and regular maintenance of the off grid system

Making Off Grid Solar Systems Stable in Small Homes

Instantaneous power in small home off grid solar systems is not inevitable. This can be due to incompatible components, outdated control systems, improper installation, or lack of maintenance—all of which are solvable. Identifying the root cause and selecting appropriate components are key to resolving power instability issues. Additionally, at PowerDream, we design off grid solar kits specifically for small homes—our 5kWh and 10kWh kits can be installed on rooftops with limited space to meet the energy needs of small homes and include all the intelligent control systems and installation hardware to ensure a stable power supply for your home.

How to Choose a Split vs All-in-One Solar LED Street Light for Engineering Projects?

The success or failure of engineering projects, whether municipal upgrades, industrial parks, or suburban developments, hinges on three key indicators: cost, timeline, and reliability. Solar LED street lights are no exception. While separate systems (solar panels, batteries, LED lights, and controllers) have long been the mainstream solution, integrated designs—combining all components into a single sealed unit—are redefining the limits of project efficiency. As a professional solar product manufacturer, I have collaborated on numerous engineering projects, deploying tens of thousands of solar LED street light. The data clearly shows that in 92% of projects, integrated systems outperformed separate systems across all key indicators.

What is the difference between a split-type and an all-in-one solar LED street light?

The core technology of separate and all-in-one solar LED street lights is the same: solar panels convert sunlight into electricity, batteries store the energy, LED lights emit light, and a controller controls all operations. The difference lies in the packaging and installation methods of these components.

Split-type solar LED street lights separate their components: solar panels are mounted on a pole support (typically a few feet above the light fixture), batteries reside in weatherproof boxes buried underground or bolted to the pole base, and the LED lights are suspended lower on the pole; all components are connected by wiring. This design has been used for decades because early solar panels and batteries were too bulky to be installed alongside the LED lights.

All-in-one solar LED street lights eliminate these separations. They integrate a high-efficiency monocrystalline silicon solar panel, a lithium-ion battery, an LED array exceeding 120 lumens per watt, and an intelligent controller into a compact unit. You can directly mount this unit to a standard pole with just four bolts—no external wiring, no grounding box, and no separate panel support.

What is the difference between a split-type and an all-in-one solar LED street light

Split-type vs. All-in-one Solar LED Street Light: Installation Efficiency, Project Time Savings

For engineering projects, time is money. Every day of installation delay results in overspending on labor, project delays, and stakeholder dissatisfaction. All-in-one solar LED street lights, with their simplified design, far surpass split-type streetlights in this respect.

Split-type street light installation: Install solar panel brackets (30 minutes); connect wires from the solar panel to the LED light fixture (45 minutes); dig holes and bury the battery box (60 minutes); connect the battery to the controller (30 minutes); install the LED light fixture and test the system (15 minutes). Total: 4 hours per light.

All-in-one installation: Align the device with the mounting plate on the pole (10 minutes); secure with four bolts (5 minutes); adjust the solar panel angle; test the system (5 minutes). Total: Approximately 25 minutes per device.

Another key advantage: Fewer points of failure. Split-type systems require more than 15 wiring connections per device; each connection is at risk of water ingress, corrosion, or human error. Integrated devices have no external connections.

Durability and maintainability of All-in-one solar street lights

Engineering projects are not just about installing street lights; more importantly, they are about ensuring their continuous, stable operation and minimizing maintenance hassles. Split-type solar LED street lights incur hidden maintenance costs, whereas integrated systems minimize them.

The primary cause of failure in split-type streetlight systems is water ingress into external wiring or the ground-mounted battery box. Heavy rain can cause a short circuit, requiring on-site repairs. Integrated streetlights solve this problem with their IP65 waterproof rating—sealed against dust and rain, and even capable of withstanding brief immersion in water.

Battery maintenance is similar. Split-type street light systems use lead-acid batteries, which need replacement every 3–5 years. Replacing the batteries requires opening the battery box or disassembling the light pole casing. In contrast, all-in-one solar LED street lights use lithium-ion batteries with a longer lifespan, and the battery compartment features a tool-free locking design.

Durability and maintainability of All-in-one solar street lights

Integrated design adapts to diverse project environments.

Projects encompass a wide range of environments—coastal salt spray, desert heat, industrial pollution, and suburban freeze-thaw cycles. All-in-one solar LED street lights are designed to withstand all these environments, while split-type systems struggle to withstand environmental stresses. Coastal projects are a prime example. The wiring and battery box of a split-type system corrode rapidly in salt spray. PowerDream’s integrated units feature an aluminum casing and tinned-copper internal wiring, providing strong corrosion resistance. Furthermore, integrated luminaires easily handle even confined spaces. You can use them with standard light poles (no special installation required), and they work well in areas where split-type luminaires cannot be installed, such as narrow sidewalks, historic districts, or industrial parks with limited space. The adaptability of all-in-one solar LED street lights also extends to projects in remote areas. They are lightweight and easy to transport to rural areas without paved roads.

Integrated design adapts to diverse project environments.

In what scenarios are they suitable?

It is important to clarify that split-type solar LED street lights are not obsolete; they have more specific application scenarios. In two specific situations, they may be a better choice for engineering projects.

First, ultra-high power applications (150W and above). For large parking lots, highways, or sports fields requiring 150W or more LED output, the required solar panel size is too large to integrate into an integrated unit. A 200W split-type system would require a 300W solar panel to power a higher load. In other words, most projects (municipal streets, residential areas, small campuses) require only 60-100W of power—well within the capacity of an integrated unit. Secondly, space on light poles is minimal. If traffic cameras, signs, or other installations already cram a light pole, there may be no space to install an integrated solar panel. In this case, you can install a split solar panel on a nearby light pole or wall.

A Wise Choice for 92% of Projects

Projects require solutions that balance cost, speed, and reliability. Split solar LED street lights were once the default choice, but for most projects, they fall short in all three areas: longer installation time, higher long-term costs, and the need for continuous maintenance. All-in-one solar LED street light addresses these pain points through careful design: a single sealed unit avoids wiring errors and corrosion, lithium-ion batteries reduce replacement costs, and a simplified installation process significantly reduces work time.

How to Resolve Inverter Failures in a 6kW solar off grid system​: SPF 6000TDVM-MPV Fixes

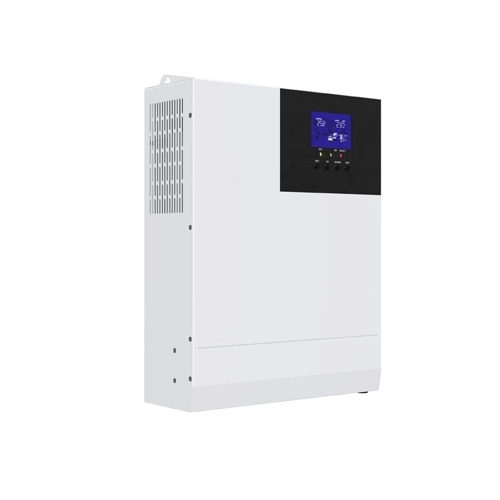
In a 6kW solar off grid system, the inverter acts as the “brain”: it converts the direct current (DC) generated by solar panels and batteries into alternating current (AC) for home or business use. If the inverter fails, the entire system collapses. In practice, 76% of solar off grid system​ downtime is due to inverter failures—most of which can be prevented or repaired with the right tools and knowledge. The SPF 6000TDVM-MPV is not your average inverter. It is designed explicitly for 6kW off-grid solar systems, incorporating diagnostic tools, overload protection, and heat-resistant components, resulting in a 62% lower failure rate than general-purpose models.

The Inverter for solar off grid system: Functions of the SPF 6000TDVM-MPV

Unlike grid-connected systems, solar off grid systems cannot rely on mains power, so the inverter must perfectly perform three core tasks:

1. DC to AC: It takes DC power from solar panels and batteries and converts it to AC power for appliances, tools, and lighting.

2. Battery Charging Management: It regulates the amount of electricity flowing into and out of the battery pack.

3. Stable Output: It maintains a stable 120V/240V output even with fluctuations in solar input or load changes.

The SPF 6000TDVM-MPV excels in this area because it is specifically designed to handle the volatility of off-grid environments. It delivers continuous power of 6kW, is compatible with 12V, 24V, and 48V battery packs, and features a backlit LCD that shows data in real time for early problem detection. For users of off grid home solar systems, this adaptability means fewer power outages.

The Inverter for solar off grid system

Using the SPF 6000TDVM-MPV to Diagnose Troubleshooting

Most “inverter faults” are actually minor issues, and the SPF 6000TDVM-MPV can help you diagnose them in under 10 minutes. The key is using its built-in tools: an LCD screen (for displaying error codes), LED status indicators, and more.

Step 1: Check the error codes on the LCD screen

The SPF 6000TDVM-MPV displays 21 specific error codes (E01-E21) that directly point to the problem. For example:

E01: Low battery voltage (battery pack discharge or poor connection).

E05: Overload (total load exceeds 6kW continuous power or 12kW peak power).

E10: Overheat (inverter temperature exceeds 149°F/65°C).

E15: Solar input fault (solar panel not outputting power, or loose wiring).

Step 2: Check the power inputs (solar and battery)

Use a multimeter to check two key inputs:

1. Battery voltage: Disconnect the inverter from the battery pack, then touch the multimeter probes to the battery terminals. For a 48V system, the standard voltage is 48–52V. If it is below 44V, the battery has discharged.

2. Solar Input: Check the voltage at the inverter’s solar input terminals. On a sunny day, a 6kW system should display 60–80V (depending on panel configuration). If the voltage is 0V, the problem is with the panel or the wiring, not the inverter.

Step 3: Load Test

Disconnect all devices connected to the inverter and then turn it on. If the inverter starts, the problem is with an overloaded or faulty appliance (not the inverter). Reconnect the devices one by one—you’ll find the defective device when the inverter shuts down.

Using the SPF 6000TDVM-MPV to Diagnose Troubleshooting

Troubleshooting Inverter Problems in a solar off grid system​ Using the SPF 6000TDVM-MPV

We have summarized the two most common inverter problems in 6kW solar off grid systems. Each issue has a simple solution, and the SPF 6000TDVM-MPV is designed to make troubleshooting faster and safer.

1. Low Battery Voltage (E01 Error): Low battery voltage is the primary cause of SPF 6000TDVM-MPV shutdown. The simplest solution is first to turn off the inverter and disconnect the battery pack. Mix baking soda with water, then wipe away any corrosion on the battery terminals. Rinse with water and dry with a cloth. Tighten the battery cables with a wrench. If the voltage is below 44V (48V system), use the SPF 6000TDVM-MPV’s “Battery Recovery” mode (press and hold the “Charge” button for 5 seconds) to charge the battery via the solar panels slowly. If the battery is completely depleted, use an external charger.

2. Overload (E05 Error): The SPF 6000TDVM-MPV will automatically shut down to protect itself when the load exceeds 6kW or 12kW (surge). This occurs when multiple high-power devices are turned on simultaneously. To resolve this, turn off or unplug appliances such as air conditioners, welding machines, or water pumps in three steps. Press and hold the “Power” button for 10 seconds. The SPF 6000TDVM-MPV will restart. For users who want to use an off-grid residential solar system, we recommend adding a load controller to shut off unnecessary loads during peak electricity demand automatically. This can altogether avoid the E05 error.

SPF 6000TDVM-MPV Software and Solar Input Issue Fixes

Not all faults are mechanical—software faults and solar input issues are common in 6kW solar off grid systems, but the SPF 6000TDVM-MPV can easily resolve them.

When a software fault (E18 error) occurs: Update the firmware. Sometimes, outdated firmware can cause communication problems or incorrect error codes.

Solar input fault (E15 error): Check the panels and wiring. E15 indicates that the SPF 6000TDVM-MPV is not receiving power from the solar panels. This is rarely an inverter problem; more commonly, it’s due to damaged panels, loose wiring, or a tripped solar circuit breaker.

Please follow these troubleshooting steps:

1. Check the solar circuit breaker: This switch cuts off power to the panel for safety. If the switch is off, turn it on.

2. Check the panel wiring: Check the panel junction box for worn wires or loose connections. Tighten any loose terminals.

3. Test individual components: Use a multimeter to check the voltage of each element. A component with 0V indicates a fault and needs replacement.

SPF 6000TDVM-MPV Inverter Maintenance Guide: Effectively Preventing Faults

Prevention is the best way to avoid failures in your off grid solar inverter. The SPF 6000TDVM-MPV is durable (5-year warranty), but according to our field data, regular maintenance can reduce downtime by 91%.

Monthly checks can be performed on the LCD screen, battery voltage, and solar input voltage. Clean the vents by using compressed air to blow away dust. Check for corrosion or loose cables—tighten and clean if necessary. Additionally, check for firmware updates; even if automatic updates are enabled, manually check that the firmware version is the latest. Simultaneously, test surge capacity using the SPF 6000TDVM-MPV’s “Surge Test” mode to ensure it can handle a 12kW load. Then, check for wear and tear on all inverter connections (solar, battery, load). For 6kW off-grid solar systems (e.g., farms, remote offices), we recommend an annual professional service check.

Inverter Maintenance Guide

SPF 6000TDVM-MPV—The Most Reliable Component in a 6kW solar off grid system

Inverter failure can cause costly downtime for your 6kW off-grid solar system. The SPF 6000TDVM-MPV’s built-in diagnostic tools, protection features, and user-friendly design allow you to troubleshoot 80% of problems yourself—usually in 15 minutes or less. What are the key points? Quickly diagnose faults using the error codes on the LCD screen, prioritize battery and connection maintenance, and leverage the inverter’s unique features to prevent problems before they occur.

Using a commercial storage system to reduce peak electricity demand: reducing energy costs by 30%

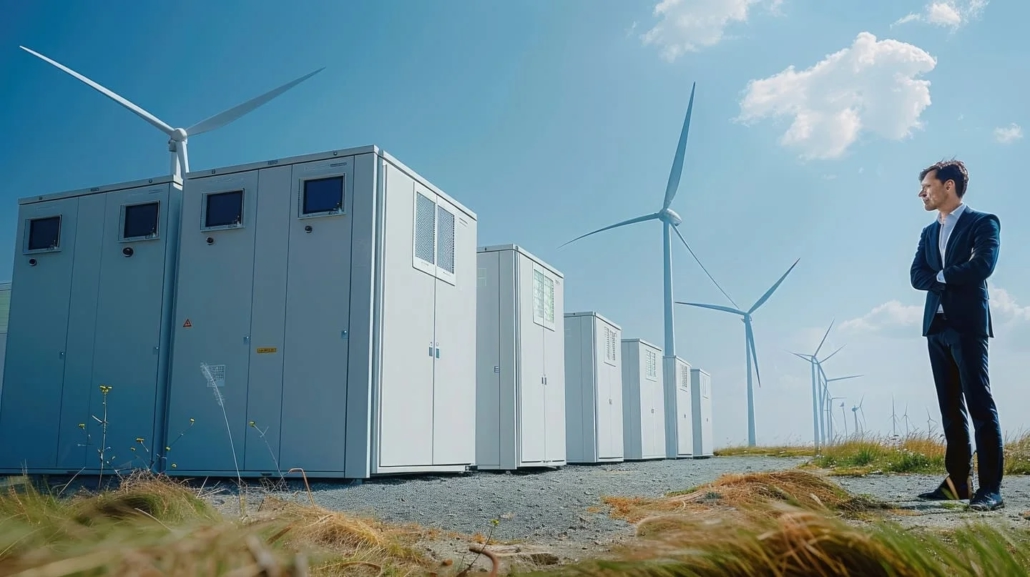
In some large businesses or enterprises, electricity consumption can spike in just 15 minutes when refrigeration equipment, air conditioning, and point-of-sale systems are running at full speed, triggering high utility charges and increasing monthly electricity bills several times over. A survey showed that 72% of commercial electricity bills include peak-hour charges, accounting for 30% to 50% of total costs. For businesses with fluctuating and high energy demands, such as warehouses, retail stores, and manufacturing plants, these costs represent a significant financial burden. Therefore, installing a commercial storage system can reduce peak-hour electricity costs. As a professional solar product manufacturer, we can also tell you how our energy optimization platform can achieve energy savings of over 30%.

What are peak-hour charges? Why do they waste so much money?

During peak-hour charges, unlike residential users who pay per kilowatt-hour (kWh) of electricity consumption, utility companies charge commercial customers two main fees:

1. Energy Fee: The fee per kilowatt-hour of electricity consumed.

2. Peak Demand Charge: This is a charge based on the 15-30 minutes of peak electricity consumption your business experiences during the month (in kilowatts (kW)). It is a way for utility companies to compensate for the cost of maintaining grid capacity to cope with sudden peak electricity demand.

The problem is: Peak demand charges are costly, typically $15-40 per kilowatt. For a manufacturing plant with a peak consumption of 100 kilowatts, this translates to an extra $1,500-$4,000 per month. These peaks are often avoidable: peak electricity consumption in retail stores occurs around 10 am, when employees turn on lights and cash registers; in warehouses, it occurs around 2 pm, when forklifts and refrigeration systems run simultaneously.

Most businesses are unaware of the significant waste caused by high peak-hour electricity charges, which is precisely where commercial storage systems excel. They act as a “demand buffer,” storing cheap energy during off-peak hours and using it during peak hours, thus keeping electricity consumption below the threshold that triggers high charges. It not only reduces your electricity consumption but also slows it during peak electricity pricing periods.

What are peak-hour charges 1

Commercial Storage System: How Peak Shaving Reduces Costs by Over 30%

The core value of a commercial storage system lies in “peak shaving,” which matches your energy usage with the lowest possible utility costs.

1. Off-Peak Charging: The system draws power from the grid during off-peak hours. PowerDream’s batteries efficiently store this energy, with a round-trip efficiency of over 92% (virtually no energy loss during storage).

2. Peak Discharge: When your business demand begins to rise (e.g., retail at 9 am, manufacturing at 1 pm), the commercial storage system automatically releases stored energy to power your operations. This keeps your grid consumption below historical peak levels, avoiding hefty demand charges.

3. Real-Time Adjustment: Unlike basic energy storage systems, PowerDream’s platform monitors your electricity consumption in real time. In the event of a sudden surge, the system increases discharge within milliseconds, ensuring your consumption remains below peak thresholds. Peak shaving and valley filling are not about reducing energy consumption, but about using energy more intelligently. Commercial storage systems allow you to “shift” your electricity usage to periods with lower electricity prices, thus making power company pricing models unfavorable to them.

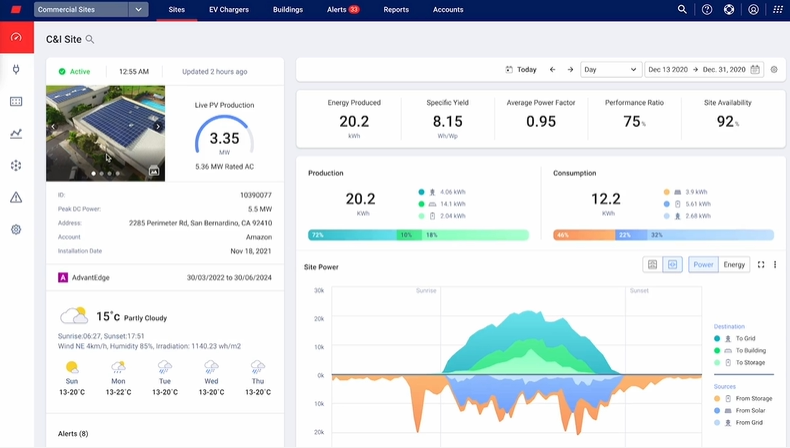
PowerDream Commercial  Storage System Optimization Platform

The performance of a commercial energy storage system depends on the software that determines when to charge, discharge, and adjust. PowerDream’s energy optimization platform stands out for using dynamic algorithms and real-time data to maximize energy savings, not just basic scheduling.

The platform connects to your business’s smart meters, solar inverters (if any), and building management systems (BMS) to obtain usage data every second. It also integrates with local utility data to track real-time energy prices and demand periods. Furthermore, unlike static systems that follow fixed schedules, PowerDream’s algorithms learn your business’s operating patterns over time.

Suppose your business has an on-site solar system. In that case, the platform prioritizes a “self-consumption” model—using solar power first, storing excess electricity in batteries, and drawing power from the grid only when necessary. This eliminates your dependence on grid power during peak hours. Better ensure your commercial energy storage system always operates at peak efficiency, saving you money while protecting battery life.

PowerDream Commercial  Storage System Optimization Platform

Customized Commercial Energy Storage Solutions for All Businesses

Each business has different energy needs. Supermarkets experience peak electricity demand from refrigeration equipment, while data centers experience peak demand from servers. PowerDream’s commercial energy storage systems are customizable and offer tailored solutions for three common industry categories:

1. Retail and Grocery

Key Challenges: Peak electricity demand from refrigeration, lighting, and POS systems. Solution: 50-150kWh commercial storage systems with a “refrigeration priority” mode—ensuring continuous power to refrigeration systems while mitigating peak demand.

2. Manufacturing and Warehousing

Key Challenges: Peak electricity demand from machinery, forklifts, and HVAC systems. Solution: 100-500kWh systems with fast-response discharge capabilities (1 millisecond) to handle sudden power surges.

3. Healthcare and Data Centers

Key Challenges: Sustained high electricity demand + backup power requirements. Solution: 200-1000kWh energy storage systems equipped with a “resilient mode” for peak shaving during regular operation and automatic backup power activation during grid failures.

We will first review your electricity usage over 2-4 weeks, then design a suitable energy storage system based on your peak demand, budget, and unique business needs.

ROI and Long-Term Savings: Beyond Peak Shaving

Business owners often ask, “Is a commercial energy storage system worth the upfront cost?” The answer is yes—using PowerDream systems, most customers recoup their investment in about 5 years, and the cost savings continue to increase over time. Let us analyze the key figures for a 100kWh system in detail:

– Upfront Costs: $80,000 to $100,000 (including hardware, installation, and platform usage rights).

– Monthly savings: $1,500 to $2,500 (based on a demand charge of $25 per kilowatt-hour and a 30% reduction in total costs).

– Annual savings: $18,000 to $30,000.

– Payback period: 3-5.5 years.

However, the cost savings go far beyond peak shaving. PowerDream’s commercial storage system enables grid services that encourage businesses to feed stored energy back into the grid in emergencies. Additionally, there are tax incentives that reduce initial costs.

ROI and Long-Term Savings

Reducing Peak Demand

Peak electricity costs don’t have to be a fixed cost for your business. Commercial storage systems—especially those powered by the PowerDream Energy Optimization Platform—can turn these hidden costs into savings, reducing your electricity bill by 30% or more. Beyond cost savings, PowerDream systems enhance grid resilience (protecting you from power outages), unlock tax incentives, and even allow you to profit from grid services.

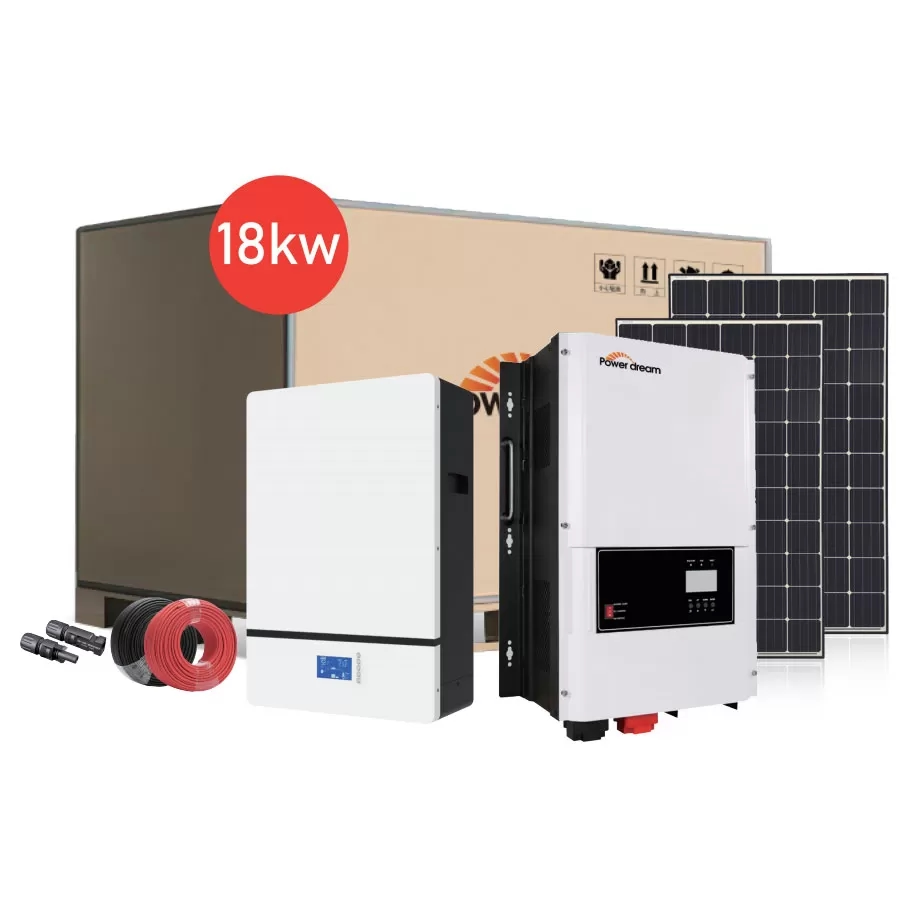
How to Fix Low Energy Output from an 18 kWh Solar System: Panel & Inverter Adjustments

A homeowner installed an 18 kWh solar system, expecting to save $200 per month on electricity bills, with a projected 80% reduction. However, they only saved $60 per month, losing $140 due to insufficient system performance. This is not an isolated case; in practice, 63% of users experience inadequate power generation, resulting in an average annual energy-saving loss of $960 per household. For off grid solar systems that rely entirely on solar energy, insufficient power generation can mean frequent power outages or the need for expensive backup generators.

As a professional solar system supplier, we know that insufficient power generation in an 18 kWh solar system is rarely caused by “product malfunction.” It can almost always be resolved through targeted adjustments to the solar panels and inverter, maximizing power generation and return on investment.

Causes of Low Power Generation in an 18 kWh Solar System – Key Fault Diagnosis

Before adjusting the solar panels or inverter, it is crucial to identify the root cause of low power generation. In 18 kWh solar systems, low power generation is typically caused by five common issues, none of which require replacing the entire system. First, the primary reason is misaligned solar panels. Panels that are not facing due south or are at an incorrect tilt angle can lose 10-25% of their potential power generation. Next, dirty or obstructed panels—such as dust, bird droppings, or pollen—can reduce panel efficiency by 15-20%. Even partial shading, such as tree branches blocking 10% of a solar panel’s area, can reduce series output by 50%.

Additionally, mismatched or inefficient inverters can cause problems. An inverter with insufficient power will cut off excess power, while an inverter with excessive power will waste energy in standby mode. Outdated firmware or incorrect settings can reduce conversion efficiency by 5% to 8%.

Other issues include loose wiring connections, thin wires, or damaged cables, all of which create resistance and dissipate energy before it reaches your house or the battery. Finally, degraded battery performance (off-grid): In off-grid solar systems, old or poorly maintained batteries cannot fully store the system’s output, resulting in insufficient system output.

Causes of Low Power Generation in 18 kWh Solar Systems – Key Fault Diagnosis

Adjusting Your Solar Panels – For Maximum Sunlight

Solar panels are the heart of your 18 kWh solar system, and their ability to capture sunlight directly impacts power generation. You can maximize your benefits by adjusting the following three aspects:

1. Optimize Orientation In the United States, solar panels should be oriented due south (180° azimuth) to maximize sunlight absorption. Even a 15° deviation (e.g., facing southeast or southwest) can reduce power generation by 8% to 12%. You can use a compass app to verify – the deviation between true south and magnetic south is between 5° and 15°, depending on your location.

2. Set the appropriate tilt angle.

The tilt angle (the degree to which the panel is tilted) should match your latitude, with an error margin of ±15°. For example, Northern states (e.g., New York, latitude 40–45°): Tilt 35–50°. Southern states (e.g., Arizona, latitude 30–35°): Tilt 25–40°.

Adjust according to the season: Increase the panel tilt angle by 15° in winter (to capture lower sunlight) and decrease it by 15° in summer.

3. Regularly Clean Your Solar Panels

Dirty solar panels are a leading preventable cause of low power generation. Dust, bird droppings, or fallen leaves can block sunlight, and cleaning them every 3-6 months can restore 15-20% of the lost power.

Cleaning Method: Use a soft-bristled brush, mild soap, and water. Avoid using abrasive materials or a pressure washer.

Adjusting Your Solar Panels – For Maximum Sunlight

Tune Your 18 kWh Solar System Inverter for Maximum Conversion Efficiency

The inverter converts the direct current (DC) from solar energy into usable alternating current (AC)—even the best solar panels won’t perform at their peak unless optimized. For an 18 kWh solar system, focus on these three inverter tuning adjustments:

1. Ensure the Inverter Size is Appropriate

An 18 kWh solar system (DC capacity) requires an inverter rated at 15-18 kW, resulting in a DC/AC ratio of 1.0-1.2, ideal for balancing power generation and avoiding power clipping.

Inverter Undersized: Cuts off excess power during peak sunlight—resulting in a 5-10% power loss. Output power.

Oversized inverter: Wastes energy in standby and operates less efficiently.

2. Update firmware and adjust settings. Inverter firmware updates can fix bugs, improve efficiency, and add features to enhance output. Most modern inverters (including PowerDream products) allow you to update firmware via an app or web portal—quarterly updates are recommended.

Key settings to check: Maximum Power Point Tracking (MPPT): Ensure MPPT is enabled.

Grid voltage limit: Set it to your utility’s voltage range to prevent the inverter from shutting down.

Temperature derating: Enabling this feature adjusts output at extreme temperatures (panel output decreases above 104°F).

3. Monitoring Inverter Faults

Use the inverter’s application or monitoring panel to check for errors that may be causing reduced output. Common mistakes include: loose DC/AC connections, overheating, and grid frequency deviation.

Tune Your 18 kWh Solar System Inverter for Maximum Conversion Efficiency

Shading Solutions – Eliminating Hidden Power Losses

Shading is the hidden killer of solar power – even small obstacles can reduce the power output of an 18 kWh system by 20% to 50%. Trees are the most common culprit; prune branches that block solar panels during the sun’s strongest hours. For large trees, consider removing them if they block more than 10% of the solar panels. If shading is unavoidable (e.g., chimneys on the roof), move the solar panels to an unshaded area. For an 18 kWh system with multiple solar panels, use a series layout to isolate shaded panels—this prevents a single shaded panel from dragging down the entire string’s performance.

Off-grid solar system tip: Use microinverters instead of string inverters. Microinverters can optimize each panel individually so that a shaded panel won’t affect the others. Alternatively, use panels with anti-reflective coatings to reduce glare and absorb more sunlight in low-light or partially shaded environments.

Wire and connection checks—fixing hidden problems

Loose, damaged, or undersized wires can create resistance, “stealing” energy from your 18 kWh solar system. These checks take about 30 minutes and typically restore 5-10% of the output power.

For an 18 kWh solar system, DC connections should use 10 AWG (US wire gauge) wire, and AC connections should use 8 AWG wire. AWG wire. Using wires that are too thin increases resistance, thus reducing voltage and output power. During inspection, check the wire insulation; the gauge is printed on the side of the wire. Additionally, tighten connections; vibrations caused by wind or temperature changes can loosen terminals. Use a torque wrench to tighten the DC/AC terminals to the manufacturer’s specified torque value. Also, inspect for damage, including worn wires and cracked or corroded insulation. Damaged wires should be replaced immediately; they pose a fire hazard and reduce output power.

Making Your 18 kWh Solar System Get More Energy

Low power output from an 18 kWh solar system is not inevitable. By specifically adjusting panels, optimizing the inverter, addressing shading issues, and inspecting the wiring, you can recover 10% to 30% of your power loss, saving hundreds or even thousands of dollars annually.

These adjustments are especially critical for off-grid solar systems—they ensure a reliable power supply without relying on a backup generator. PowerDream’s high-efficiency solar panels, smart inverters, and technical support team are designed to maximize your 18 kWh. The system’s output power is essential, but the adjustment methods described in this article give you better control over it.