Tag Archive for: solar panel mounting bracket

How to choose solar panel mounting bracket for carport electric vehicle charging station?

Choosing the right solar panel mounting bracket for a carport-type EV charging station requires careful consideration of site loads, module layout, foundation type, and operational requirements. The Power Dream solar carport mounting system features a modular structure that allows for vertical or horizontal PV panel installation, supports tilting of 5° to 15°, and can be installed on reinforced concrete or pile foundations. Power Dream utilizes cold-rolled S235JR/S355JR steel coils that comply with EN 10025 and are hot-dip galvanized according to ISO 1461:2009. S350GD galvanized steel coils that comply with EN 10326 or equivalent are also available. This meets the requirements for solar panel mounting brackets in carport-type EV charging stations.

Determining the Material and Corrosion Resistance of the Solar Panel Mounting Bracket

The material choice determines the service life and maintenance costs of the solar panel mounting brackets on the carport. Busy public charging stations, frequently exposed to vehicle salt spray, urban pollution, and occasional de-icing splash, require robust corrosion protection. Power Dream’s solar carport mounting systems utilize cold-rolled S235JR or S355JR steel coils (EN 10025) hot-dip galvanized according to ISO 1461:2009, providing a uniform, metallurgically bonded zinc layer. For corrosive coastal or industrial environments, you can choose S350GD galvanized steel coils according to EN 10326 or corrosion-resistant substrates such as Aluzinc, Magnelis, Corrender, or Posmac. These coatings provide enhanced barrier and cathodic protection, specifying a minimum zinc or equivalent coating mass of 275 g/m², ensuring decades of service life with low maintenance costs and meeting relevant certification requirements.

Determining the Material and Corrosion Resistance of the Solar Panel Mounting Bracket

Consider the Structural Design and Environmental Loads of the Solar Panel Mounting Bracket

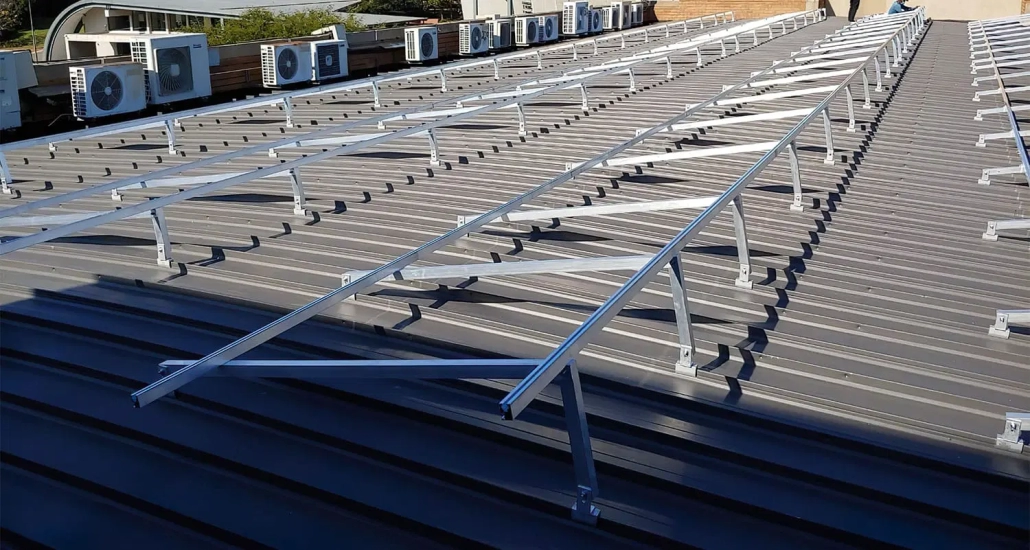
When selecting a carport solar panel mounting system, it must be able to safely withstand environmental loads while providing adequate clearance for the vehicle and charger. First, define the design loads according to local building codes. For example, US projects refer to ASCE 7 for wind and seismic load design; European projects refer to Eurocodes; and Indian projects refer to IS Codes. The mounting system’s cross-sectional area, component dimensions, and connections must be verified through structural analysis based on these site-specific loads.

Key structural considerations include panel orientation, effective tributary area per module, and tilt angle. In certain latitudes, a higher tilt can improve energy capture, but it increases wind lift and snow accumulation, increasing the required mounting stiffness and foundation size. For urban carports where clearance height is a concern, designers should achieve a minimum of 2.2–2.4 meters.

Furthermore, you must ensure that the mounting system maintains module clamping force and alignment under dynamic loads. Use lock washers or pre-torqued nuts where applicable, and design connectors to allow for simple on-site replacement without disturbing adjacent modules. For locations with significant temperature fluctuations, provide expansion joints or slots in the rails. For long spans, include mid-span supports or stronger profiles to prevent excessive deflection. If the carport utilizes a multi-bay modular array, consider modular column spacing that matches the bay dimensions to reduce material waste and simplify installation.

Foundation and Mounting Options

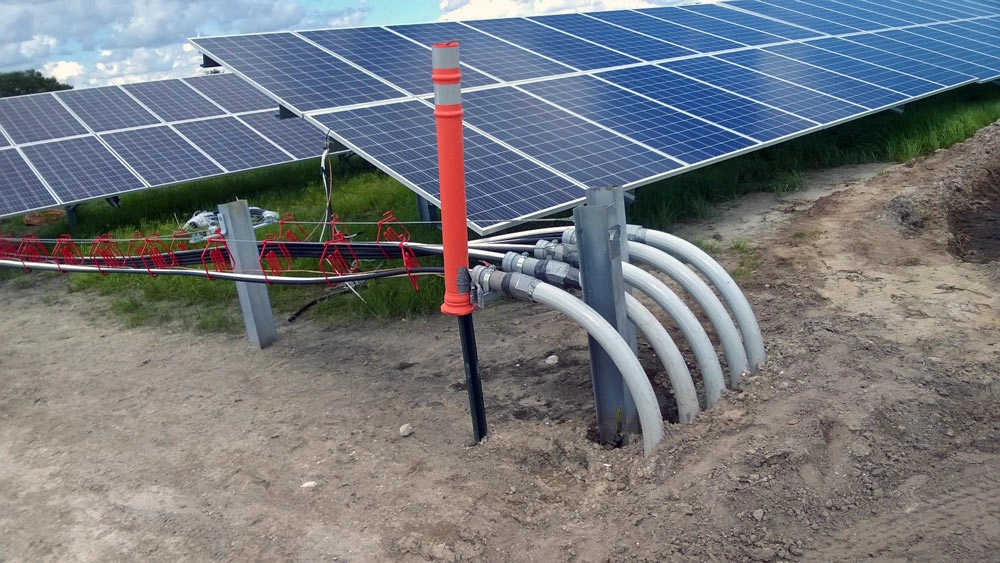
Choosing the appropriate solar panel mounting bracket for a carport electric vehicle charging station also depends on local soil conditions, budget, and installation speed. Power Dream’s solar carport mounting systems are designed for reinforced concrete pad foundations as well as driven or bored pile foundations.

Reinforced concrete provides stable support and is suitable for sites with good bearing capacity and surface preparation. To prevent corrosion, we hot-dip galvanize or use stainless steel for anchor bolts, and we protect the baseplate-concrete interface with a coating or sleeve to prevent water seepage. For pile foundations, we prefer screw piles, driven steel H-piles, or bored piles on sites with poor surface soil or limited excavation. Screw piles speed installation and reduce concrete usage. They can be load-tested on-site and provide immediate load-bearing capacity. For carport charging stations, we pre-assemble the main beams and tracks into manageable modules and then hoist them into place, rather than assembling numerous small components at height.

Determining PV Panel Layout and Orientation

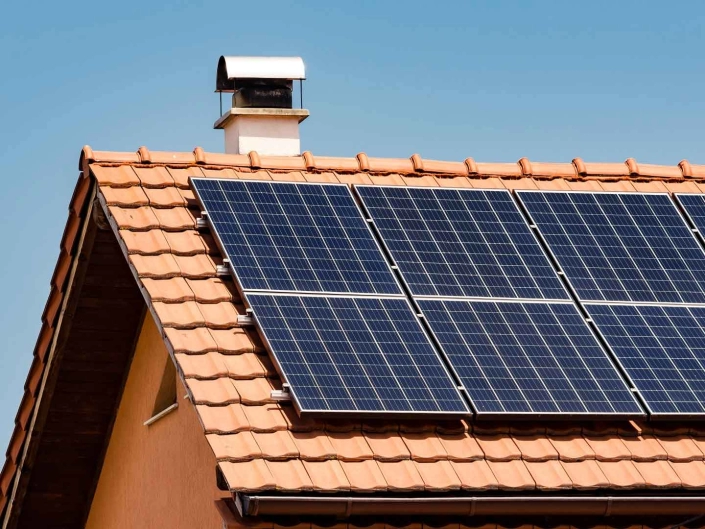
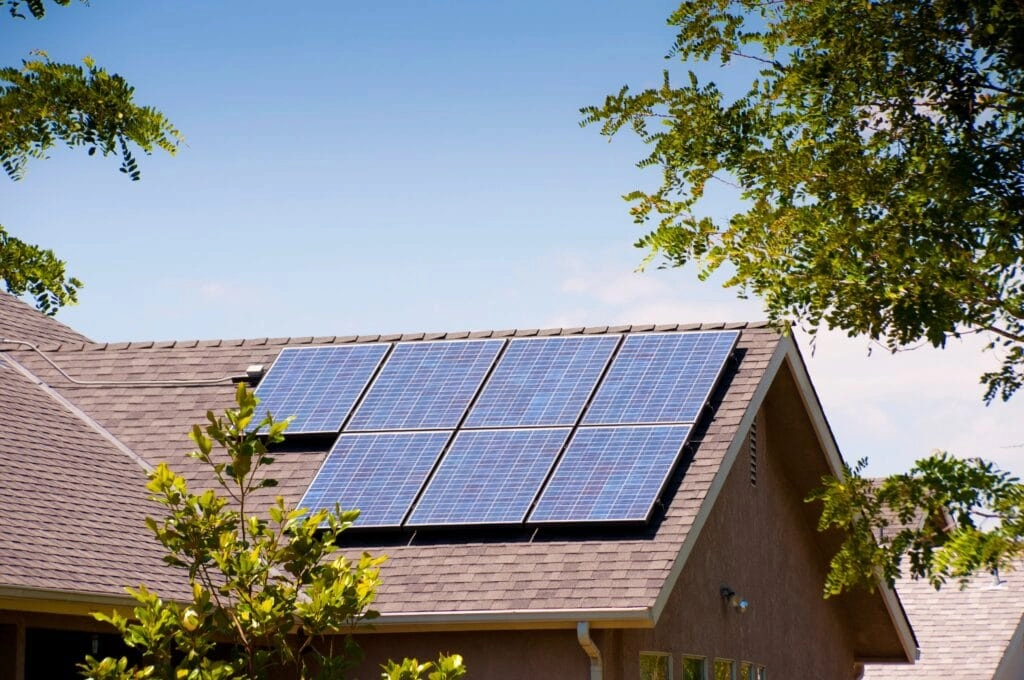
The availability and usability of a charging carport depend not only on the solar panel mounting brackets but also on the PV panel layout and orientation. Power Dream’s flexible solar carport mounting systems allows panels to be installed vertically or horizontally, with tilts of 5° to 15° to the south or east. Leverage these degrees of freedom to optimize energy production and address site constraints.

For customers in the Northern Hemisphere, a south-facing array (or a north-facing array in the Southern Hemisphere) maximizes peak energy production. An east-facing array better suits morning charging patterns. For public or workplace charging with irregular arrival times, consider an east-west split array to balance power generation throughout the day. Both horizontal and vertical mounting options affect shading and panel spacing. Vertical layouts allow for closer integration with lampposts or signage, while horizontal layouts reduce wind and facilitate panel replacement. The electrical design should also consider string length, MPPT allocation, and distance from the EV charger and inverter. During the expected lowest temperature, you should keep the string voltage within the inverter input range to avoid overvoltage. Finally, the design should consider future expansion by reserving spare capacity in the column base and planning routing for additional cabling.

Solar Carport Mounting Systems

Suitable Mounting Brackets for Carport-Type Charging Stations

Selecting the appropriate solar panel mounting bracket for a carport-type EV charging station requires a balance between structural design, material science, electrical integration, and construction practicality. Power Dream provides solar panel mounting brackets certified to relevant standards. Under standard conditions, they utilize hot-dip galvanized, cold-rolled S235JR/S355JR steel compliant with ISO 1461:2009, as well as S350GD/Aluzinc/Magnelis steel for harsh environments, or anodized aluminum alloy. We also select the appropriate hardware based on site requirements, ensuring ISO-compliant A2-70 stainless steel or coated carbon steel. We also provide comprehensive certification, FAT/SAT testing, and a comprehensive warranty. Furthermore, engineers use energy modeling and shading analysis to confirm panel orientation and tilt, ensuring safe, long-term electric vehicle charging operations.

How to Install Solar Panel Mounting Brackets on Flat Roofs with Flashing?

We have undertaken numerous solar panel mounting brackets on flat roofs, the most common type of rooftop renewable energy. Each installation on a different roof type involves connecting the solar panel mounts to the roof membrane and aligning them with existing membrane seams, using specialized tools, sealants, and materials from the solar panel kit to ensure a reliable, weatherproof installation in the harshest conditions.

Site Assessment and Planning for Solar Panel Mounting Brackets

Before touching any roofing materials, I conduct a comprehensive site assessment at the beginning of each project. First, the installer walks the roof to identify low spots where water may accumulate and uses a digital inclinometer to check the slope and membrane condition; then, the PV array layout is drawn and the CAD overlay is exported to a tablet to ensure that each row of solar panel mounting brackets is aligned with the roof seams and underlying structural supports. Existing roof penetrations, vents, HVAC outlets, and skylights are also located to avoid interfering with the placement of the mounts.

Next, technicians use a laser measurement tool to mark mount locations within ±1 cm accuracy and verify clearances from walls and equipment. Our installers will calculate wind and snow load requirements according to local building codes and adjust bracket spacing, ballast, or direct connection methods accordingly. Install each bracket securely on a solid, dry surface.

Site Assessment and Planning for Solar Panel Mounts

Select the type of solar panel mounting bracket and the waterproof material you prefer.

Suitable hardware can bring a lasting installation. I often use adjustable stainless steel solar panel mounting brackets, which are ideal for coastal wind areas and high snow loads. At the same time, the system pairs EPDM-lined waterproofing kits with roof membranes to achieve uniform, chemically compatible bonding. Before formal installation, we will evaluate the bracket foot design of each solar panel kit, using bolt-on connections in high-wind areas or non-penetrating ballast solutions to prevent roof warranty-prohibited penetration. Additionally, we will pre-cut and thermoform the flashing to match the installation location of each bracket, thereby reducing on-site manufacturing time and waste by ensuring a precise match between the bracket and flashing materials. Proper installation ensures a seamless, durable seal between the bracket and roof surface, extending the solar panel’s service life.

Roof Preparation and Membrane Protection

Once the materials are selected, we clean the membrane around each marked location using 100% isopropyl alcohol and a lint-free cloth to remove oil, dirt, and oxides. Afterwards, I remove loose debris with a soft-bristle brush and verify that the membrane has no punctures or seam separations. In addition, I apply a membrane-approved primer to each area to enhance the adhesion of the flashing tape or liquid flashing membrane. In high-traffic areas, I install silicone-coated sidewalk mats to prevent wear on the roof and reduce the risk of slips while working. Additionally, workers set up temporary sunshades as needed to prevent the sealant from curing too quickly in direct sunlight. By protecting the membrane and ensuring that the substrate is clean and primed, I lay the foundation for a strong, leak-proof flashing bond that will withstand years of thermal cycling and structural movement.

Solar Panel Mounting Brackets 1-2

Install Flashing and Baseboards

Installing flashing underneath each solar panel mounting bracket is key to a flashing design. At this stage, I carefully place the prefabricated flashing over the primed area, smoothing out bubbles and wrinkles with a weighted roller; I then glue or weld the flashing edges according to the membrane system’s specifications, using heat welding for TPO/PVC and industrial adhesives for EPDM. We also use stainless steel spacer fasteners to secure the bracket base through the flashing, ensuring a snug fit without over-torquing and deforming the membrane. Each fastener head is then back-sealed with a compatible butyl sealant to prevent capillary wicking. For some of the windier South American locations, I also apply a continuous coat of polyurethane sealant around the perimeter of the base for added redundancy. This creates a solid, impermeable barrier that protects the roof under the solar panels from moisture penetration and mechanical wear.

Securing the panels and adjusting the tilt

Once all bracket bases and flashings are in place, the rails and panel fixings begin. Installers snap the extruded aluminum rails into the bracket clamps and use a box level with a laser line to align them vertically. Then, they secure non-slip end stop clips and mid-span fasteners to block rail movement under wind loads. We install each solar panel using factory-supplied torque-controlled stainless steel clamps and neoprene washers to minimize micro-vibration and precisely achieve the specified clamping torque. Next, technicians adjust each bracket’s tilt angle using built-in slots and calibrated protractors, typically setting it between 10° and 15° for maximum annual energy output. Finally, I recheck all fasteners to ensure consistency and compliance with structural calculations and local building codes.

Final Inspection and Maintenance Tips for Solar Panel Mounting Brackets

After completing all installations, I will inspect each solar panel mounting bracket and flashing detail comprehensively to confirm their integrity. Finally, I will perform a water immersion test, gently spraying water on the panel array with a calibrated nozzle and monitoring the flashing interface for any signs of leakage. I will also verify the torque of all bolts and confirm the straightness of the track using multiple data points from laser line scanning.

At the same time, our installers will prepare a detailed handover report, including high-resolution photos and torque logs of each flashing. They will then guide customers through routine maintenance tasks, such as cleaning debris around the bracket base, conducting annual sealant inspections, and recording thermal anomalies through infrared scanning. By combining a meticulous final inspection with clear maintenance instructions, we ensure that every flat roof solar installation can withstand the test of various factors.

Careful and reliable completion of each installation

Before each installation, we assess the roof condition, select compatible brackets and waterproof membranes, prepare and apply the baseboard, and install and seal each baseboard with mechanical fasteners and high-performance sealants. We also install and align rails and modules, and perform a comprehensive final inspection. To ensure the flat roof solar array is durable, leak-free, improves power generation, and minimizes maintenance.

What are the best practices for post-installation commissioning of an 18 kWh solar system?

When off grid solar kits and off grid home solar systems underperform, a small percentage of the reason is due to insufficient commissioning. To ensure your 18 kWh solar system can achieve its rated 18 kWh daily output, a thorough mechanical check of the solar panel mounting brackets and array alignment is performed. All electrical connections and PV string voltages are then verified, and the inverter, charge controller, and battery interface are configured and tested. After that, performance is verified under actual irradiance and load conditions. You subsequently calibrate safety devices, surge protectors, and ground fault monitors. Finally, you demonstrate the training monitoring software. These commissioning methods achieve continuous system uptime of more than 98% and confirm that all solar panel mounts are performing at peak performance.

Mechanical and Structural Verification of 18 kWh Solar System

When installing an 18 kWh solar system, first ensure that the physical installation is accurate and secure. For example, you should check that all solar panel mounting brackets are properly torqued, verify that they meet the manufacturer’s specifications, and confirm that they have corrosion-resistant coatings suitable for coastal or desert climates. Additionally, verify that the tilt and azimuth settings meet the design specifications for the seasonal sun path, which is typically 30-35° for mid-latitudes. You can tighten the rail and bracket bolts to the specified 15 Nm using a calibrated torque wrench to prevent micro-movements that could cause connector fatigue or lead to wind-induced stress fractures. Additionally, you should seal the roof penetrations with UV-resistant, waterproofing materials and ensure that the battery enclosures in these off grid solar kits are level and adequately ventilated to prevent heat buildup.

Mechanical and Structural Verification of 18 kWh Solar System


Wire connection test for an 18 kWh solar system

Next, we need to perform electrical verification of the 18 kWh solar system, which is critical for any off grid home solar system setup. First, confirm the open-circuit voltage and short-circuit current of each string under standard test conditions using a handheld PV string tester. Then, verify that polarity, phase alignment, and grounding between modules, inverters, and charge controllers are correct using a continuity checker. To prevent intermittent arcing, you should mark each DC string and securely lock the MC4 connectors. Then, test the ground lugs of each solar panel mounting bracket to ensure the resistance is less than 5 Ω. Additionally, ground fault detection testing ensures the off grid solar kit’s grounding electrode system is functioning correctly, preventing electrical shock hazards and fire risks. Accurate electrical checks prevent parasitic losses and dangerous faults, protecting equipment and personnel.

Wire connection test for 18 kWh solar system

Debug and check the inverter and battery interface configuration

Commissioning an 18 kWh solar system also requires the precise setup of the inverter, MPPT charge controller, and battery management system. In addition to verifying the firmware version, configure the inverter’s MPPT voltage window to match the panel Voc and maintain optimal power tracking across the temperature range. To maximize energy extraction from the panels mounted on the solar panel mounting bracket during cloudy mornings and evenings. I adjust the charge and discharge current limits of the lithium ion solar batteries to 0.5 C to balance fast charging and battery life, and test the inverters’ on-grid or off-grid switching within 200 milliseconds. Test the switching between on grid and off grid modes, and verify the low-voltage disconnect threshold at the battery pack level. Properly calibrated power electronics ensure seamless energy flow and battery health within your off grid home solar system.

Performance Verification Under Real-World Conditions

To confirm that your 18 kWh solar system is delivering the expected yield, you perform performance verification under realistic irradiance and load profiles. For example, you install a weather station module next to the solar panel mounting rack to record irradiance, ambient temperature, and module backplane temperature every minute for at least one week. This allows you to compare the measured AC output with simulated yield data of 1,000 W/m² on a sunny day. Additionally, you deploy monitoring software to calculate the system’s performance ratio (PR), which should aim for 75–85%. This is a key metric for a well-installed off grid home solar system, and it also helps troubleshoot any strings that deviate by more than ±5%. Real-world testing uncovers shading issues, voltage imbalances, and connection losses that commissioning might miss, verifying your 18 kWh solar system reliably powers critical loads.

PanelsCost-min-1024x680

Safety Device Calibration and Protection Settings

Safety comes first when commissioning any 18 kWh solar systems or off grid solar kit. Start by calibrating overcurrent protection devices, such as DC string fuses rated at 125% of their full current rating and AC circuit breakers rated at 125% of their full current rating. However, avoid oversizing, which can delay fault clearing and risk equipment damage. Next, rigorously test residual current devices (RCDs) to trip within 30 ms at a 30 mA leakage current, ensuring immediate isolation of any ground faults near the solar panel mount or battery bank. Also, verify that surge protection devices clamp transients to less than 1.5 kV on both the DC and AC sides to protect sensitive electronics in these off-grid home solar systems. Correctly set protection devices prevent damage during lightning events or utility disturbances, making your 18 kWh solar system both operationally resilient and compliant.

Best Post-Installation Commissioning Practices

Post-installation commissioning best practices for 18 kWh solar systems include mechanical integrity checks of solar panel mounts, electrical connection testing, inverter and battery setup, actual performance verification, and calibration of safety devices. We recommend referring to this commissioning process to achieve optimal energy yield and provide reliable, sustainable power.